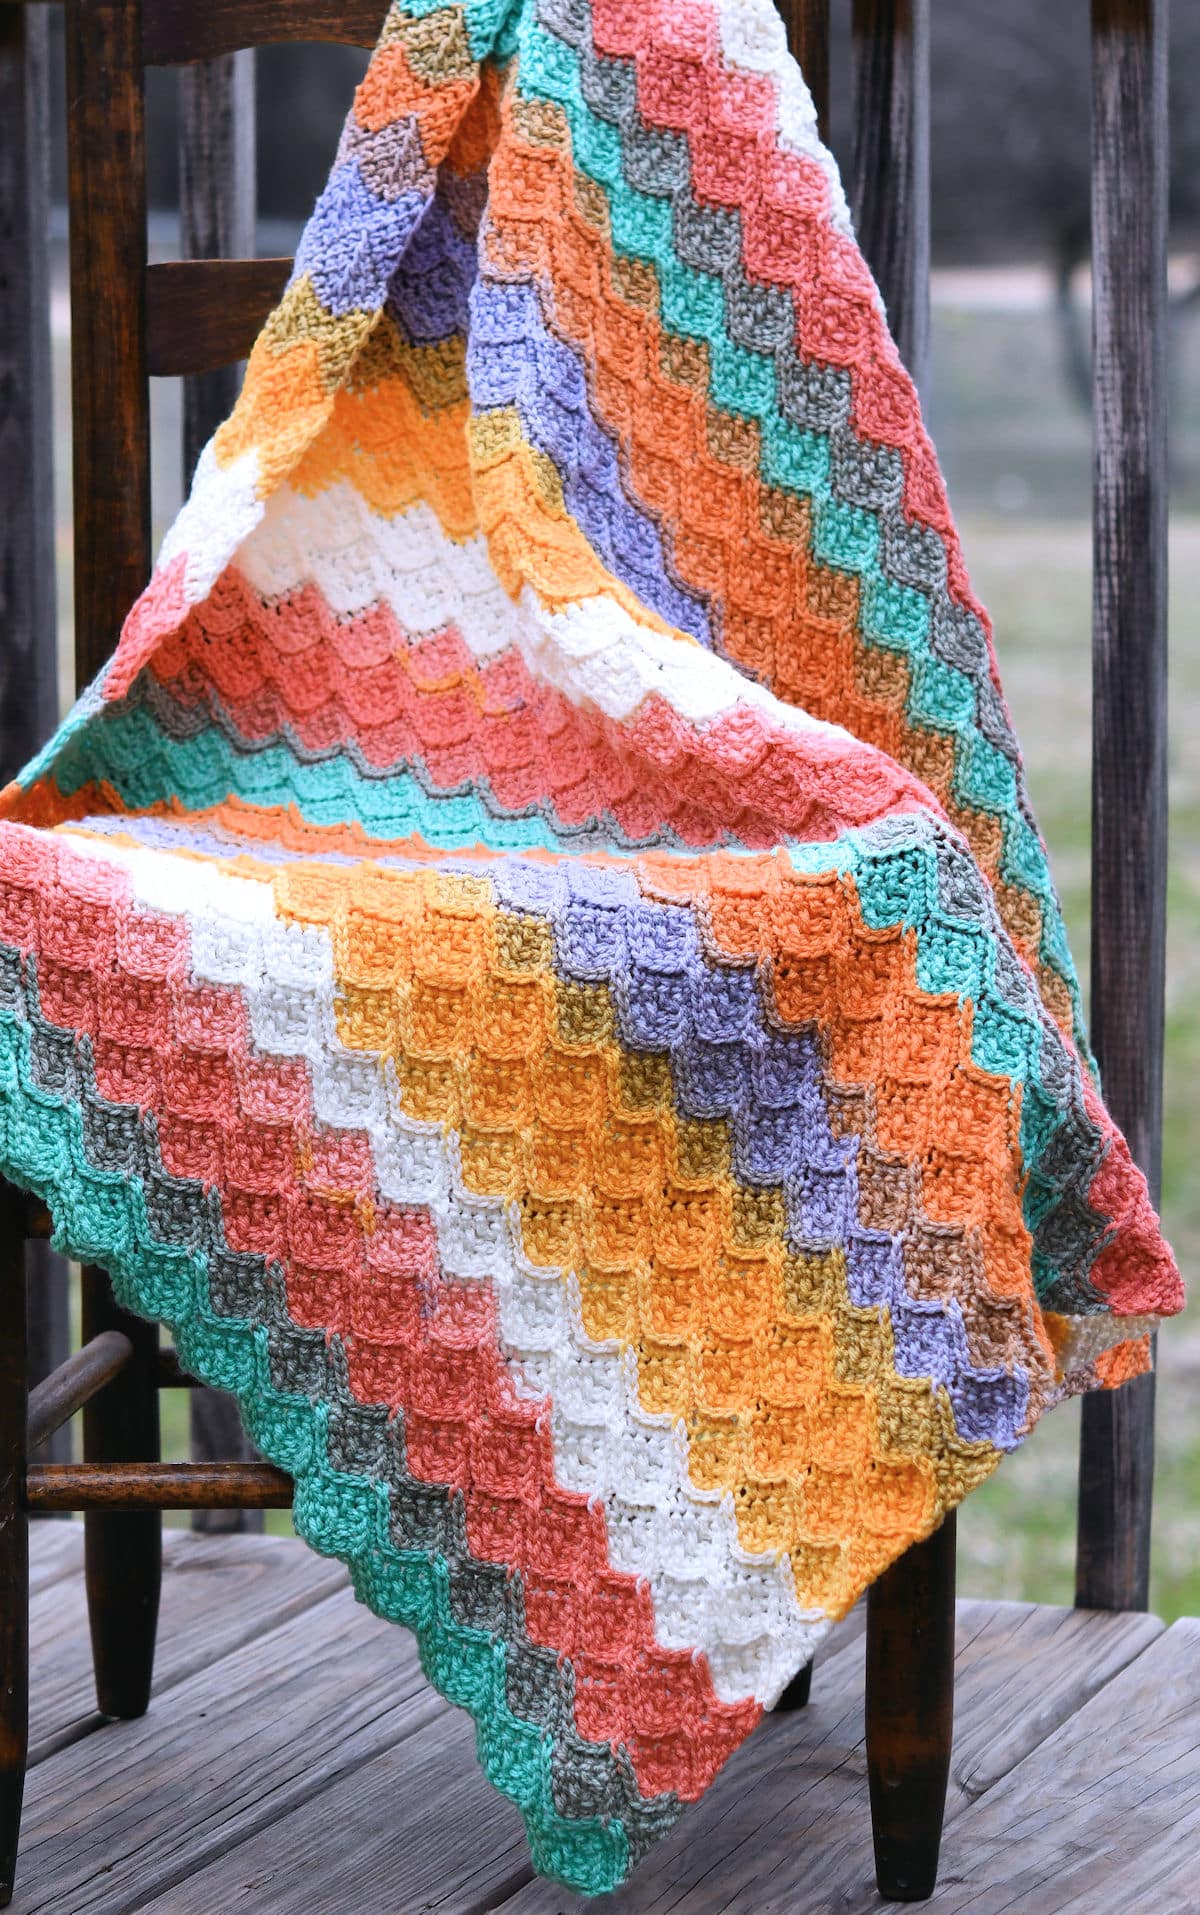
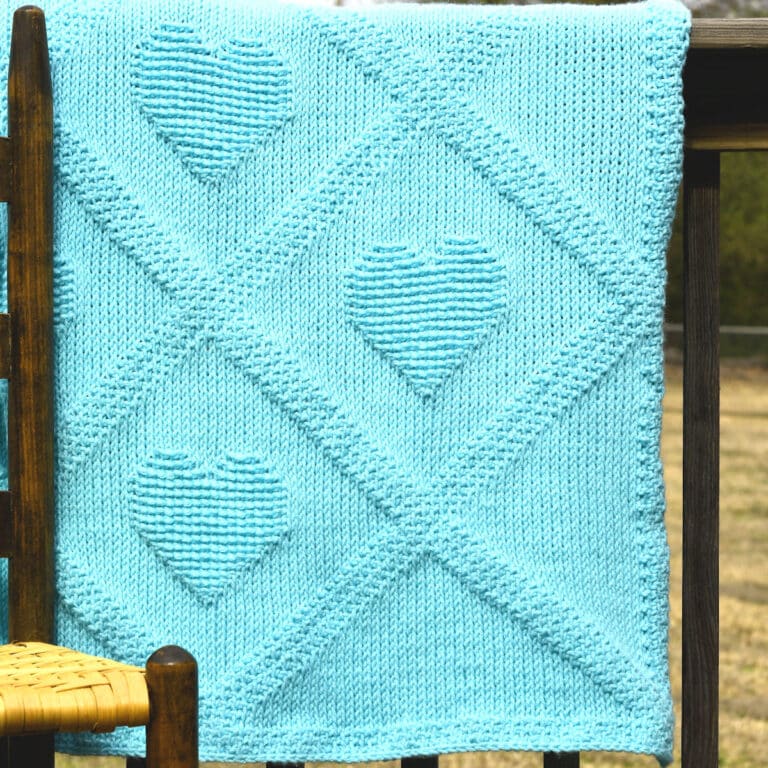
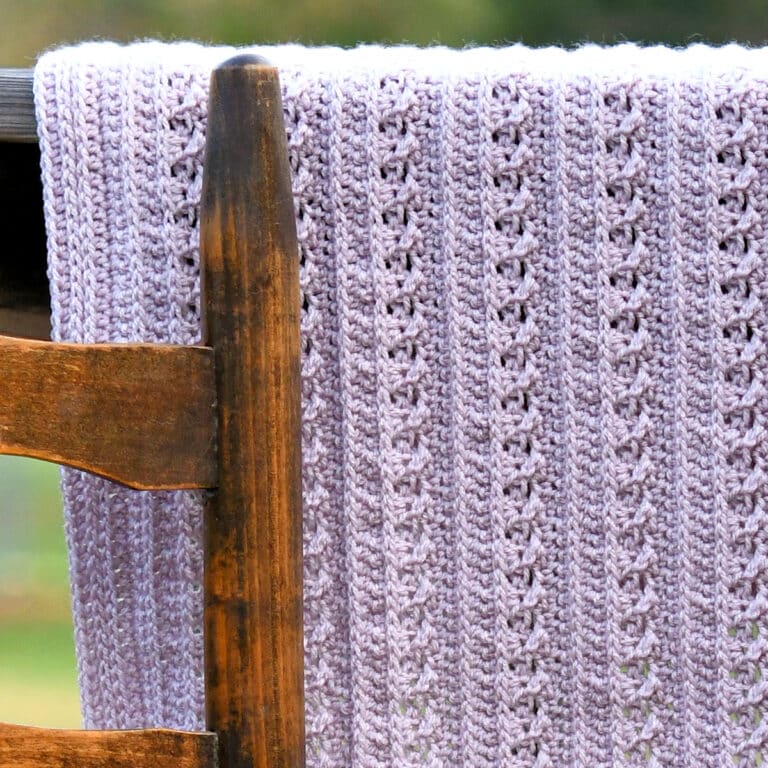
This Dragon Scales Baby Blanket is an incredibly textured, award-winning afghan made in a combination of regular crochet and Tunisian crochet. Similar to Crochet Entrelac, this baby afghan is made in a unique, continuous mitered square repeat.
Unlike Tunisian crochet you typically find, you will NOT need to use a long hook. Since each mitered square is a maximum of only 9 stitches, a standard hook can be used.
“Dragon Scales Baby Blanket” free crochet pattern by Kim Guzman © Mar. 2023. All rights reserved.
Technique: Regular crochet with Tunisian crochet elements.
Skill Level: Intermediate.

Crochet Pattern At A Glance
Dragon Scales Baby Blanket Pattern
Designer: Kim Guzman © 2022-2026. All rights reserved.Rate the Pattern
Yarn
- Lion Brand “Mandala”, 100% acrylic, 590 yds/540m per 5.3 oz/150g per skein: approximately 1600 yards of colorway: Pixie.
Other Materials
- Suggested Crochet Hook Size J-10 (6mm) or hook needed to meet gauge
- Yarn Needle for weaving ends
Instructions
- Begin with an initial chain and a row of single crochet with ripple/wave stitch elements.
- In between the rises of the ripple, create continuous mitered squares (Diamonds) across.
- Make another row of single crochet ripple/wave stitch.
- In between the rises of the ripples, create continous mitered squares in alternating positions of the ones prior.
- Follow the 4-row repeat until a total of 75 rows have been completed.
Full Free Crochet Pattern Below

This is a free crochet pattern and the written instructions are below. If you prefer a printable download, a PDF is also available for purchase.
Although this pattern indicates 23 hours of crochet time, this doesn’t mean it will take you one day. This is an estimate of actual crochet time. No breaks, eating, starting over for a mistake, checking Facebook, etc. If I were to estimate, it would take me about 4 days of fairly intense crocheting.
My Crochet Pattern Notes
If you already know some basic Tunisian crochet, this baby afghan is on an intermediate level. If you know nothing of Tunisian crochet, please review the basic videos provided and the pattern will be a little more challenging until you become familiar with those techniques.
This design is worked in regular crochet with Tunisian crochet elements. Each mitered square is worked individually in a continuous row without cutting or changing the yarn. The color changes are made by the use of a self-striping yarn. The changes were not planned and are exactly as the yarn comes out of the cake.
This is a new method I created myself. It’s similar to Crochet Entrelac patterns but avoids the one thing I disliked the most about those designs: cutting off after each row to start back at the beginning. I’ve created something continuous throughout.
Be patient, especially when you’re just starting out. Count your stitches. Trust me when I say that, if you make a mistake in a Diamonds row, you will feel like your life is over.
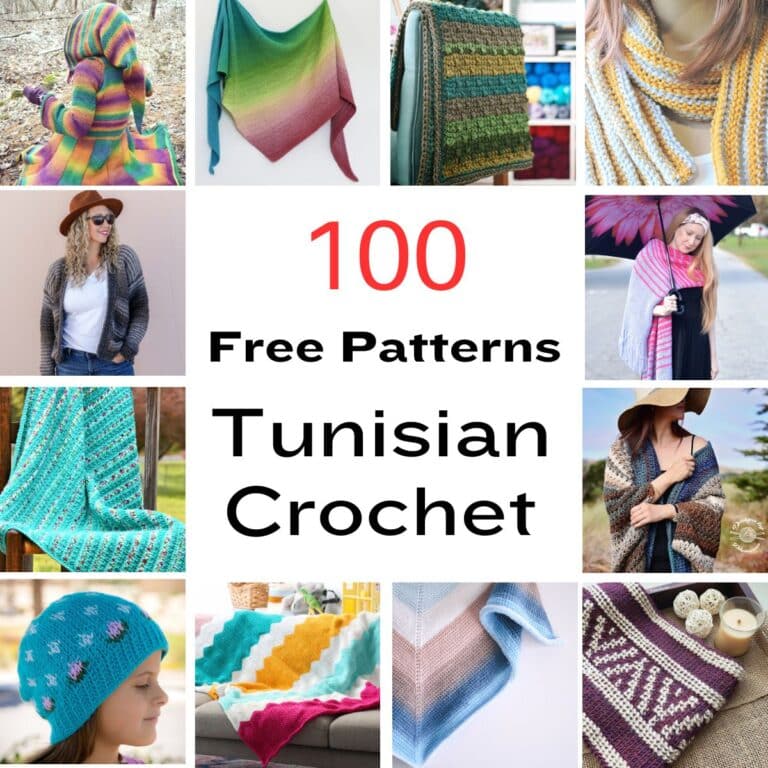
If you love Tunisian crochet as much as Kim, you won’t want to miss this curated roundup of over 100 Free Tunisian Crochet Patterns available on the internet.
Pin It For Later
Does Tunisian Crochet Make Nice Baby Blankets?
Yes! I think the most popular feature of Tunisian crochet is that most of the stitch patterns have NO HOLES! What do most parents want right now with crochet? “Please, Nana, make the afghan more modern and without holes!”
50 years ago, Tunisian crochet was very thick and heavy. These days, you can easily make a Tunisian crochet baby blanket without all that bulk. Because the blankets aren’t as heavy, you can make a baby blanket without worry about the baby getting too hot.
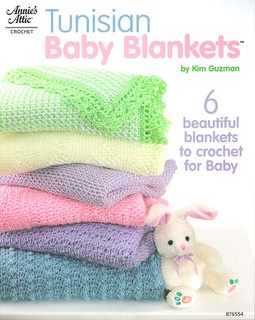
In my book Tunisian Baby Blankets, published by Annie’s Attic, I used a finer weight yarn and the blankets were perfect! I especially loved doing the fun regular crochet borders on each of them.
Can You Mix Tunisian and Regular Crochet?
You are probably already doing some form of Tunisian crochet. If you’ve been using Foundation Stitches instead of an initial chain, that’s Tunisian crochet. If you’ve used Linked Stitches, that’s Tunisian crochet as well.
So, you’re already mixing Tunisian and Regular Crochet without even knowing it.
For this beautiful baby blanket, I’ve made Tunisian mitered squares on one side (the even numbered rows), with regular ripple style single crochet on the other side (the odd numbered rows).
Tunisian crochet already has a huge variety. Imagine what happens when you add your regular crochet stitches and the sky will be the limit.
Right Side and Wrong Side
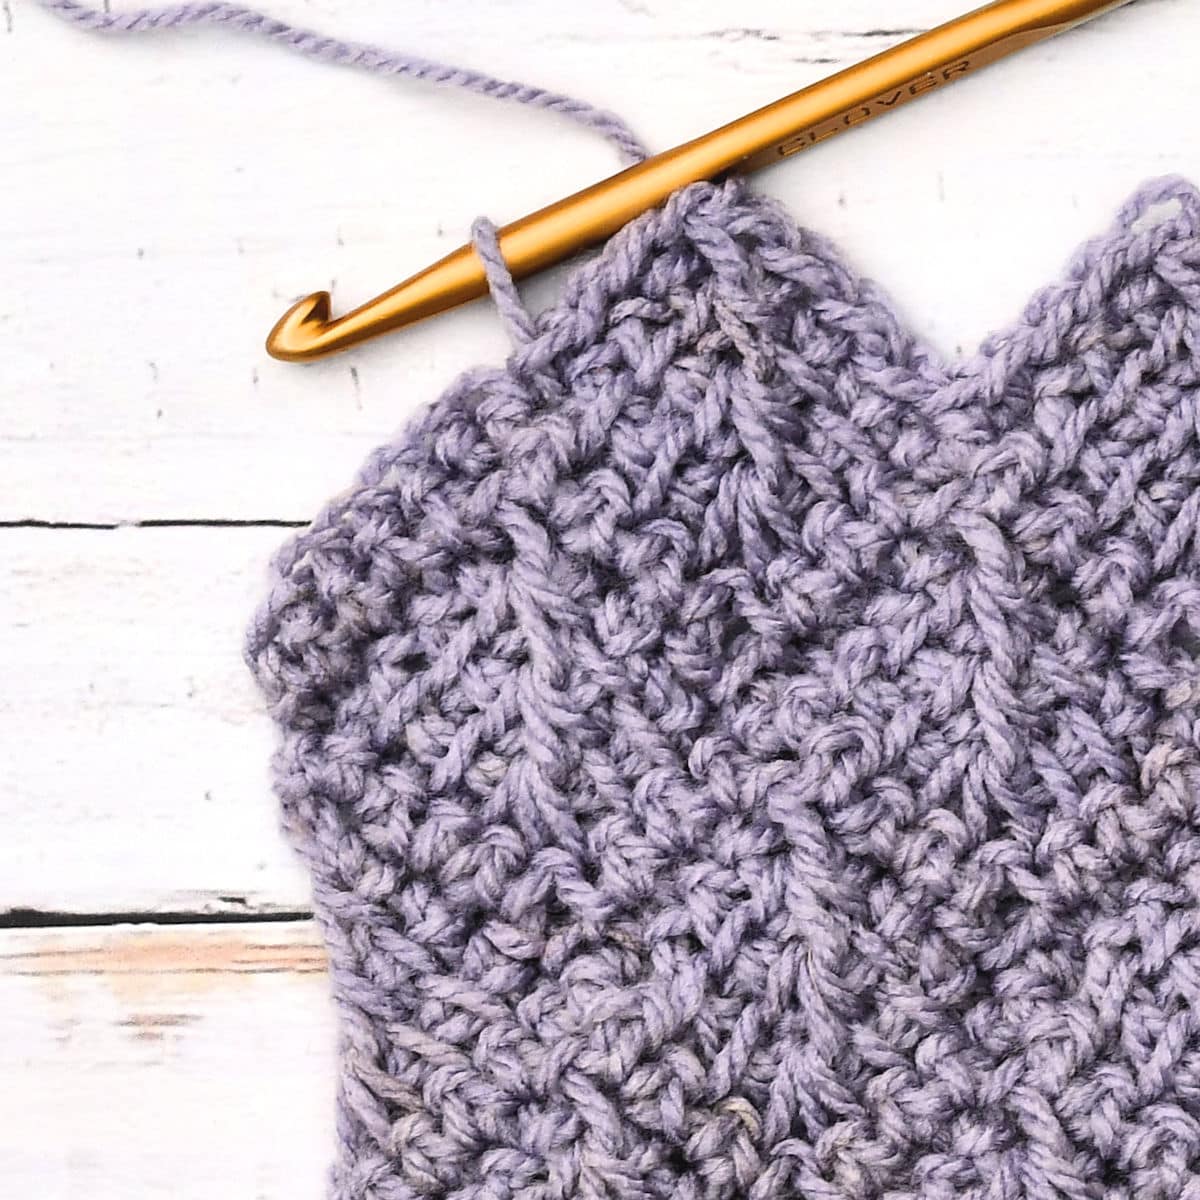
The side with the even numbered rows creates a smoother fabric, looking a little like leaves.
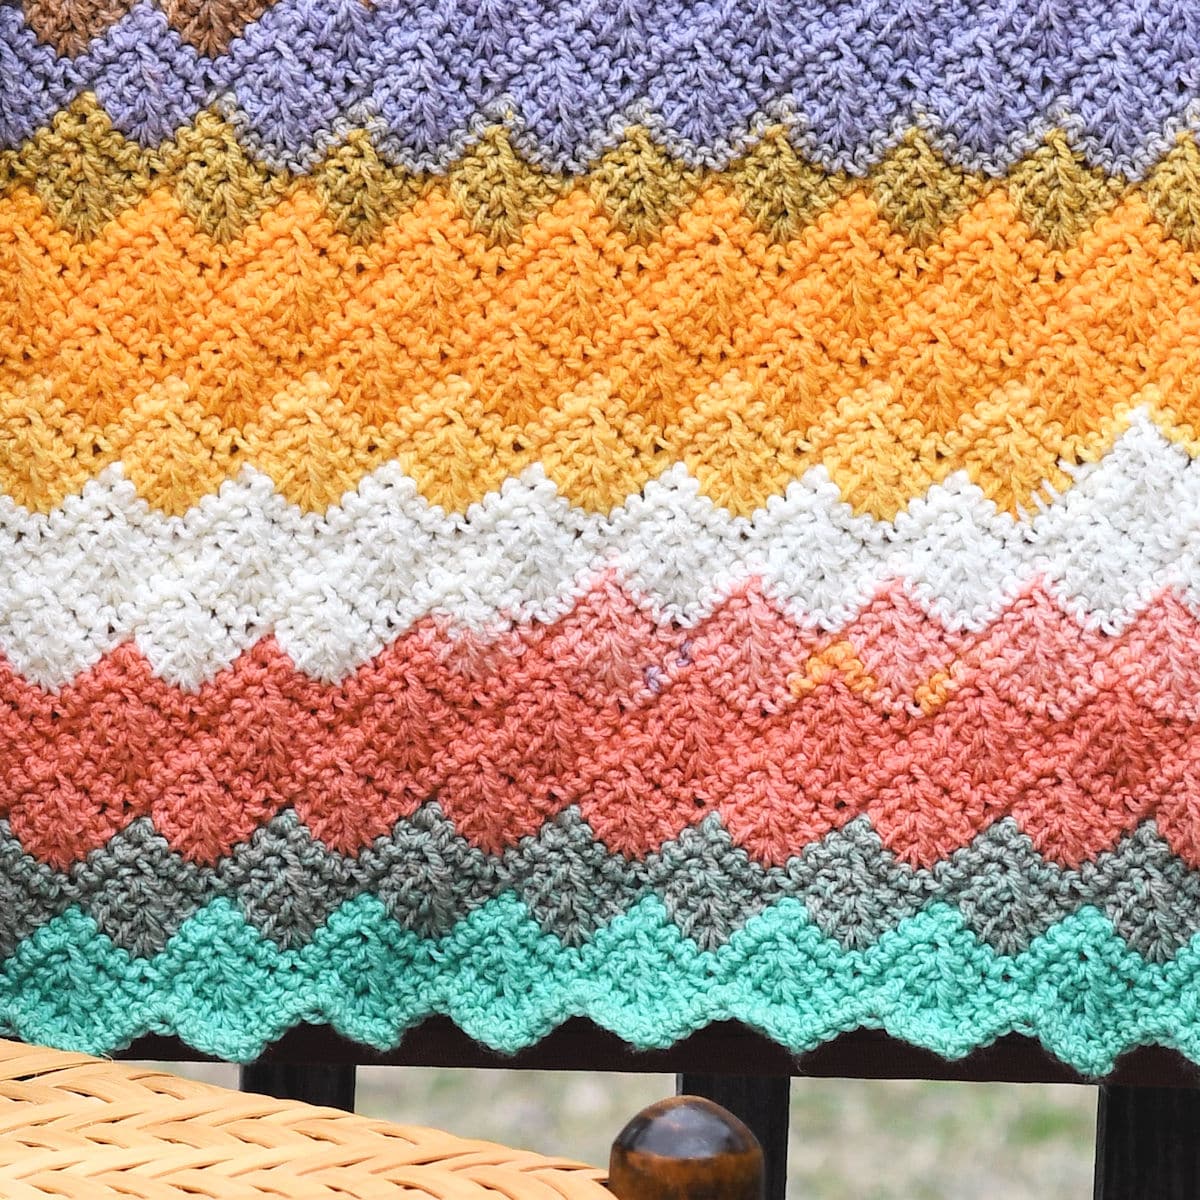
Although this is technically what would be called the “right side”, I much prefer the other side.
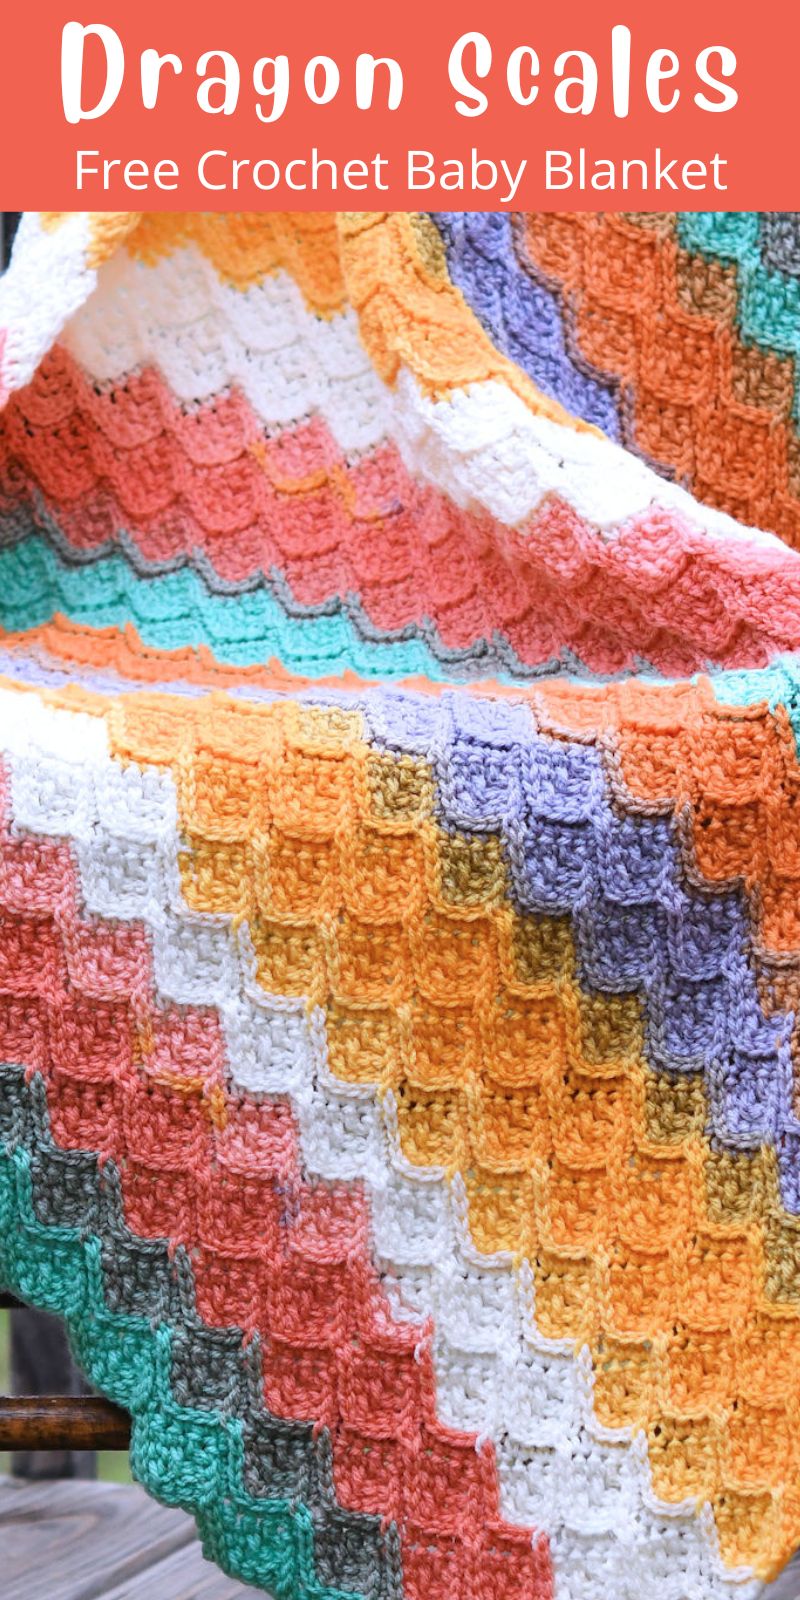
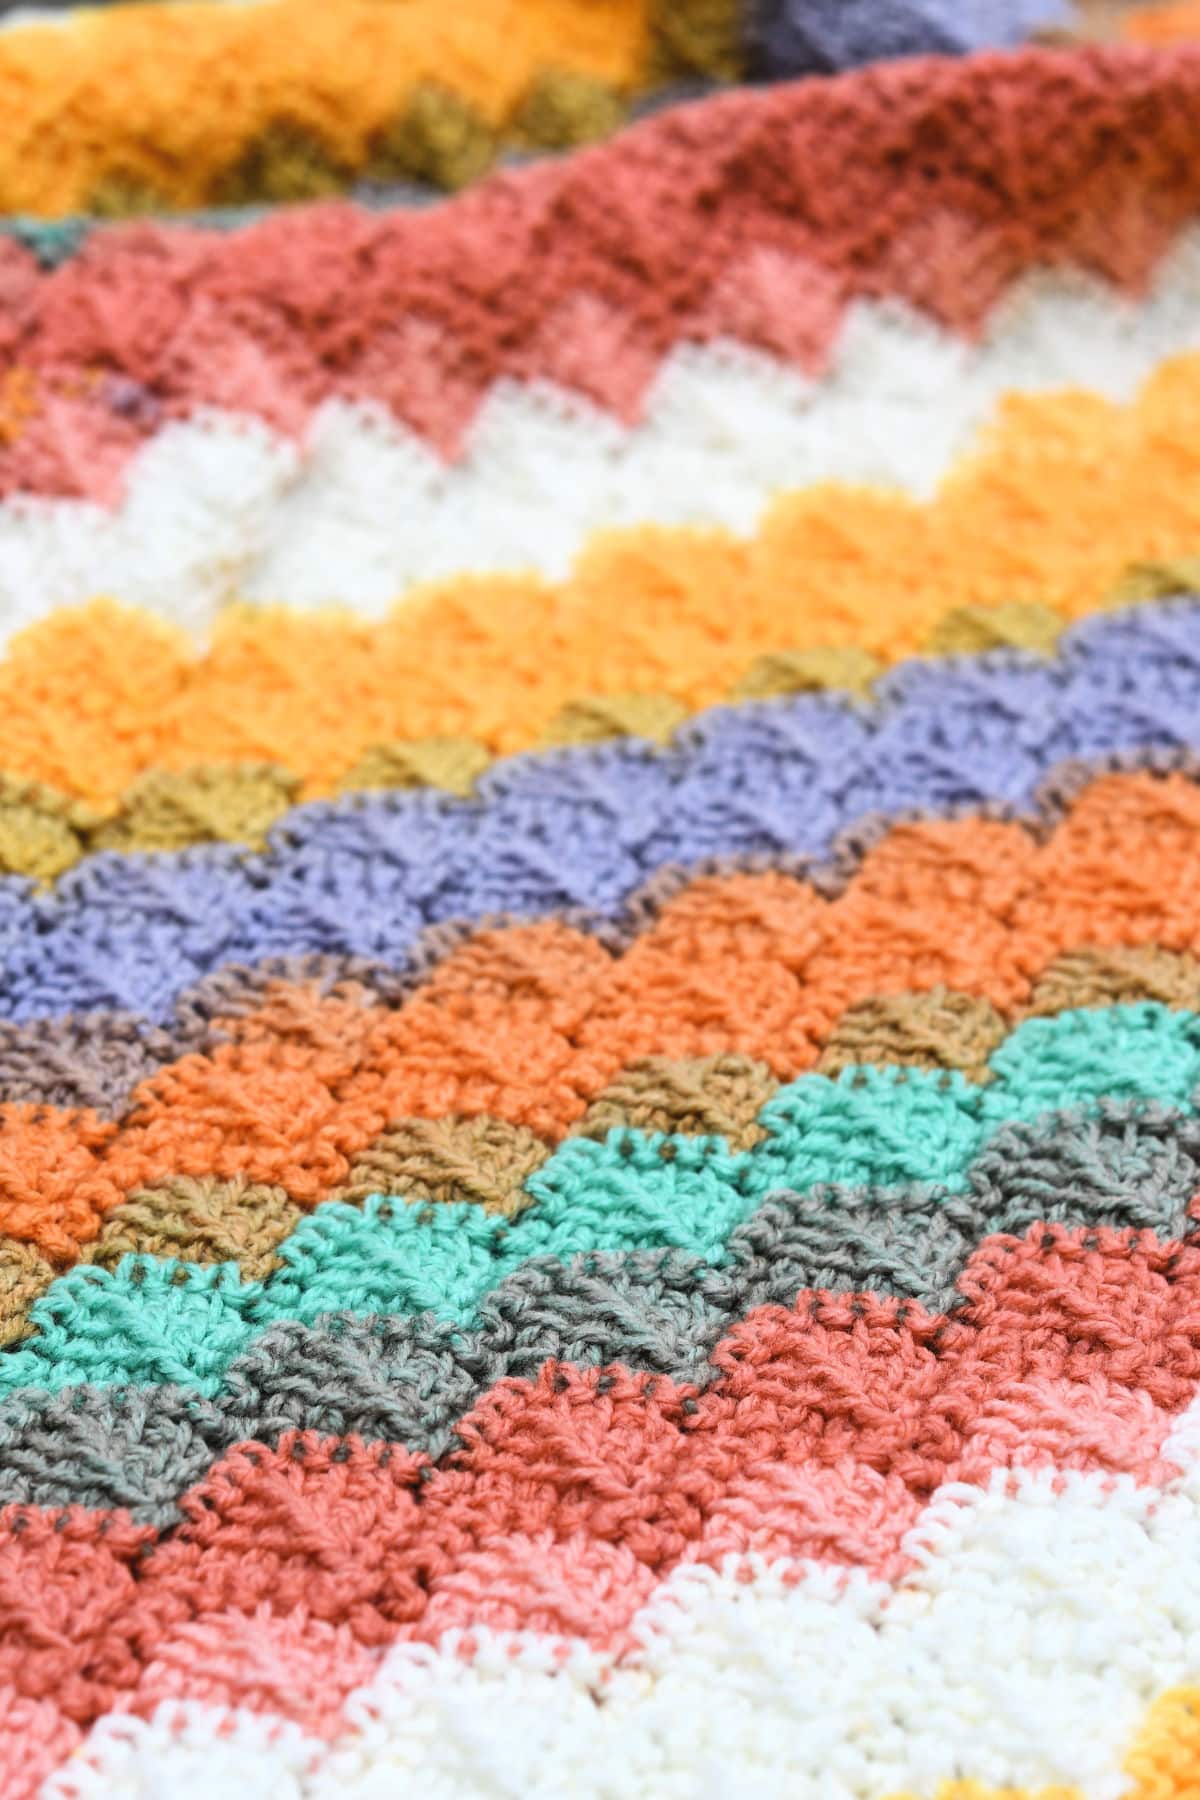
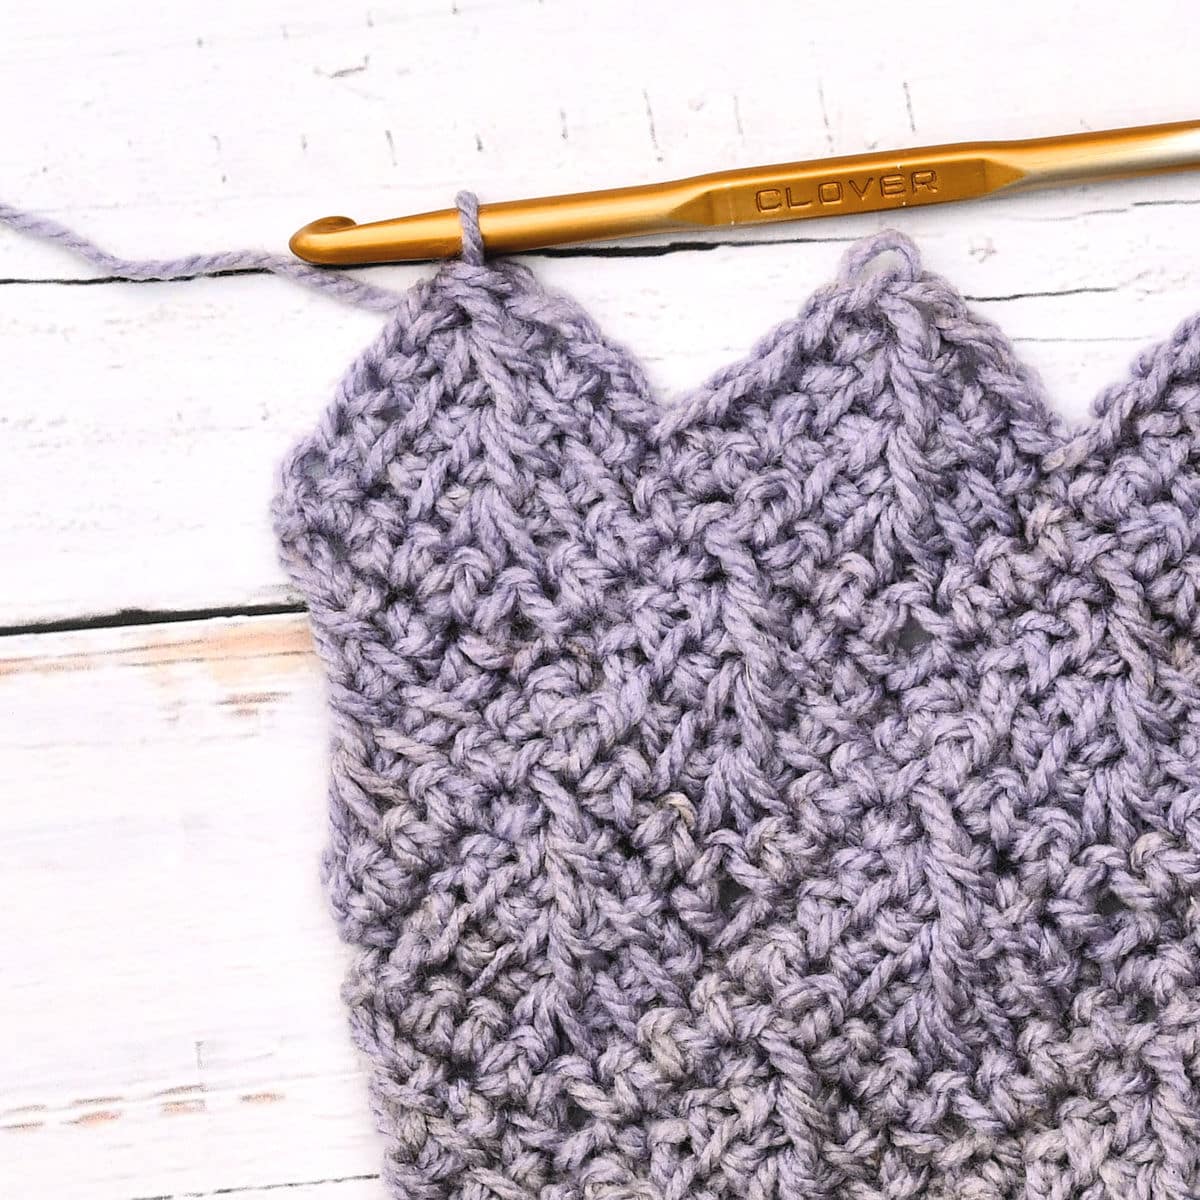
The odd numbered rows produce the more textured look of the waves and is the reason for the name I’ve given the blanket of “Dragon Scales”. It may be the “wrong side” but I think it’s gorgeous!
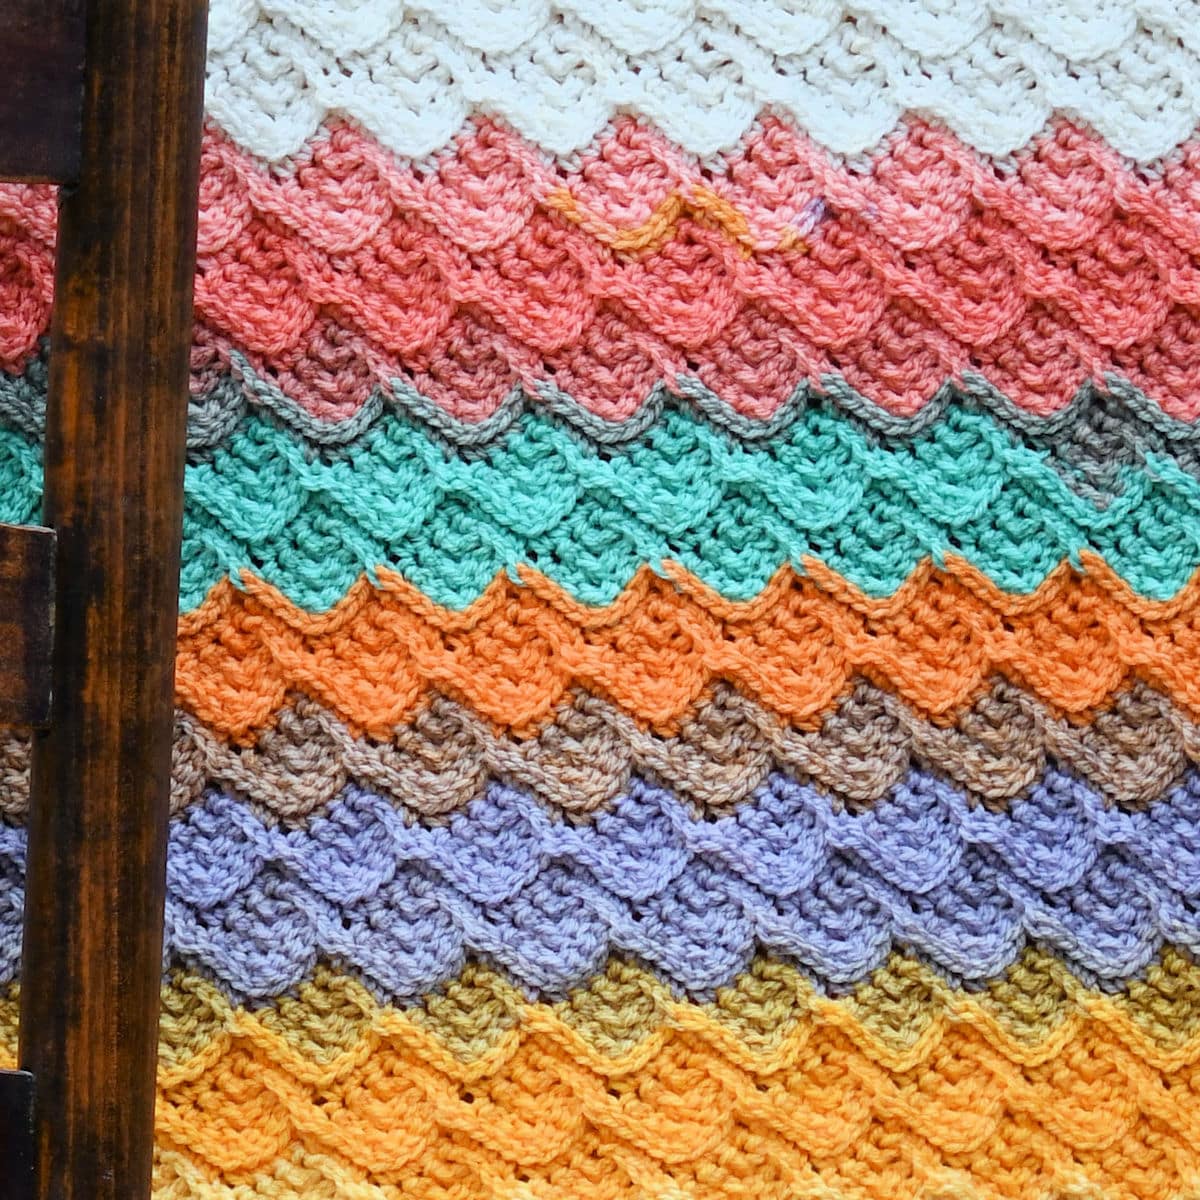
It’s a difficult choice, I know! Fortunately, you can love both sides equally and you don’t need to make the choice.
Finished Size
32″ x 39″.
Yarn
Lion Brand “Mandala”, 100% acrylic, 590 yds/540m per 5.3 oz/150g per skein: approximately 1600 yards of colorway: Pixie.

“Mandala” is classified as a DK weight (size 3) yarn and is currently available in 27 colorways.
Mandala is a readily-available yarn and is available in different yarn weights. There is more than one variety so be sure to get one marked as size 3.
Other Materials
Suggested Crochet Hook Size J-10 (6mm) or hook needed to meet gauge.
Yarn Needle for weaving ends.
Gauge
It’s difficult to measure gauge for this project. Each full Diamond measures about 1 1/2″ across. Each 2-row repeat measures a little under 2″ high.
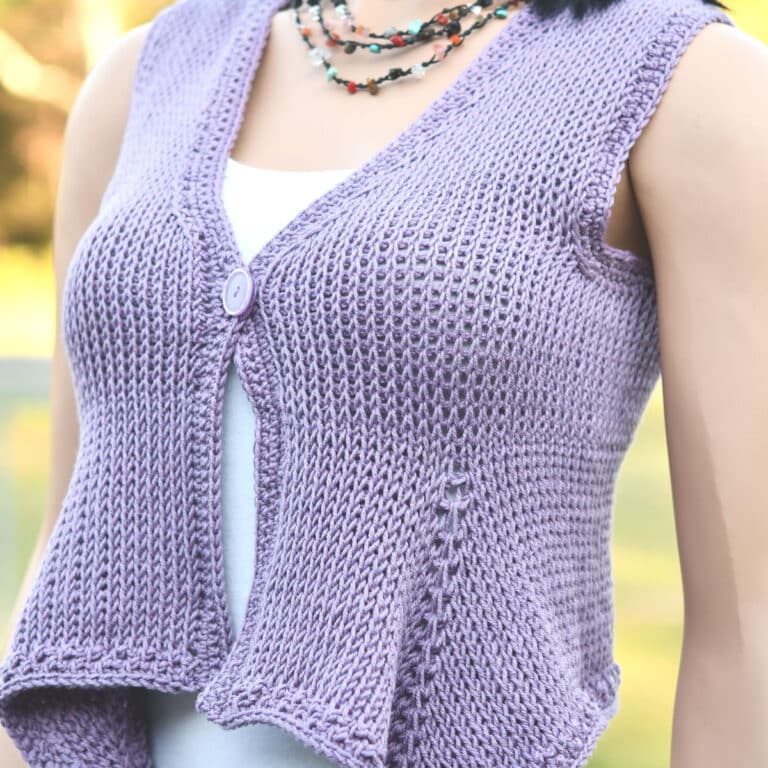
Use the Stitch Multiple to create the baby afghan in any size or yarn weight by adjusting the initial chain count and/or yarn weight. You can use it to make a full size afghan or throw.
Or, if you want to try out the stitch pattern without the large commitment, try making a scarf instead. I’m currently making a scarf and I started with an initial chain of 42.
Stitch Multiple
If you would like to change the width of this blanket, you’ll need any multiple of 8, then add 10.
Free PDF Download Weekend
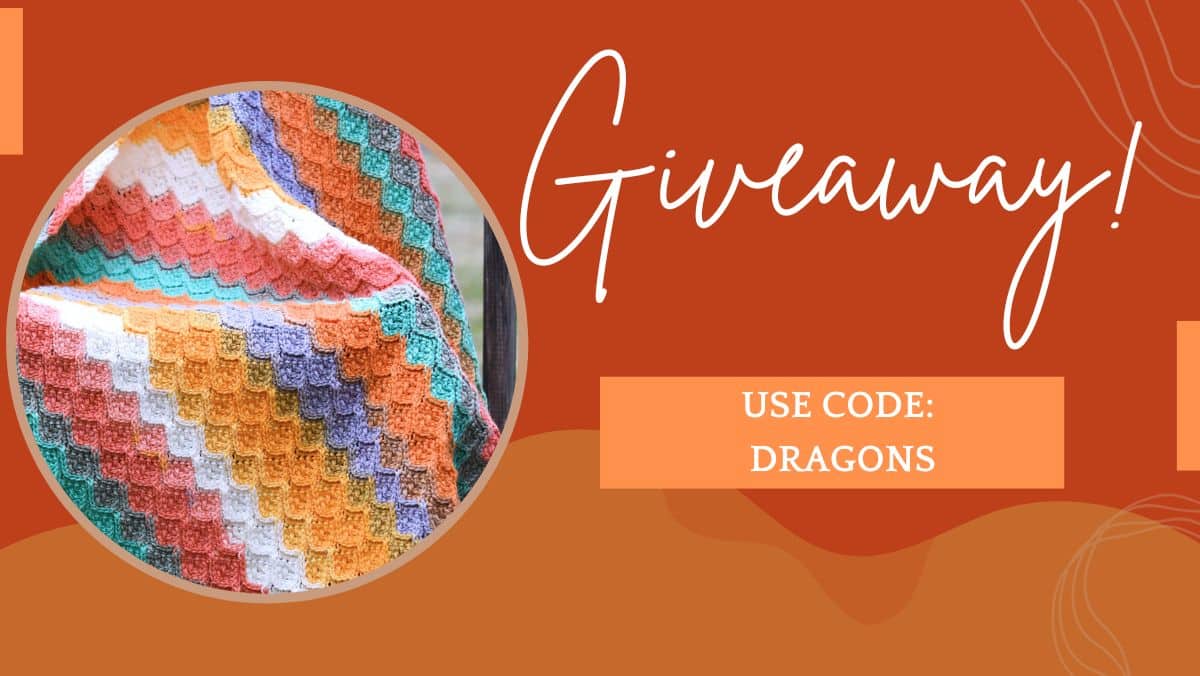
This pattern is made free through ad support below, but the PDF download for the Dragon Scales Baby Blanket pattern is available for free this weekend only. This promotion ends at 11:59pm CST, Monday, October 20.
This promotion is concluded. Please sign up for the email newsletter to make sure you don’t miss any weekly promotions. Scroll down for the free online pattern.
Special Instructions
When making the initial chain, ensure that you chain loosely. If you tend to make this chain too tightly, it’s okay to go up a hook size while making the chain. After the chain, switch to the hook you’ll be using.
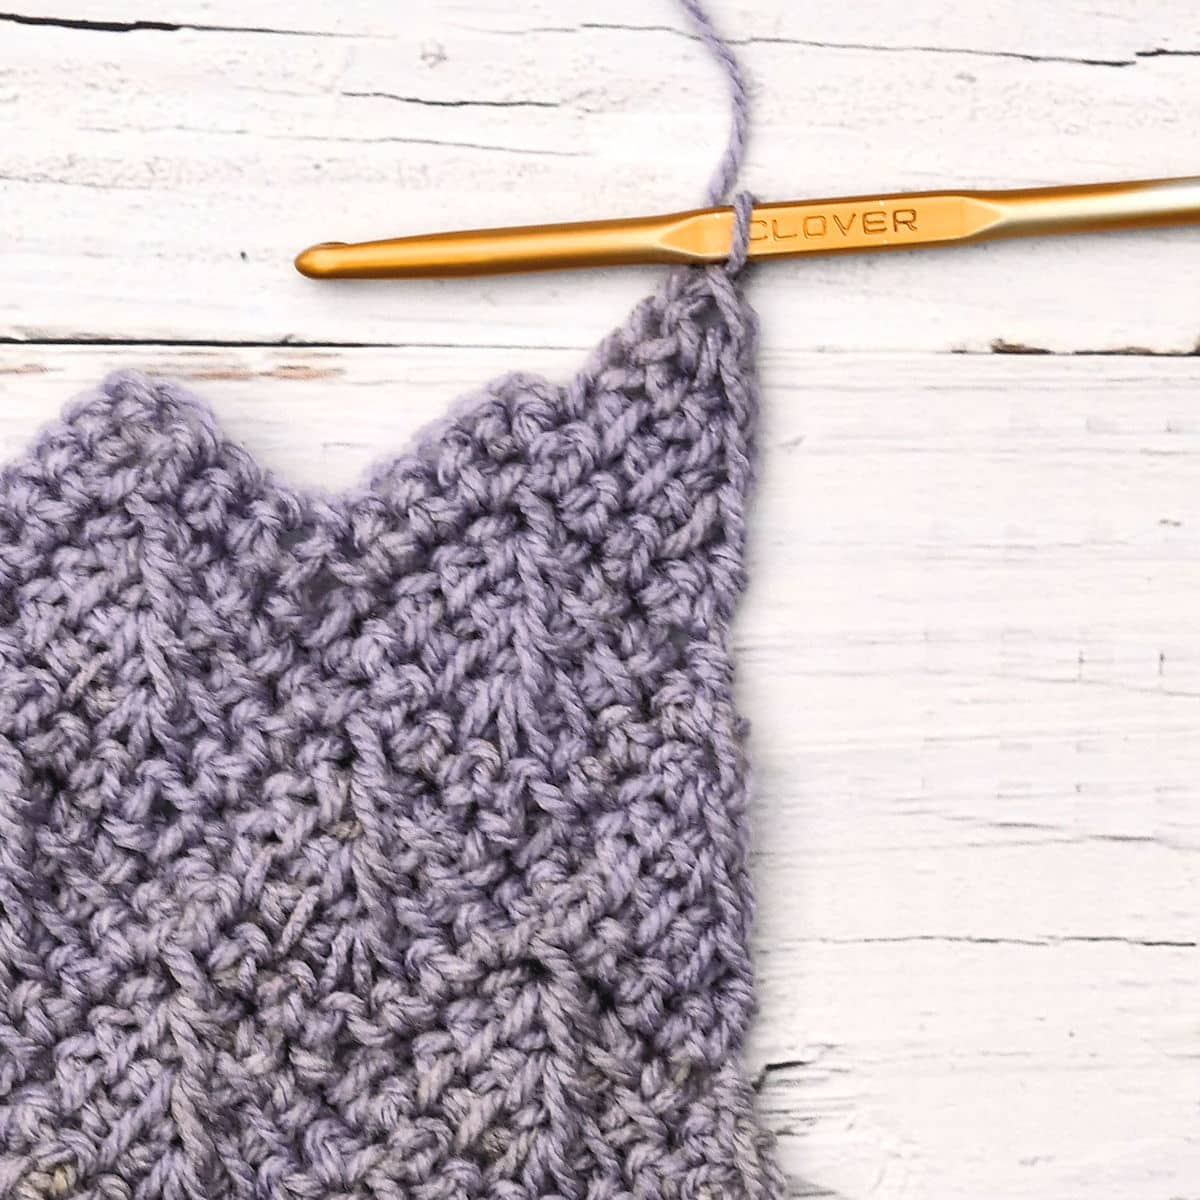
When working on the Diamond rows, there is no chain 1 at the beginning. It goes straight into pulling up loops.
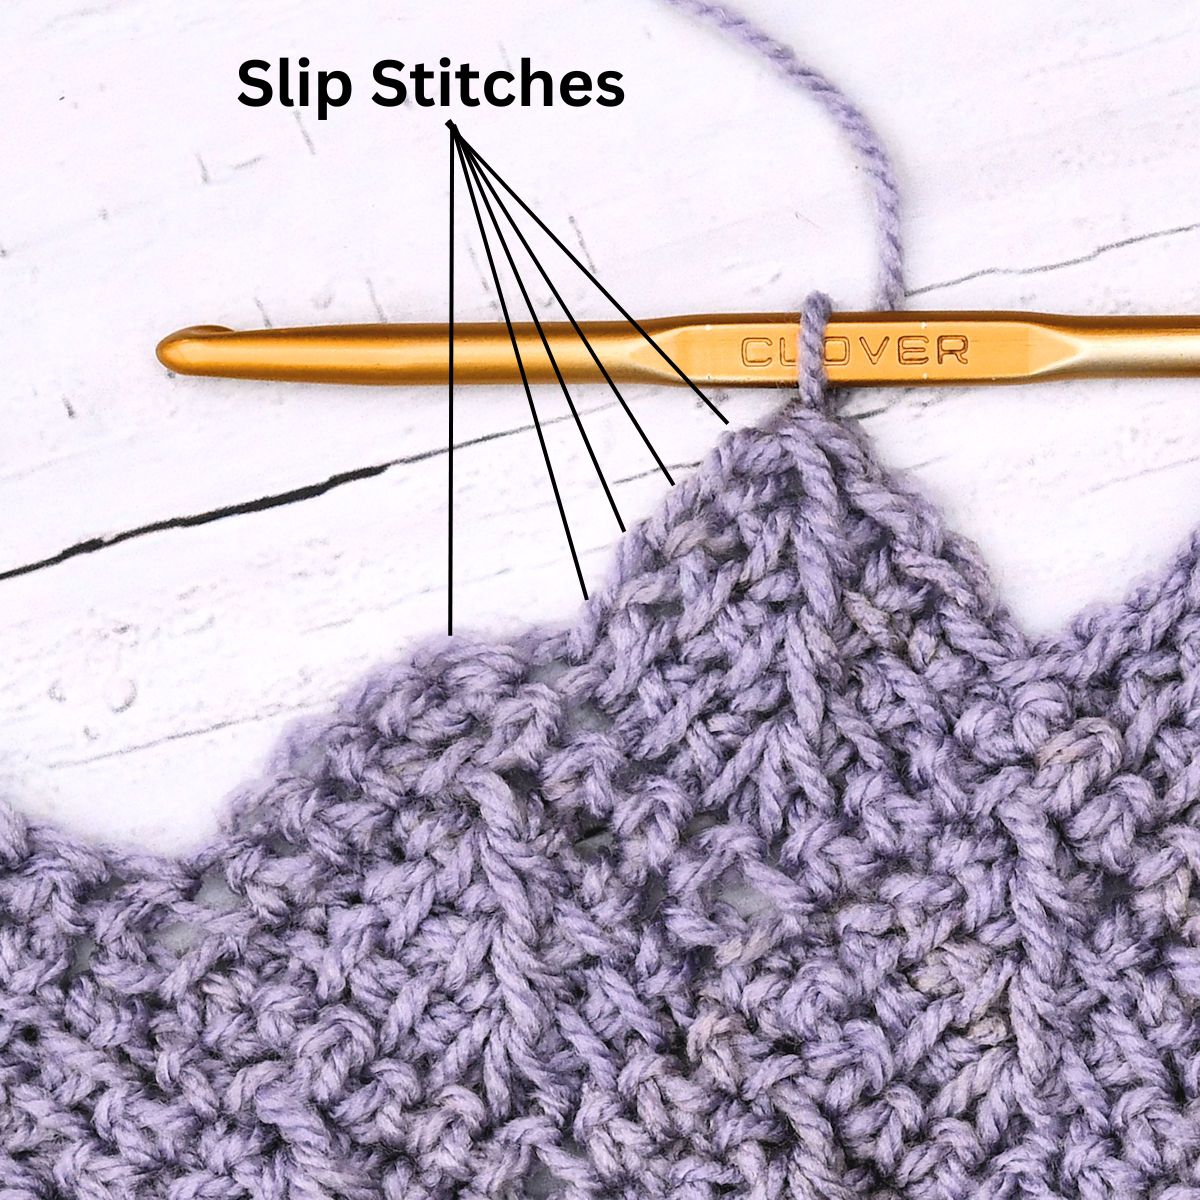
When working slip stitches down the side of the Diamond, ensure that you insert your hook under the 2 outer vertical bars of the last stitch of each row to keep the edges stable. Slip stitch loosely. You’ll be making single crochet into them on the next row.
After slip stitching down the side of the Diamond, when slip stitching into the next single crochet of the current row, ensure that you’re working into the next single crochet and not into the stretched out single crochet right before it.
Abbreviations
This baby blanket pattern is written in US crochet terminology.
ch=chain; lp(s)=loop(s); rep=repeat; sc=single crochet; sk=skip; sl=slip; st(s)=stitch(es); yo=yarn over.
All numbers after the colon at the end of an instruction are stitch counts. Use the stitch count to check your work.
Special Stitches
When making the chain 1 to close the first loop of a row when working on a Diamond, keep it loose. After working on this stitch repeat for awhile, you will find that working a tight tension is going to make everything more difficult.
The Diamonds follow Tunisian crochet principles, even though there are only 9 stitches maximum and you can use a standard crochet hook. There is no need for a special hook. You will be using the following techniques for the Diamonds only, the rest is in regular crochet:
Tunisian Simple Stitch: Right-Handed Video | Left-Handed Video
Last Stitch of a Row: The last stitch of each row is worked into the outer 2 vertical bars. It’s basically a knit stitch with an extra loop. You don’t want to work under only one vertical bar since it will cause the loop to stretch too much and cause gaps. Working under both loops makes a nice, clean, sturdy edge. Right-Handed Video | Left-Handed Video
It’s unnecessary to be a pro at Tunisian crochet but it does help to brush up on some of the basics.
The following are the instructions for each mitered square which I’ve called Diamonds. The overall pattern for the row repeats is below the instructions for the Diamonds.
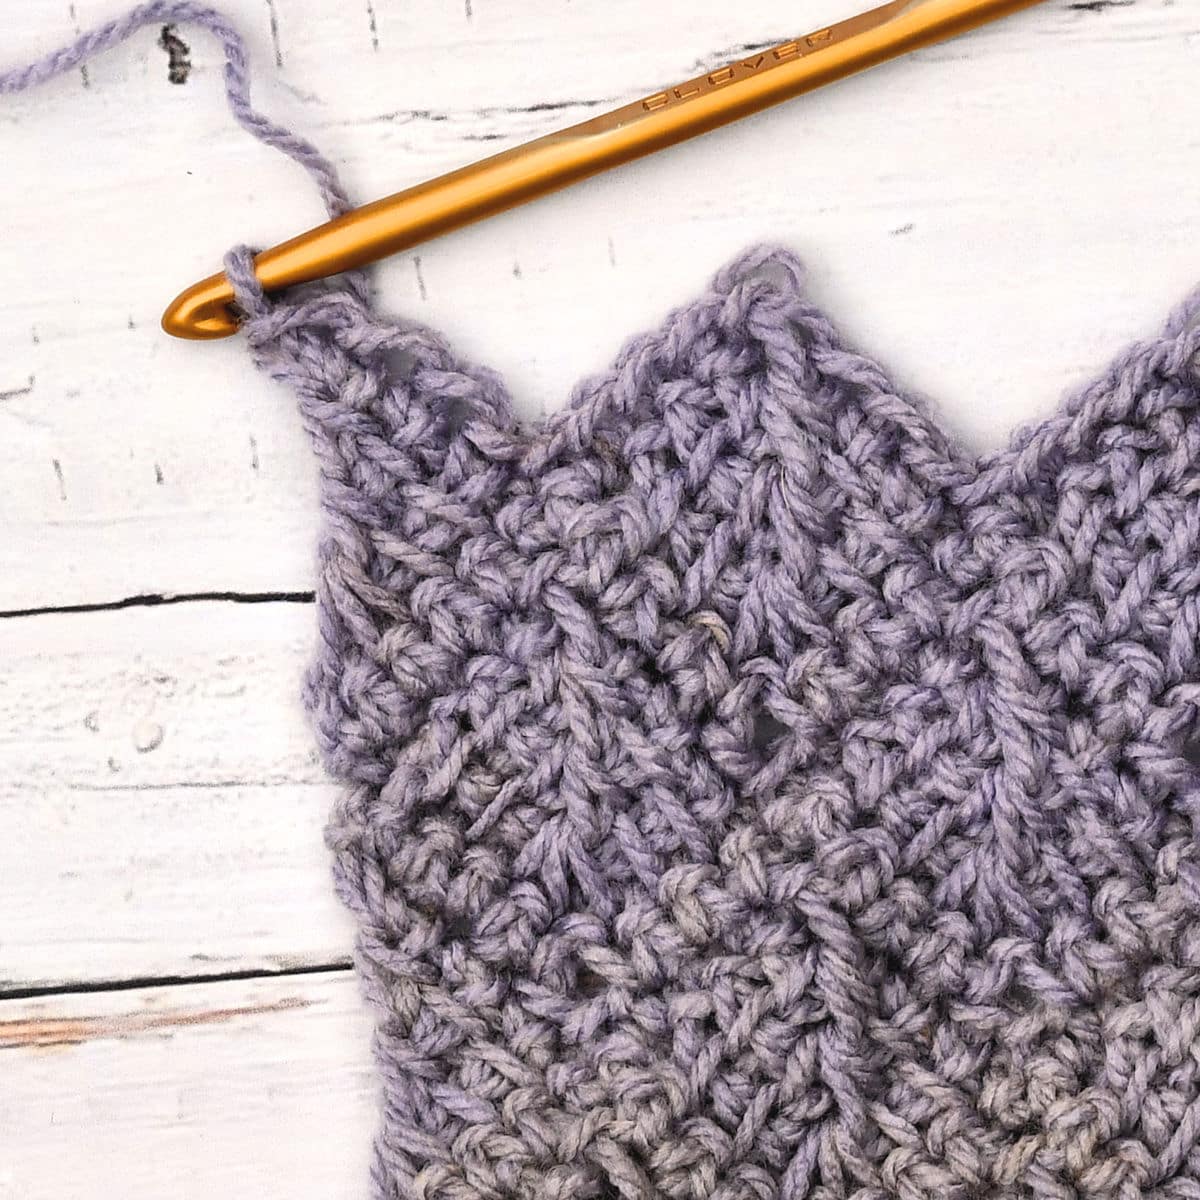
Diamond
Row 1: Start with 9 lps on hook in indicated sts, ch 1, [yo, pull through 2 lps on hook] twice, yo, pull through 4 lps on hook (3 lps closed here and throughout), [yo, pull through 2 lps on hook] 3 times: 1 lp remains on hook.
Row 2: Sk first vertical bar, [insert hook under next vertical bar, yo, pull lp through] twice, insert hook under 3 vertical bars, yo, pull lp through, [insert hook under next vertical bar, yo, pull lp through] 3 times (7 lps on hook), ch 1, yo, pull through 2 lps on hook, yo, pull through 4 lps on hook, [yo, pull through 2 lps on hook] 2 times: 1 lp remains on hook.
Row 3: Sk first vertical bar, insert hook under next vertical bar, yo, pull lp through, insert hook under 3 vertical bars, yo, pull loop through, [insert hook under next vertical bar, yo, pull lp through] twice (5 lps on hook), ch 1, yo, pull through 4 lps on hook, yo, pull through 2 lps on hook: 1 lp remains on hook.
Row 4: Sk first vertical bar, insert hook under 3 vertical bars, yo, pull lp through, insert hook under last vertical bar, yo, pull lp through (3 lps on hook), yo, pull through 3 lps on hook: 1 lp remains on hook.
First Side Diamond
Row 1: Start with 5 lps on hook in indicated sts, ch 1, [yo, pull through 2 lps on hook] twice, yo, pull through 3 lps on hook (2 lps closed here and throughout): 1 lp remains on hook.
Row 2: Sk 2 vertical bars, [insert hook under next vertical bar, yo, pull lp through] 3 times (4 lps on hook], ch 1, yo, pull through 2 lps on hook, yo, pull through 3 lps on hook: 1 lp remains on hook.
Row 3: Sk 2 vertical bars, [insert hook under next vertical bar, yo, pull lp through] twice (3 lps on hook), ch 1, yo, pull through 3 lps on hook: 1 lp remains on hook.
Row 4: Sk 2 vertical bars, insert hook in last vertical bar, yo, pull lp through, yo, pull through 2 lps on hook: 1 lp remains on hook.
Last Side Diamond
Row 1: Start with 6 lps on hook in indicated sts, yo, pull through 3 lps on hook, [yo, pull through 2 lps on hook] 3 times: 1 lp remains on hook.
Row 2: Sk first vertical bar, [insert hook under next vertical bar, yo, pull lp through] 2 times, insert hook under 3 vertical bars, yo, pull lp through (4 lps on hook), [yo, pull through 2 lps on hook] 3 times: 1 lp remains on hook.
Row 3: Sk first vertical bar, insert hook under next vertical bar, yo, pull lp through, insert hook under 2 vertical bars, yo, pull lp through (3 lps on hook), [yo, pull through 2 lps on hook] twice: 1 lp remains on hook.
Row 4: Sk first vertical bar, insert hook under 2 vertical bars, yo, pull through, yo, pull through 2 lps on hook: 1 lp remains on hook.
Free Crochet Pattern Instructions
Note: Read all Special Instructions and Special Stitches before beginning.
Row 1: Ch 162 loosely, sk ch, 2 sc in next ch, sc in next 3 ch, *sk ch, sc in next 3 ch, 3 sc in next ch, sc in next 3 ch, rep from * to last 5 ch, sk ch, sc in next 4 ch, turn: 1 lp remains on hook (counts as first lp of next row here and throughout).
Row 2: Sk first sc, pull up lps in next 8 sc (9 lps now on hook here and throughout), work Diamond (see Special Stitches above), sl st at side of each of 4 rows of Diamond, sl st in next sc of current row (1 lp on hook), *pull up lps in next 8 sc, work Diamond, sl st at side of each of 4 rows of Diamond, sl st in next sc of current row (1 lp on hook), rep from * to last 8 sc, pull up lps in next 8 sc, work Diamond, sl st at side of each of 4 rows of Diamond, sl st in sc at base of Diamond, turn: 20 Diamonds.
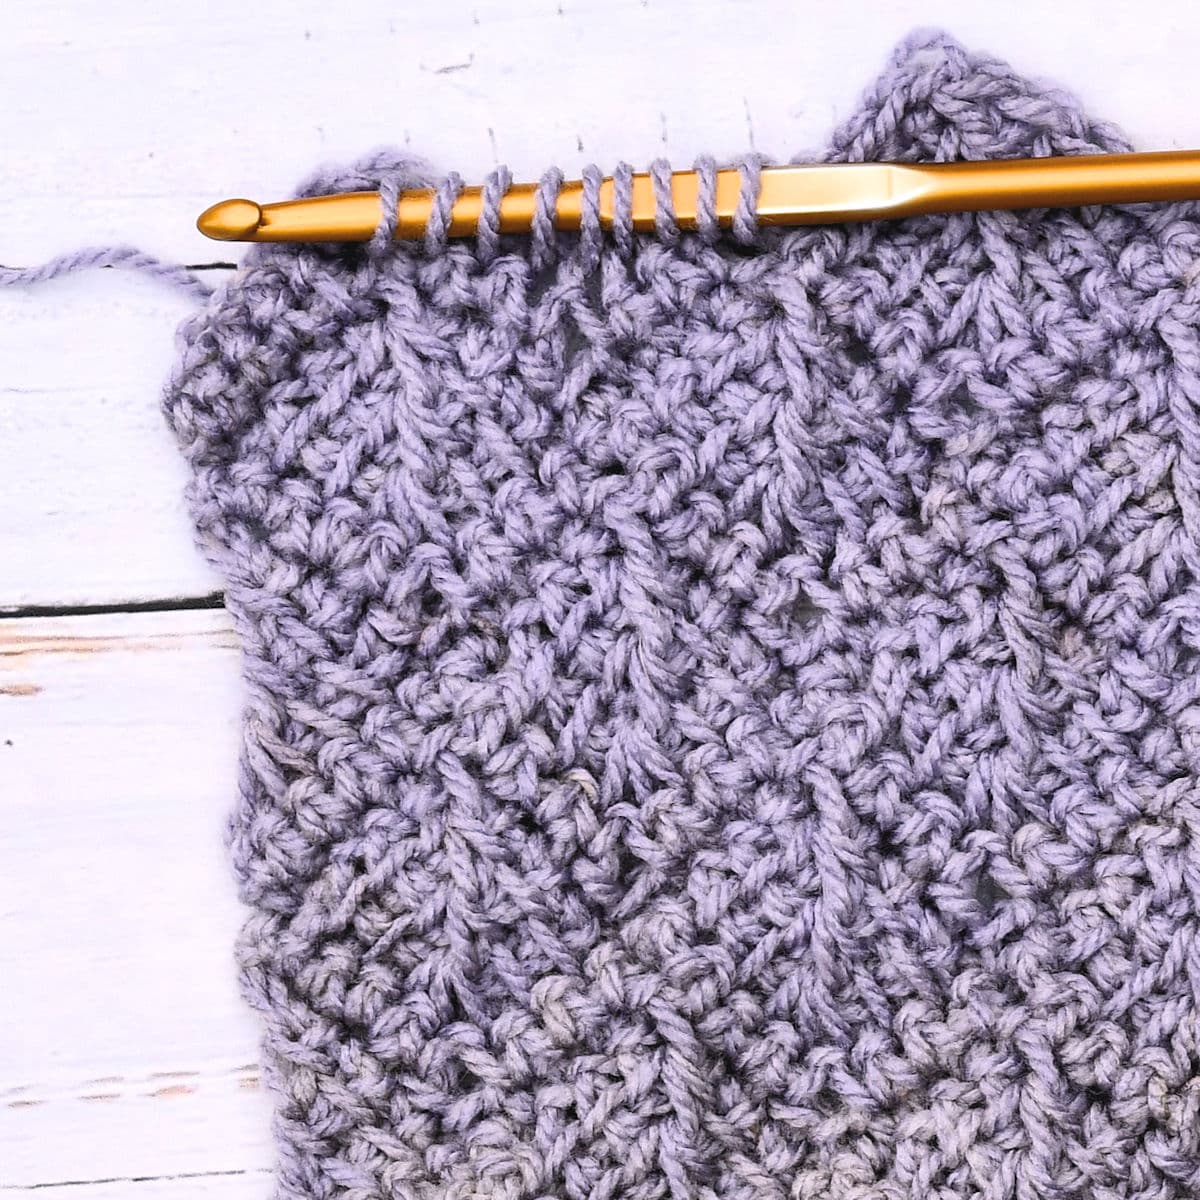
Row 3: Ch 1, working in BOTH lps of sl st (here and throughout), sc in first sl st, *sc in next 3 sl st, 3 sc in one lp only at top of Diamond, sc in sides of 3 rows of Diamond, sk last row of Diamond and first sl st of next Diamond, rep from * to last Diamond, sc in next 3 sl st, 3 sc in one lp only at top of Diamond, sc in sides of 4 rows of Diamond, turn: 1 lp remains on hook: 182 sc.
Note: The Diamond rows shift by one stitch on each alternating Diamond row to control the bias. Follow the instructions to maintain this shift.
Row 4: Sk first sc, pull up lps in next 4 sc (5 lps now on hook), work First Side Diamond (see Special Stitches above), sl st at side of each of 4 rows of Diamond, sl st in next sc of current row (1 lp on hook), *pull up lps in next 8 sc, work Diamond, sl st at side of each 4 rows of Diamond, sl st in next sc of current row (1 lp on hook), rep from * to last 5 sc, pull up lps in next 5 sc (6 lps now on hook), work Last Side Diamond, (see Special Stitches above) turn: 19 full Diamonds and 2 half Diamonds.
Row 5: Ch 1, 2 sc in sides of next 2 rows of Diamond, sc in side of next row of Diamond, *sk last row of Diamond and first sl st of next Diamond, sc in next 3 sl st, 3 sc in one lp only at top of Diamond, sc in sides of next 3 rows of Diamond, rep from * to before last Diamond, sk last row of previous Diamond and first sl st of last Diamond, sc in next 3 sl st of last Diamond, sc in top of last Diamond, turn: 180 sc.
Rows 6-73: Rep rows 2-5.
Rows 74-75: Rep row 2-3. Fasten off after final row.
Finishing
Weave in all ends securely.
Depending on your tension, especially on the first loop of each row of the Diamonds, your project could bias. If this happens, spray the entire blanket generously with cool water or dip in cool water until saturated then gently roll in clean, dry towels to remove excess water. Shape on a flat surface then allow to dry completely.

Twitter | Facebook | Pinterest
All the patterns at Make It Crochet are free. Since many of you have asked how to help with the costs of running a site like this, I’ve made all the patterns into print-ready PDFs and the cost is about the same as a cup of coffee. Every little bit helps.
TERMS: To my fellow crafters, you have my permission to use my patterns to make and sell your projects* anywhere you like. You cannot use my images to sell your projects, though. You must take photos of your own work. All patterns have been tested but mistakes can happen. If you find a mistake, please let me know. Everything at MakeItCrochet.com is protected by copyright to Kim Guzman. Other than the permissions previously given, no one other than Kim Guzman has permission to: reproduce, copy, publish or distribute this pattern, its parts or photos in any way or form, including, but not limited to, translations into foreign languages & video production.
*Not intended to be blanket permission for mass production.


This is beautiful!
Thanks so much!
Looks absolutely beautiful and the directions seem to be doable for me. I can hardly wait to start. Thank you.
Great! I hope you enjoy it. 🙂
Thanks for sharing this beautiful pattern even though I would prefer to see a tutorial of it
Thanks so much! I’m unable to get the equipment to make them available right now. Maybe later in the year.
Being a visual learner, I would love that!
Oh, that’s a lovely pattern! When I find time, I’d love to make it, especially since it uses Mandala Yarn, one of my favorites. Thank you so much for designing this lovely blanket! I’ll take your advice and start with a scarf.
That’s great! I hope you enjoy it. 🙂
Love it except no video many like me can’t read patterns and need verbal and visual help
I understand. I would love to be able to provide videos but I’m not able at the moment. Perhaps later this year, if all goes well.
Hi Kim,
This pattern is just what I have been looking for as another great grand son will join our family in June.
Is there a video that goes with it?
At age 75 I need that help as well as the photos.
I love all your Tunisian blanket patterns.
Kind Regards Laurel NZ
I’m not able to provide video hosting at this time. Perhaps later this year.
Simply stunning!
Thanks so much!
abSOLUTELY excited to start this project. Did you maybe post a similar video tutorial on facebook?
This looks similar to entrelac,
By the way, your tutorials are like my bible library and I am so grateful to have them. Good speed, great step by step instructions and clear, visible photography.
Welcome! Although similar to Tunisian entrelac, this one decreases in the center of each section for a mitered square. It’s a challenge but well worth it. 🙂 Thank you for writing!
Could you please do a video tutorial of this pattern.. I’m having a bit of trouble understanding it , It might be because I’m not that familiar with tunisian crochet however I can do it,
I am not able to make videos at this time. I hope to be able to make them by the end of the year.
I really like the blanket but where is the pattern
Thanks so much! It looks like you scrolled right past it too quickly to get to the comments section here. Go a little more slowly. 🙂
my last full diamonds don’t end up having 8 stitches. any idea what I’m doing wrong?
It usually means that the count was off somewhere when making the other diamonds. It’s really painful to realize that you’re off just a tiny bit. Taking out that much work is difficult. If I were you, I would probably be tempted to squeeze in an extra stitch rather than take out the entire section.
beautiful and I love the way it is working up. but my row of full diamonds don’t end up having 8 stitches in the last one. any idea what I’m doing wrong?
It usually means that the count was off somewhere when making the other diamonds. It’s really painful to realize that you’re off just a tiny bit. Taking out that much work is difficult. If I were you, I would probably be tempted to squeeze in an extra stitch rather than take out the entire section.
sorry didn’t mean to post twice! ignore it. and thanks for the response
Hello, I’m really struggling with understanding row 5. “ 2 sc in sides of next 2 rows of Diamond, sc in side of next row of Diamond”. I don’t understand what the “side” is. Please help me! ❤️
The sides of the Diamond are the same as you have been working in the sides of the previous Diamonds. The position of the stitches change because of the biasing in Tunisian crochet. I’ve shifted the odd rows by one stitch so it starts and ends at a different spot. To maintain this shift, you specifically work 2 singles in each of the 2 sides at the beginning. If this isn’t what you mean, please let me know and I will try to explain further. Let me know! Kim
Hi there! Can I email you a picture? I think I understand but want to make sure.
I end row 4, then turn and begin the repeat of row 2. When I finish row 2 as a repeat, I end up with an extra stitch that isn’t worked.
So, to verify what I was initially struggling with: When starting row 4, you chain one, turn, then 2 SC in the first stitch (side of what was the “last diamond”), then 2 SC in the second stitch (2nd side of what was the “last diamond”).
Is that right? Do you know how I could have ended up with an extra stitch at the end of my repeat of row 2? (I’m doing a small sample, my starting chain was only 26 stitches—2 multiples of 8+10).
I have tried to go through the entire pattern and I don’t see anywhere that you do a repeat of row 2 after a row 4. I must be missing something. Please send me a closeup photo to [email protected] and I’ll see if I can help you further.
I am having so much fun learning something new. I make baby blankets for new mothers and can’t wait to see it finished. I looked at how to do Tunisian crochet and did a small square to give me the basics and then I started out with Row 1. It wasn’t as confusing as I thought it would be and I got the hang of it. I am now beginning row 3. Thank you for sharing your pattern.
That’s great news! I’m so glad it’s working out for you. 🙂
I’m just curious, what do you mean when you say, “your project could bias.” I’ve never heard the word bias used this way. What would that look like?
With some Tunisian crochet stitches (as well as some regular crochet stitches), there can be a little bit of shifting to the right or left instead of straight vertical.
I hope that helps!
it does help thank you, and it explains why my side don’t quite line up perfect, haha. blocking should help
Yes, it’s the reason why the Diamonds are shifted on every other row, back and forth. It can still slightly bias due to variances in how someone holds the hook or other little variances. I agree that blocking is the answer for that little leftover shift. Enjoy your project! 🙂
So, I am sitting here with 3 skeins of Pixie and wondering what to do with it. I have tried a spike granny with a 4.0 mm hook which works well, but I’m not sure this is the right design for this yarn, and then a dragon flies into my laptop, leaves his coat in Pixie colors and flies away, leaving directions for this magnificent pattern! Can’t wait to give it a try. Thanks so much! Just wondering tho’…Isn’t a J hook kind of large for this yarn? I will try and adjust accordingly if I have to. I am a loose crocheter, so I will see. Thanks again!
I hope you enjoy the pattern. It’s a challenge but so worth it. If you crochet very loosely, you could try moving down to an I hook. Try it with the minimum chains to start before moving on to the larger project. Enjoy! 🙂
Hello how are you I’m gud thank you I’m from Cape Town South Africa lovely patterns can u please make a vidio for this pattern stunning and so lovely
Once I purchase the equipment necessary and get set up for making videos again, this one is first on the list. Thank you for writing!
this is a most unique pattern… I love it.. working your scarf width of 42 ch for a sample… I was able to crochet the rows .. kept practicing till I got it!.. thanks for very detailed instructions.. beautiful
I’m so glad it’s working out for you. It’s fairly challenging but worth it in the end. Thank you for writing!
Just started this pattern and I was wondering if there is a way to minimize the loose loop that is forming where the chain is , in between the diamonds.
If it’s the start of a Tunisian crochet row, there is always a loopy loop at the beginning. To minimize it, I insert my hook for the first time and, before pulling up a loop, I really tug on the loop on the hook. Then, I try to hold it there while pulling up the first loop. It doesn’t remove it completely, but it minimizes it.
I have never done Tunisian crochet before and it took me time and patience reading instructions and working the pattern over and over, but I finally began to understand. Once you get it you see that the instructions are helpful and clear even though they seemed confusing at first. Thank you for giving me this opportunity to learn. I didn’t use the recommended yarn. I had a supply of various colors of the same weight yarn so I made my own color pattern, changing colors after two to four rows. I have many ends to tie off – Not fun, but the blanket is beautiful. It’s worth the beginning effort.
How wonderful! I’m so glad to hear that it worked out for you. Thank you for writing!
Hello!! Loving how this is working up, but I am another stuck on row 5. Could you advise me a little more?
“Row 5: Ch 1, 2 sc in sides of next 2 rows of Diamond, sc in side of next row of Diamond.” Am i to do the 2 single in the entire next two diamond rows? I see In a previous comment you advise it is at the beginning. So then would it be two singles in the left and right side of the last half diamond? I hope this makes sense. I can email a photo of my last diamond and where I am curious to put the 2 sc. Really trying to figure this beginning of row 5 and I got it. Again, loving it!
Each Diamond is made up of 4 rows. You will place 2 sc in the side of the first row then the second row, then only 1 sc in the side of the next row.
If this isn’t what you meant, please send a photo to this email.
I hope that helps!
Hi, I’m new to Tunisian crochet and am confused about where the second row pulls up the loops- in all the tutorials I can find, the loops are pulled up from a vertical bar. But with the single crochet into the chain I didn’t see a vertical loop like one would see in a foundation chain. Did I mess something up here or is it worked into a different loop?
When making a Diamond directly onto the single crochet row, you will pull up loops in the single crochet. Insert your hook the way you would normally into the top of the single crochet, yarn over and pull a loop through. Repeat across and you’ll have 9 loops on your hook, then begin working them off. If you scroll up to the Diamond section, you’ll see a photo of the 9 loops so you’ll know how it will look. I hope that helps!
Oh great, thanks so much!! I just wasn’t sure where to pull up loops, and that helps a lot 🙂 Appreciate your reply!
This afghan is simply beautiful! I am clueless as to how to start it. There is nothing in the pattern that indicates how many chains to stitch. Nor does it say how to get the ripple effect in the first row of single crochet. Please help!
This pattern is very detailed and challenging. There are detailed instructions, however, I think you are still in the Special Stitches section and you will need to scroll down. The Special Stitches contain what would normally be something like a “Popcorn” except the Popcorn is very large and detailed. You will need to have a grasp of the Diamond sections so you can place them once you get to the primary instructions further down.
I’m having difficulty with row 2 of the diamond. The “insert hook under 3 vertical bars, yo, pull loop through” is confusing me. Am I making 3 loops on my hook or 1?
Thanks for writing! You will take this literally. Insert your hook under 3 bars at the same time, yarn over and pull up a loop. It will produce one loop on your hook. Then, continue. Be sure to make sure you have 7 loops on your hook at the end. Let me know if you have any other questions.
I think I’m doing something wrong. I try to follow the instructions but I end up with 6 loops instead of 7
Do you have 9 loops on row 1? If so, you are only deleting the 2 at the center, when you insert the hook under 3 bars. It’s possible that you’re missing the last stitch. It’s easy to miss. You can put a little stitch marker or piece of yarn in the 9th loop of row 1. Then, when you come back through, you’ll see if you’re missing it.
Your dragon scales baby blanket is absolutely gorgeous! I featured your incredible pattern on Crafts on Display today. It looks like the perfect challenge for creating a truly special handmade gift https://craftsondisplay.com/crochet/crochet-dragon-scales-baby-blanket-206779/
thank you. this is a lovely blanket
You’re welcome! I hope you enjoy it 🙂
Beautiful pattern! Never done tunisian crochet before (other than chain-less foundation), and have been slowly working through a test swatch to learn the pattern. I’ve made it through repeats of all the rows, and I have one small question – when you put 3 sc in one loop at the top of the diamond, do you use the front loop or the back loop only? Thanks!
Because you’re working into Tunisian crochet rows, there is no actual front and back loop the way you would find when working regular crochet stitches. Try working into the topmost loop but just work under one loop so it has extra give around the corner. I hope that helps!
Thanks for your reply! I thought the SC go into the slip stitches, which have a front and back. For the stitches up the side I go under both stitches, but at the top there’s a choice between front or back. I’ve been doing front, but wasn’t sure if that was right.
Or rather, it’s not in a slip stitch, but the top stitch looks a lot like the top of a normal crochet stitch with something like a functional front and back. Does that make sense?
I stipulated one bar so that there was enough “give” in the point there. So, in reality, it doesn’t matter which side of the loop you use, as long as it’s only one of them. The only thing I would suggest is to use the same one each time for consistency. Other than that, you can choose the one you prefer.
Ah, got it. Thanks! And thanks again for taking the time to reply – I know this pattern has been up for a while.
You’re welcome! Let me know if you have any other questions. 🙂
Beautiful blanket with no holes for wandering baby fingers
Thank you for writing! Yes, it’s very unique. I love it too. 🙂