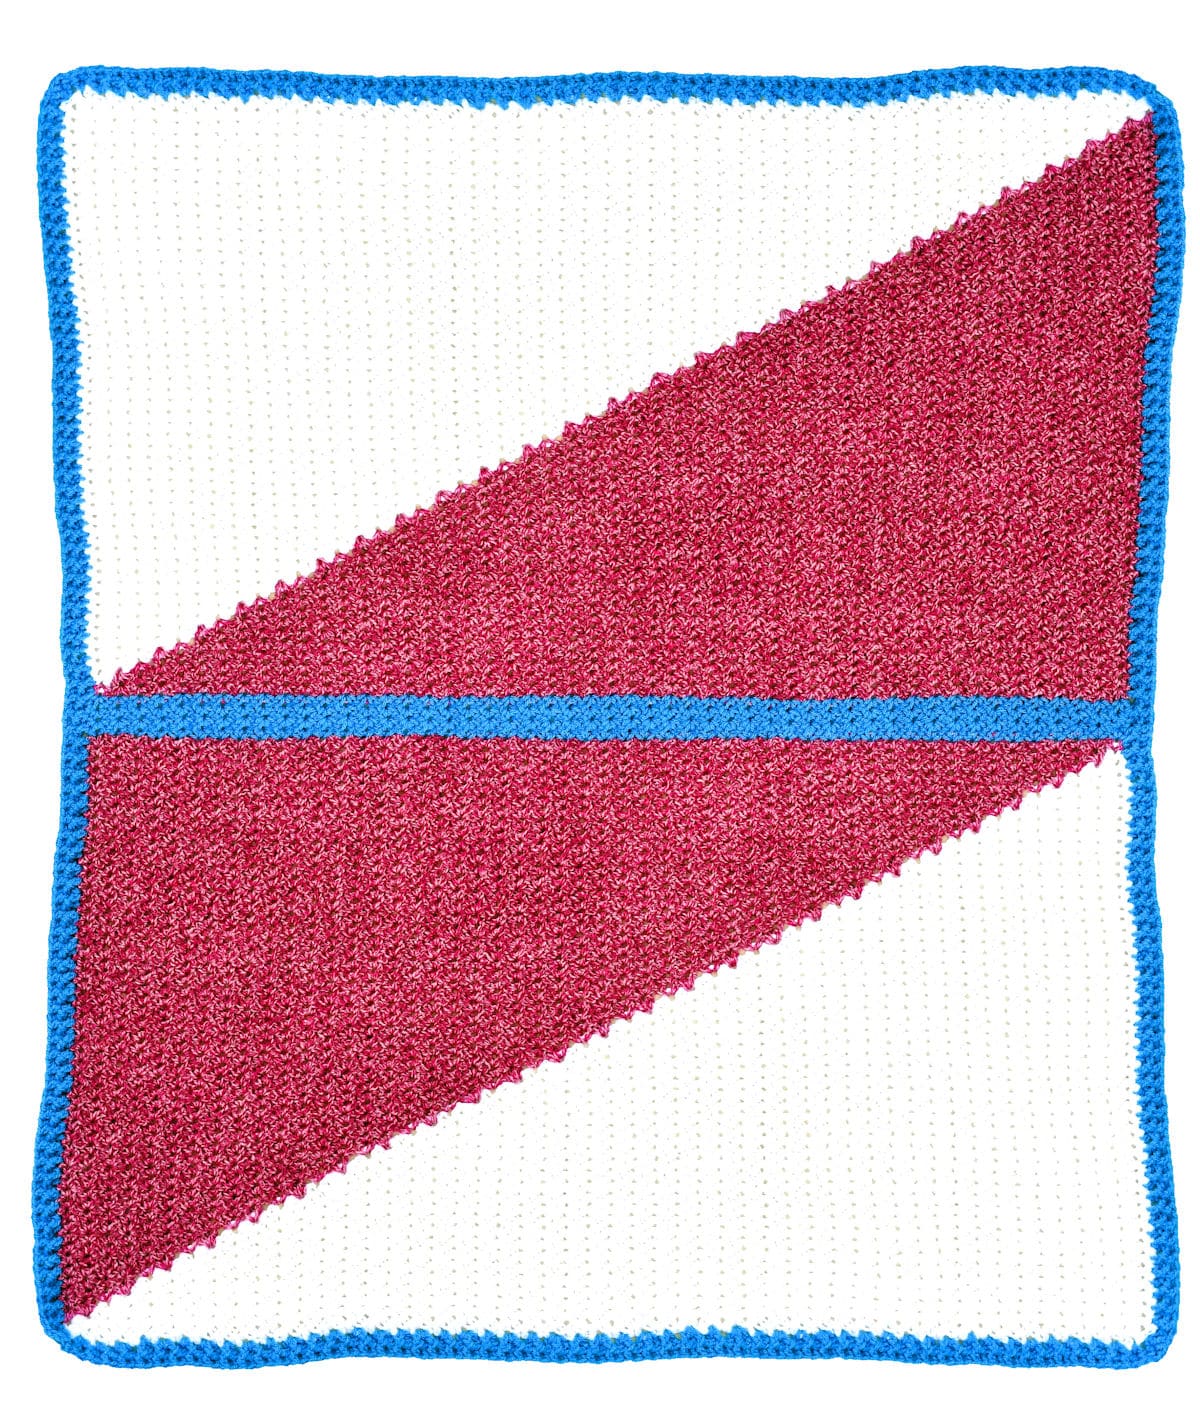
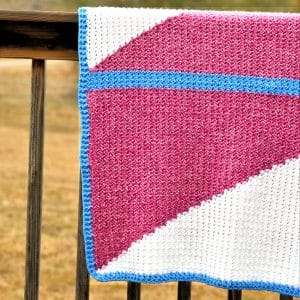
This Modern Crochet Baby Blanket pattern is designed of beautiful geometric lines with perfectly subtle texture and clever, easy stitches.
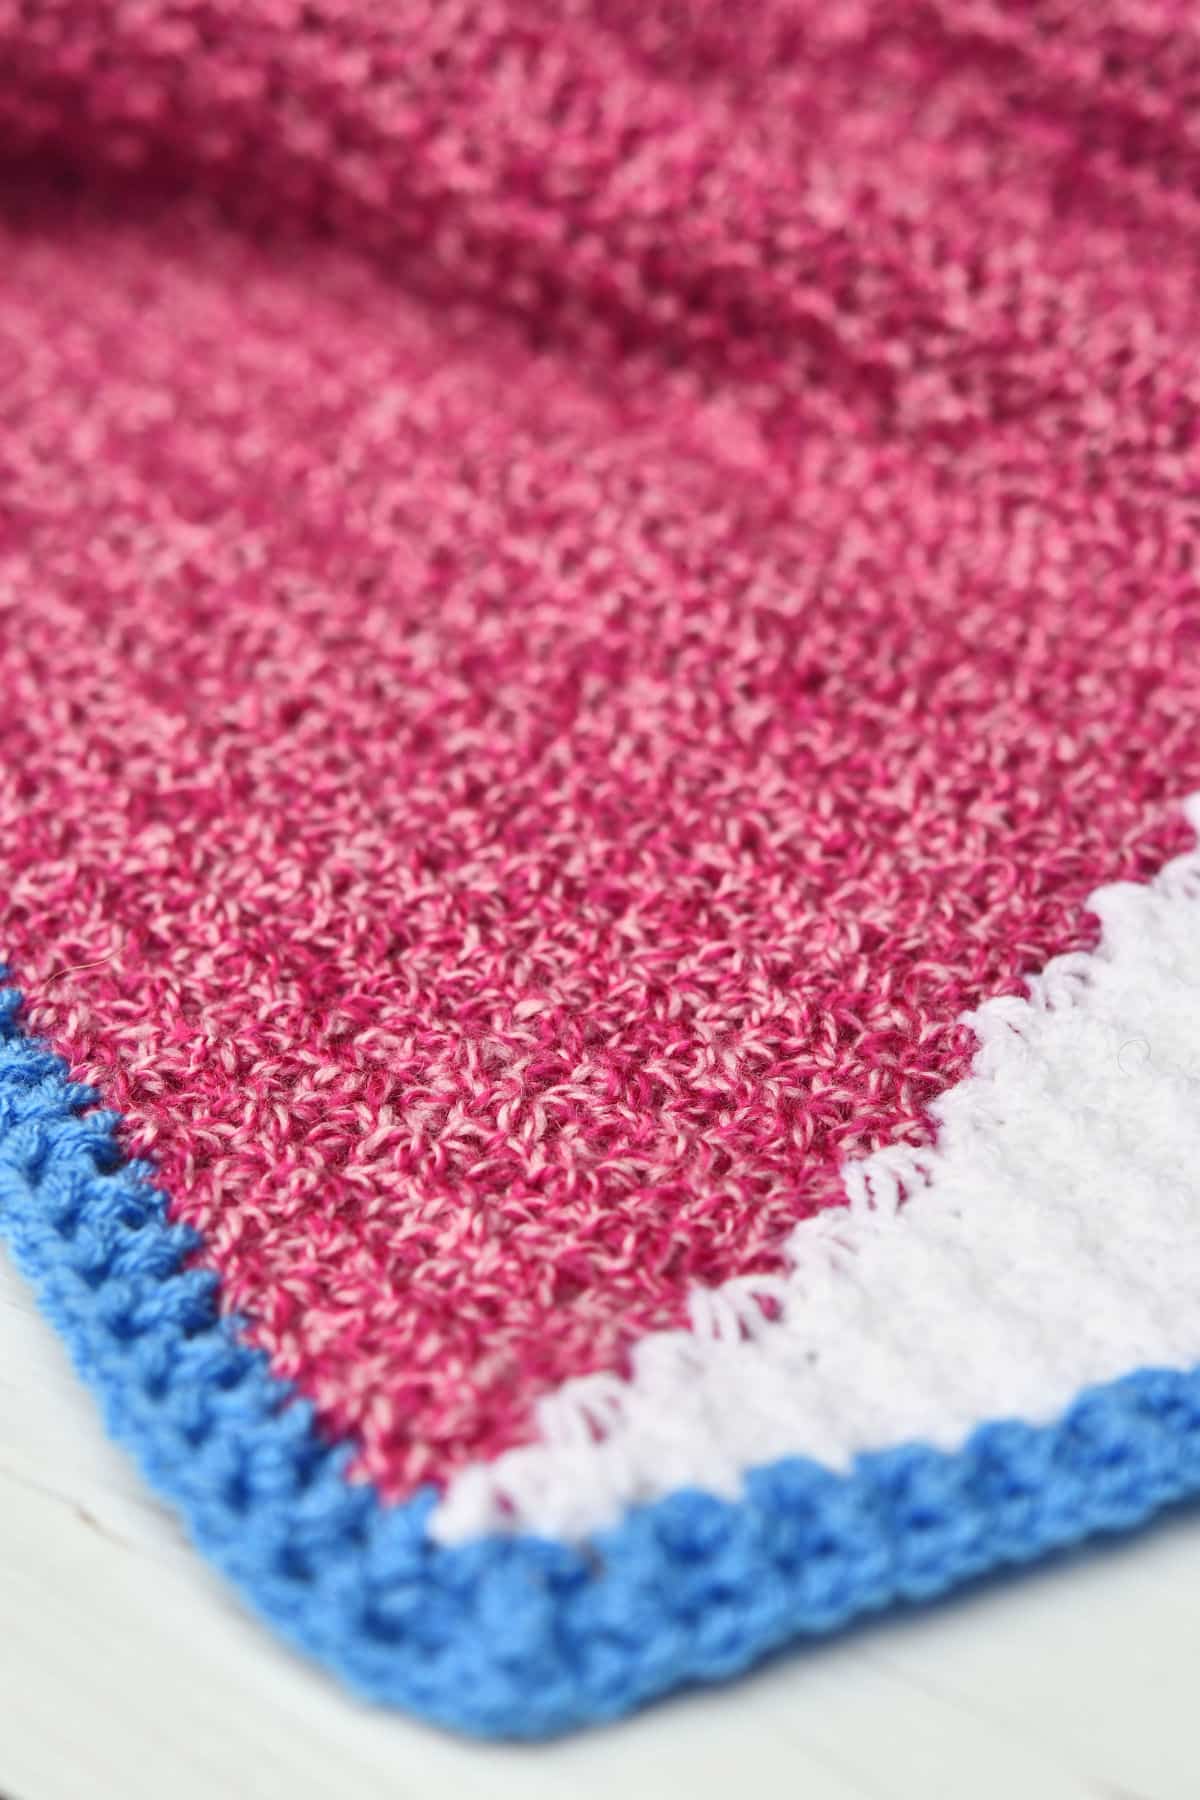
The blanket is solid and lightly textured with a wonderful drape for a baby’s first snuggle. It’s made in small shells which are basically v-stitches, made with single crochet instead of double crochet.
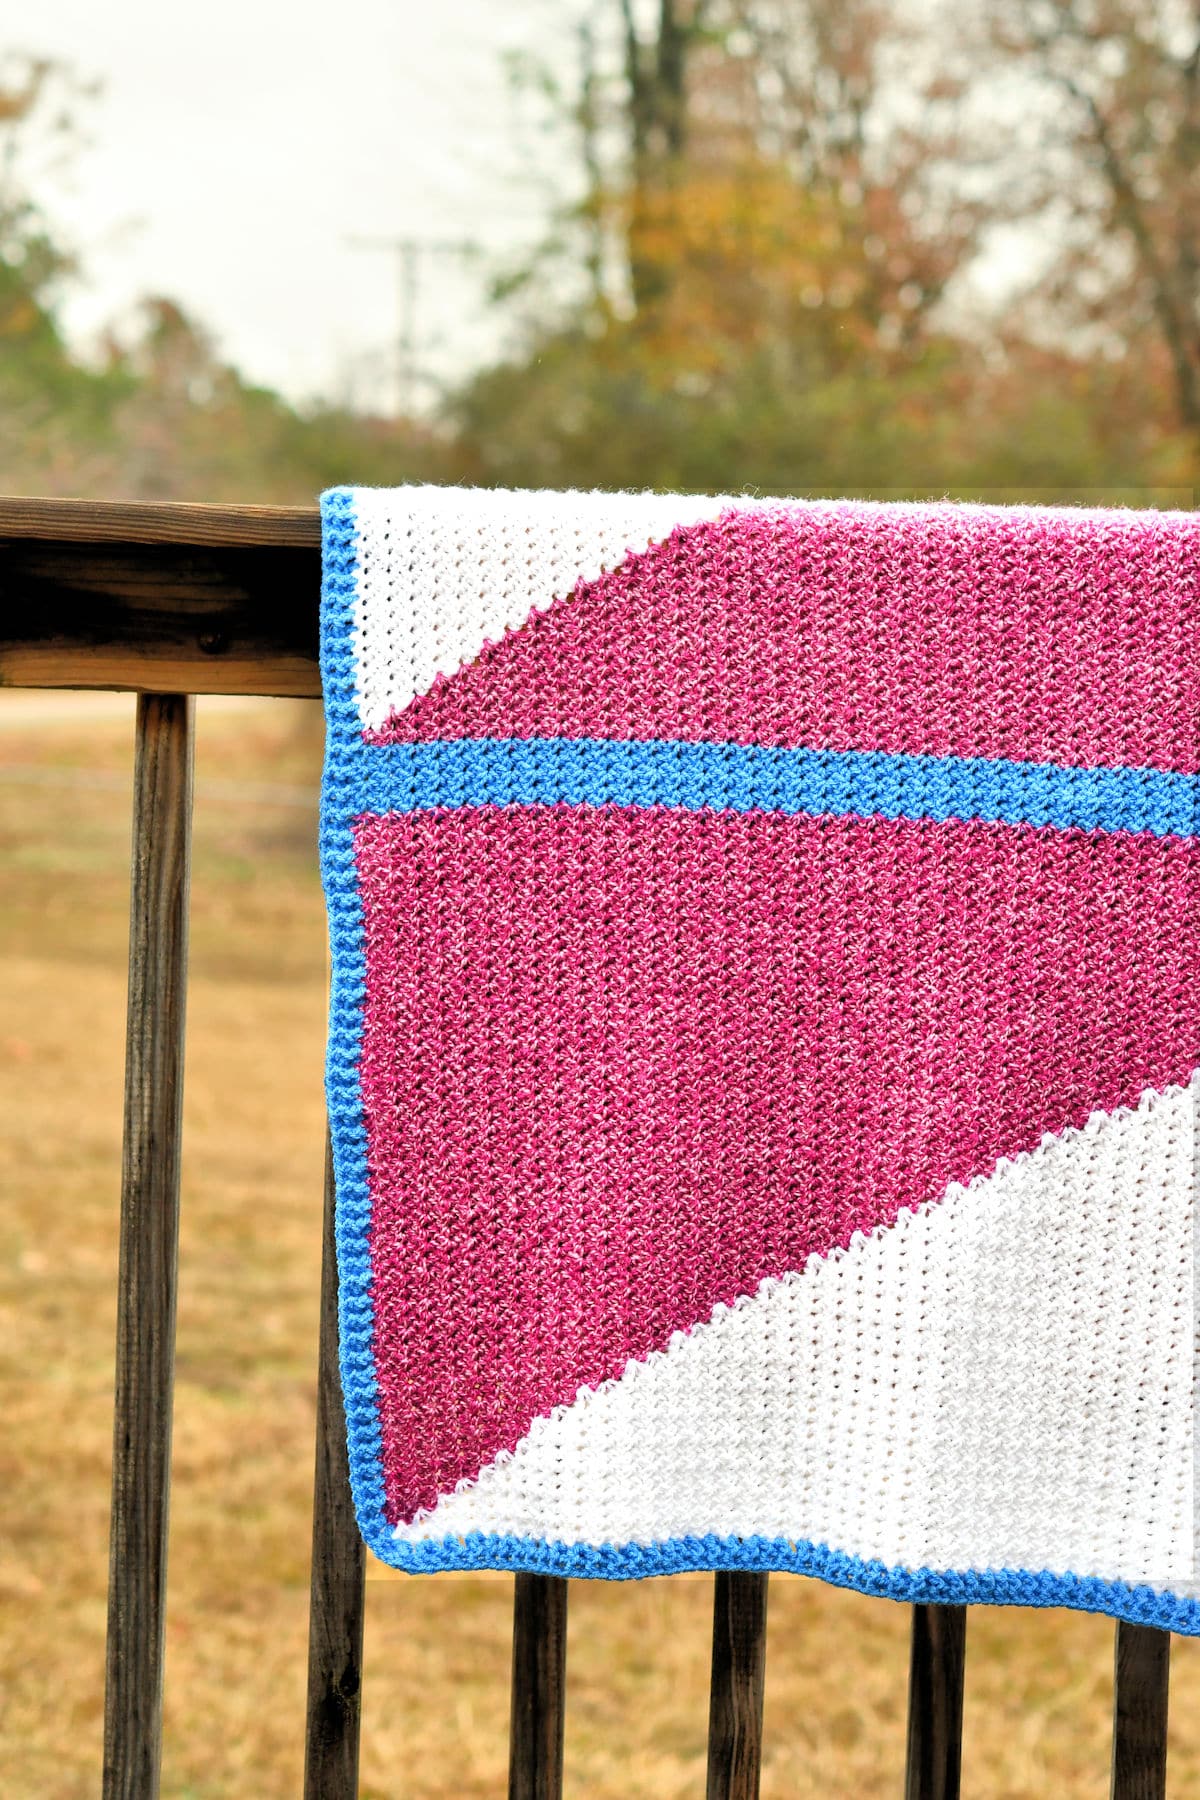
“Modern Crochet Baby Blanket” free crochet pattern by Kim Guzman © Dec. 2022 All rights reserved.
Technique: Regular Crochet.
Skill Level: Intermediate.

Crochet Pattern At A Glance
Modern Crochet Baby Blanket
Designer: Kim Guzman © 2022-24. All rights reserved.Rate the Pattern
Yarn
- Stylecraft "Special DK", 100% acrylic, 322 yds/295m per 3.5 oz/100g per skein: 2 skeins (644 yards) each of White and Carnation, and 1 skein (322 yards) of Aster
Other Materials
- Suggested Crochet Hook Size H-8 (5mm) or hook needed to meet gauge
- Stitch Marker or small piece of constrasting scrap yarn
- Yarn Needle for weaving ends
Instructions
- With White, make a triangle using a simple shell repeat.
- Join Carnation and make a triangle on the opposite side of the first.
- Make a short 4-row stripe down the center, with no increasing or decreasing.
- Repeat the triangles on the opposite side of the stripe.
- Make a 2-round border to frame the entire project.
Full Free Crochet Pattern Below
This is a free crochet pattern and the written instructions are below. If you prefer a printable download, a PDF is also available for purchase.
My Crochet Pattern Notes
The first section of this baby blanket is super easy to do, simply omitting the last shell of each row. The second section, though, is worked in reverse short rows. This fills in the opposite side.
It’s still not difficult, but you need to be able to “read” the stitches so you can tell where to position the shells. For this reason, I’ve given this an Intermediate Skill Level.
This free crochet pattern is for a unique, modern baby blanket, worked in one piece without any seaming.
You start with a simple shell repeat and work shorter and shorter rows until you are left with only one shell. This forms the first triangle, or “Wedge”.
You fill in this triangle with a reverse triangle, ending the first portion of the blanket with two triangles. There’s a small center stripe then you work the same style of Wedges on the opposite side of the stripe. Finish with a small border.
The easy to learn repeat is almost mindless, perfect for binge watching your favorite Netflix series.
Pin It For Later
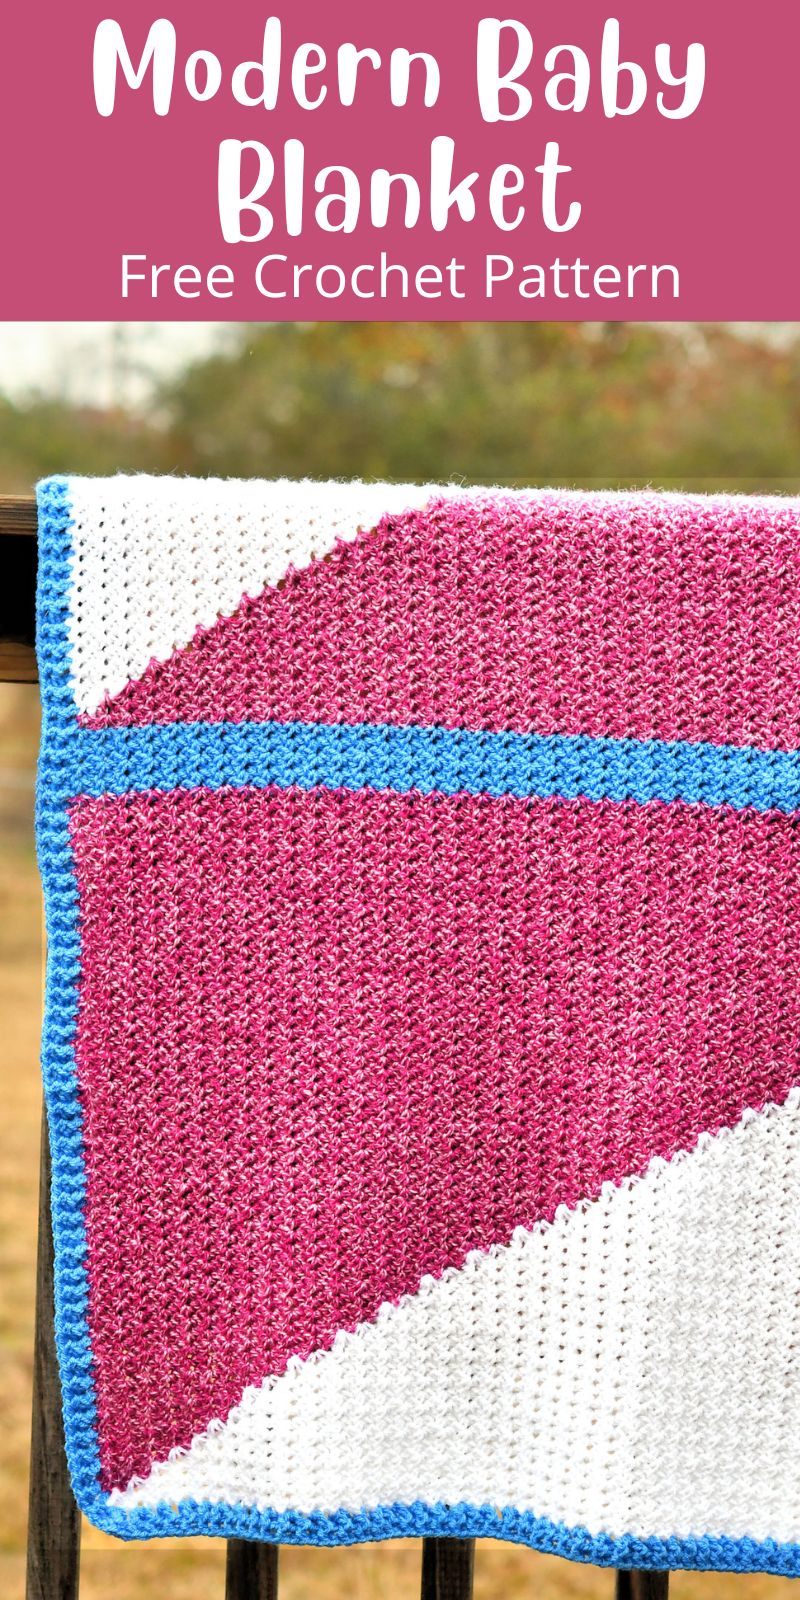
Finished Size
32″ x 37″
Yarn
Stylecraft “Special DK”, 100% acrylic, 322 yds/295m per 3.5 oz/100g per skein: 2 skeins (644 yards) each of White and Carnation, and 1 skein (322 yards) of Aster.
“Special Double Knit” is classified as a DK weight (size 3) yarn and is currently available in 100 shades.
Available at LoveCrafts (aff link). If you’re in the US, look up at the top right to switch to US Dollars. I’ve purchased from them for years and love the selection.
Yarn Substitution
I’ve used DK weight yarn (size 3) because I love this size. There’s a lot of yardage on a 100g skein of Stylecraft Special DK. You could use any yarn you like, using the hook size you prefer. You may need to make changes to the number of stitches and the amount of yarn required.
If you are unable to use Stylecraft Special DK, any acrylic or acrylic blend in size 3 lightweight yarn will be close enough.
You can also use a heavier weight yarn, if you prefer. You’ll need more yarn and a larger hook. The project will be bigger. Or, adjust the stitch count. It’s a baby blanket, so there’s a lot of things you can do to make the size you want.
Other Materials
Suggested Crochet Hook Size H-8 (5mm) or hook needed to meet gauge.
Stitch Marker or small piece of contrasting scrap yarn.
Yarn Needle for weaving ends.
Special Stitches
These post stitches are only used on the final round of the border and are unnecessary if you don’t like doing post stitches. You can omit them.
Front Post Double Crochet (FPdc): Yarn over, insert hook to the side of the indicated stitch, move hook around the back of the stitch and out the other side of same stitch, yarn over, pull loop through, [yarn over, pull through 2 loops on hook] twice.
Back Post Double Crochet (BPdc): Yarn over, with your hook held in the back of your work, insert hook to the side of the indicated stitch, move hook around the front of the stitch and out the other side, toward the back of same stitch, yarn over, pull loop through, [yarn over, pull through 2 loops on hook] twice.
Placement of Stitches Photo Tutorial
The second and fourth primary sections of this baby blanket pattern are worked in a reverse short row fashion. These sections fill in the previous sections. The placement of the stitches is a little more unusual and it helps to be able to read your stitches.
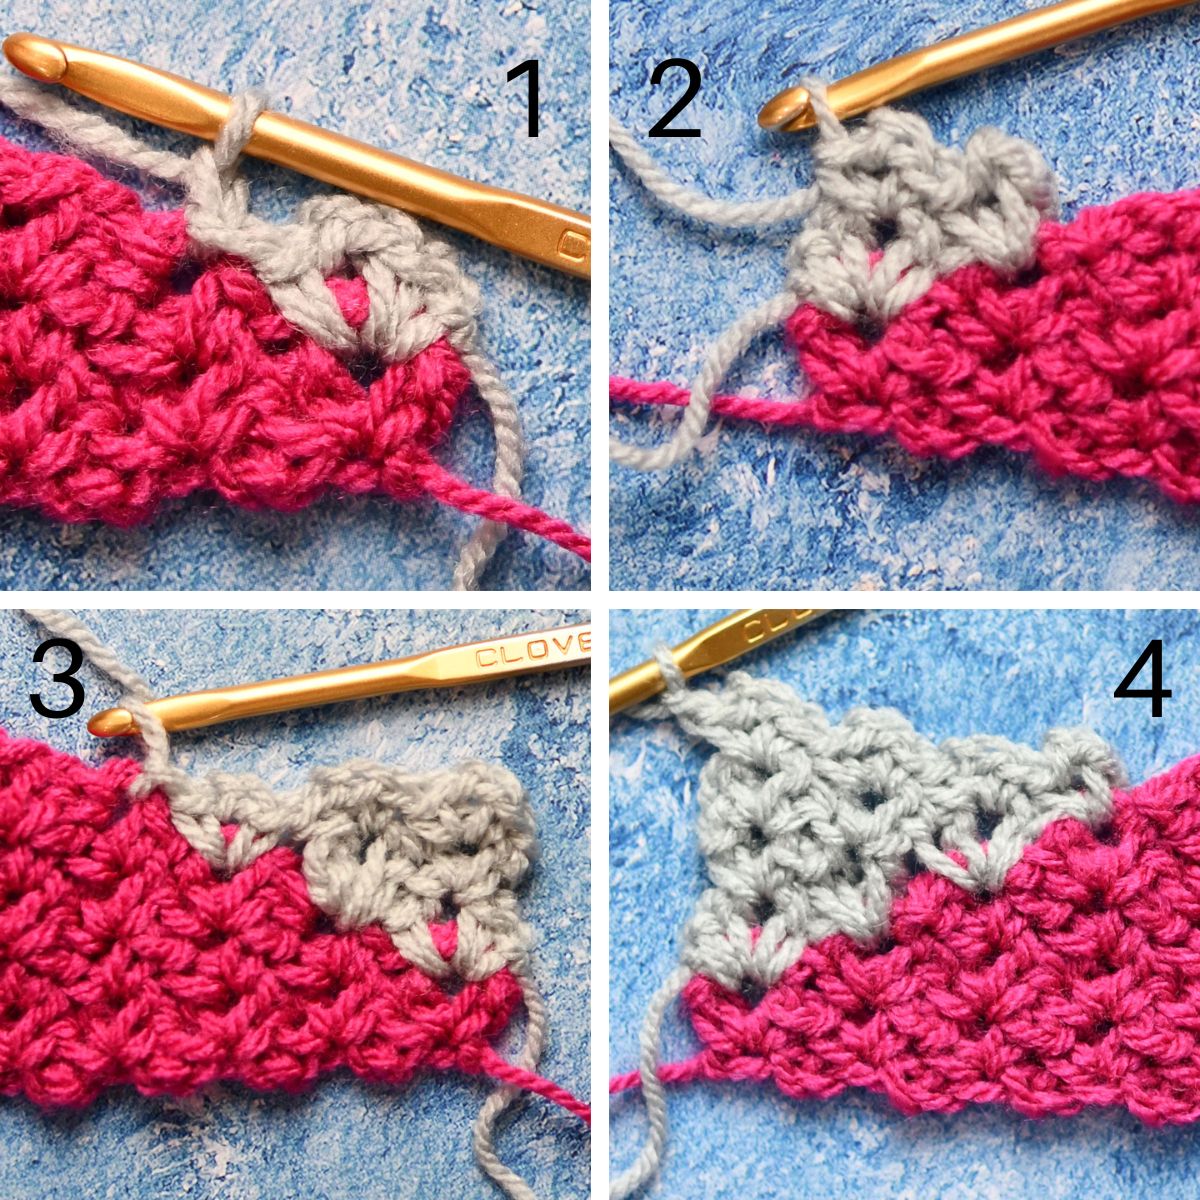
These are abbreviated instructions to give you the general idea. See the actual pattern below for more details.
- Begin the second Wedge at the short end of the first Wedge. Make a shell in the first shell then slip stitch into the next skipped shell of the first Wedge.
- Make a shell in the same shell as the slip stitch and in the next shell.
- Next, make a shell in the first and next shell, then another shell in the next skipped shell of the first Wedge. Slip stitch in the next skipped shell.
- Make a shell in the same shell as the slip stitch and in each shell across.
You will increase by one shell on each row until you have the full number of shells across.
Abbreviations
This Baby Blanket pattern is written in US crochet terminology.
ch=chain; rep=repeat; dc=double crochet; sc=single crochet; sk=skip; sl=slip; sp=space; st(s)=stitch(es).
All numbers after the colon at the end of an instruction are stitch counts. Use the stitch count to check your work.
Gauge
20 stitches (about 7 shells) for 12 rows measures approximately 4×4″. Use the stitch multiple to change the width. Gauge isn’t critical since you can use any weight yarn, changing the hook size for your preferred tension.
Stitch Multiple
To change the width, make your initial chain any multiple of 3, then add 3.
I love the Multiple of 3. In order to find out if any number is a multiple of 3, add all the digits together and, if the end result is a multiple of 3, then the full number is a multiple of 3.
Examples: 42 is 4+2=6. 6 is a multiple of 3 so 42 is too. 252 is 2+5+2=9. 9 is a multiple of 3 so 252 is too.
Free Crochet Pattern Instructions
This entire baby afghan is made in an all-over repeat of {sc, ch 2, sc]. To make counting easier, I’ve called this repeat “shells”. It’s basically a more typical v-stitch, except single crochets are used instead of doubles.
First Wedge
Row 1: With White, ch 153, sk 2 ch *[sc, ch 2, sc] in next ch, sk 2 ch, rep from * to last ch, [sc, ch 2, sc] in last ch, turn: 51 shells.
Row 2: Ch 1, sl st in next ch-2 sp (mark this ch-2 sp for later placement of the next Wedge), ch 1, [sc, ch 2, sc] in each remaining ch-2 sp across, turn: 50 shells. Note: You may want to mark the very first shell of each row 2 repeat to make it easier to see on the row 3 repeat.
Row 3: Ch 1, {sc, ch 2, sc] in each ch-2 across up to last shell, sl st in last shell, turn: 49 shells.
Rows 4-49: Rep rows 2-3. 3 shells remain on final row.
Row 50: Rep row 2: 2 shells.
Row 51: Ch 1, [sc, ch 2, sc] in ch-2 sp, sl st in next ch-2 sp, fasten off. 1 shell remains.
The next Wedge will be worked, starting with one shell then increasing one more shell on each row (the opposite of the first section).
Prepare by viewing your work closely. You’ll be working in the skipped shells from the prior rows. By looking at your work, you can see the steady rise of the shells, causing a slight ridge. Watch that ridge so you’ll know where you’ll be placing your new shells.
Second Wedge
View the Tutorial Photo Collage to help with stitch placement.
Row 1: Join Carnation with sl st in ch-2 sp of first skipped Shell of Row 1 (the marked ch-2 space), ch 1, [sc, ch 2, sc] in same ch-2 sp, sl st in next skipped shell from next row of the Wedge, turn: 1 shell.
Row 2: Ch 1, [sc, ch 2, sc] in same st as sl st (it will overlap the sl st), [sc, ch 2, sc] in next ch-2 sp, turn: 2 shells.
Row 3: Ch 1, [sc, ch 2, sc] in each ch-2 sp, [sc, ch 2, sc] in next skipped shell from last row of the Wedge, sl st in next skipped shell from last row of the Wedge, turn: 3 shells.
Row 4: Ch 1, [sc, ch 2, sc] in same st as sl st, *[sc, ch 2, sc] in next ch-2 sp, rep from * across, turn: 4 shells.
Rows 5-50: Rep rows 3-4. 50 shells on last row.
Row 51: Ch 1, [sc, ch 2, sc] in each ch-2 sp, [sc, ch 2, sc] in next skipped shell from last row of the Wedge, fasten off: 51 shells.
Center Stripe
Row 1: Join Aster with sl st in ch-2 sp of last worked shell, ch 1, [sc, ch 2, sc] in same ch-2 sp, [sc, ch 2, sc] in each remaining ch-2 sp across, turn: 51 shells.
Rows 2-4: Rep row 1. Fasten off after final row.
Third Wedge
Row 1: Join Carnation with sl st in ch-2 sp of last worked shell, ch 1, [sc, ch 2, sc] in same ch-2 sp, [sc, ch 2, sc] in each remaining ch-2 sp across, turn: 51 shells.
Rep Rows 2-51 of First Wedge.
Fourth Wedge
Row 1: Join White with sl st in ch-2 sp of first skipped Shell of Row 1 (the marked ch-2 space), ch 1, [sc, ch 2, sc] in same ch-2 sp, sl st in next skipped shell from next row of the Wedge, turn: 1 shell.
Rep Rows 2-51 of Second Wedge.
Border
Note: There is no definitive right side or wrong side, so just decide which side you want to use as the front and begin the Border.
Round 1: Join Aster at any corner, ch 3 (counts as first dc), 2 dc in same position, work 125 dc evenly across short sides and work 159 dc along long sides, with 3 dc in each remaining corner, sl st to top of beginning ch 3.
Skip round 2 completely, if you don’t like post stitches. Or, make them all regular double crochets.
Round 2: Ch 1, FPdc (see Special Stitches above) around same st, *BPdc (see Special Stitches above) around next dc, 3 FPdc around next dc (corner made), [BPdc around next dc, FPdc around next dc] to 3-dc group, rep from * twice more, BPdc around next dc, 3 FPdc around next dc, BPdc around next dc, [FPdc around next dc, BPdc around next dc] to first FPdc, sl st to top of FPdc, fasten off.
Finishing
Weave in all ends securely.
Twitter | Facebook | Pinterest
All the patterns at Make It Crochet are free. Since many of you have asked how to help with the costs of running a site like this, I’ve made all the patterns into print-ready PDFs and the cost is about the same as a cup of coffee. Every little bit helps.
TERMS: To my fellow crafters, you have my permission to use my patterns to make and sell your projects* anywhere you like. You cannot use my images to sell your projects, though. You must take photos of your own work. All patterns have been tested but mistakes can happen. If you find a mistake, please let me know. Everything at MakeItCrochet.com is protected by copyright to Kim Guzman. Other than the permissions previously given, no one other than Kim Guzman has permission to: reproduce, copy, publish or distribute this pattern, its parts or photos in any way or form, including, but not limited to, translations into foreign languages & video production.
*Not intended to be blanket permission for mass production.

Let Me Know What You Think!