
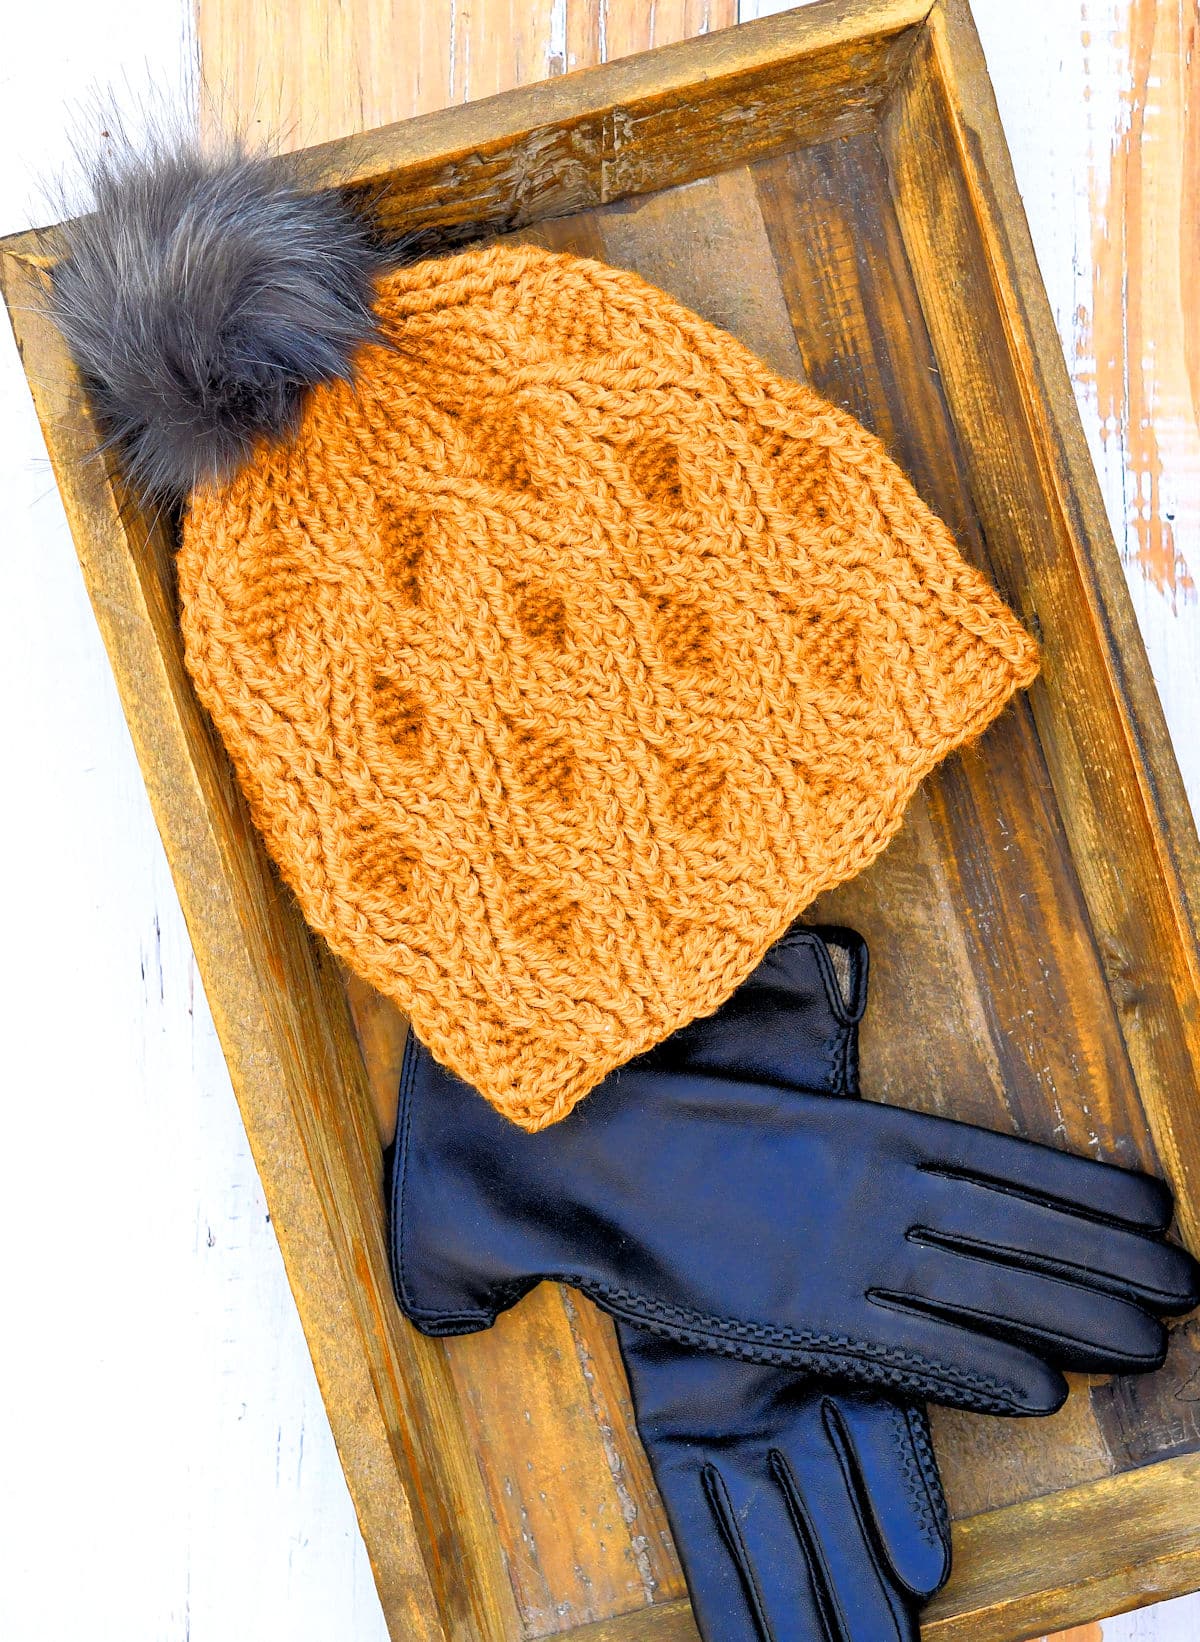
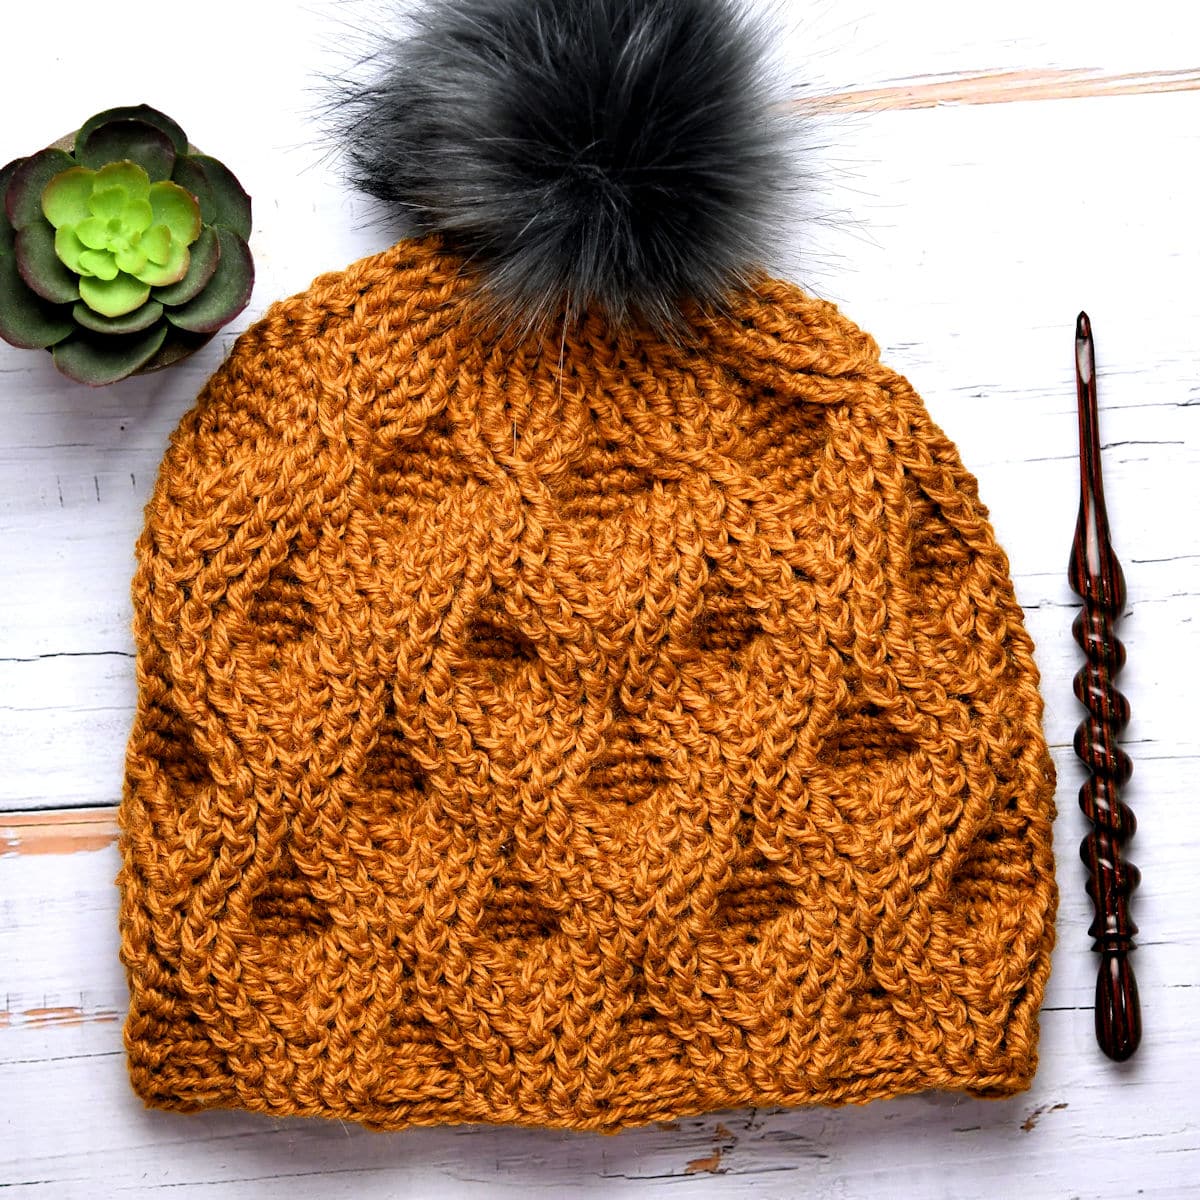
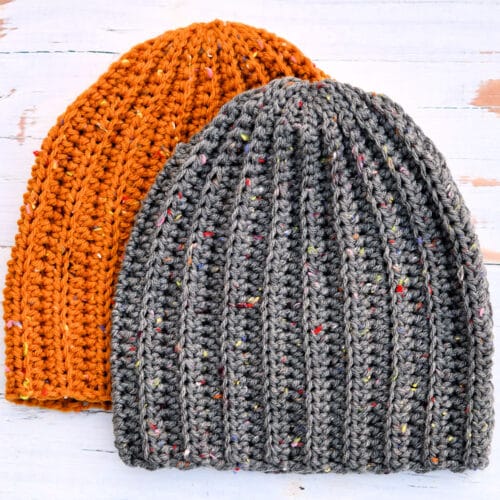
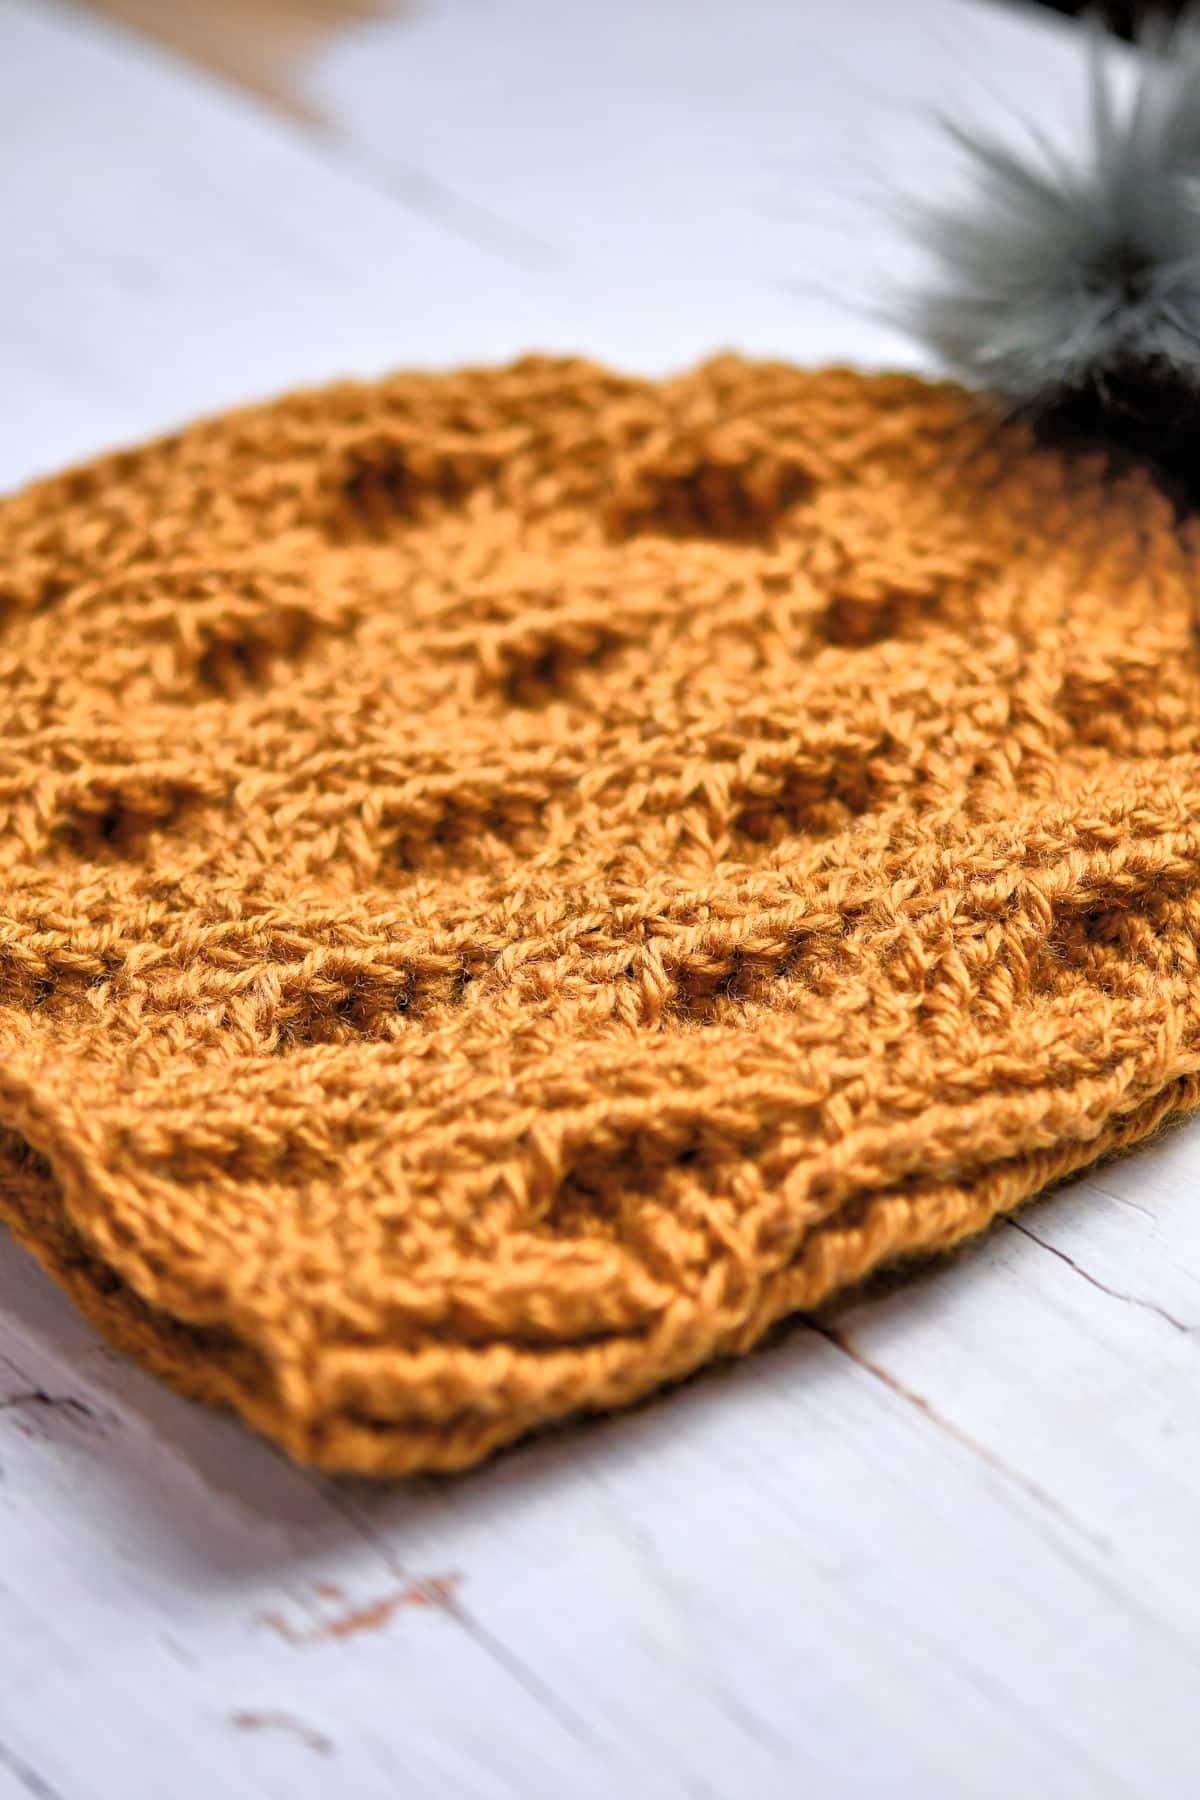
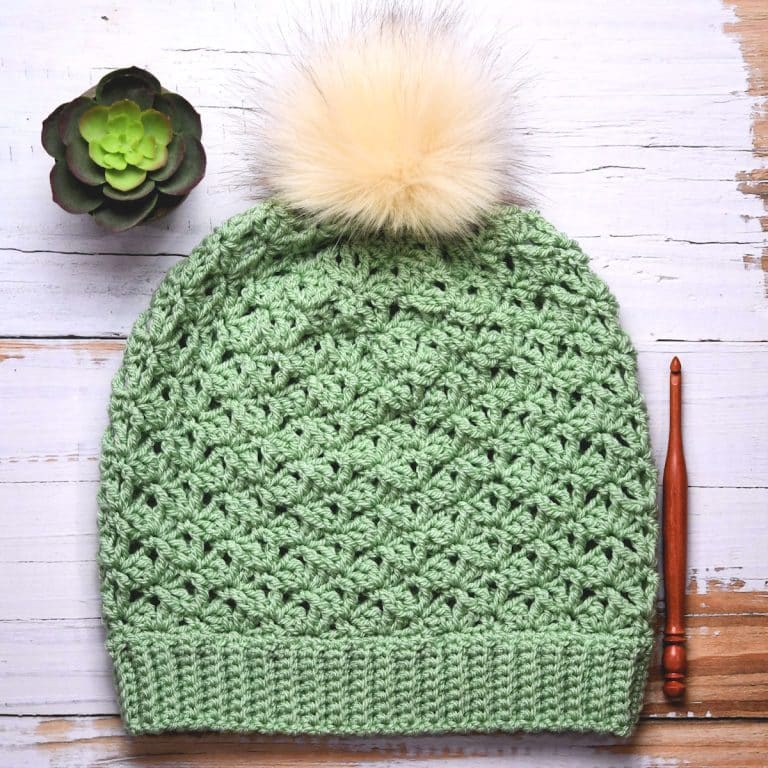
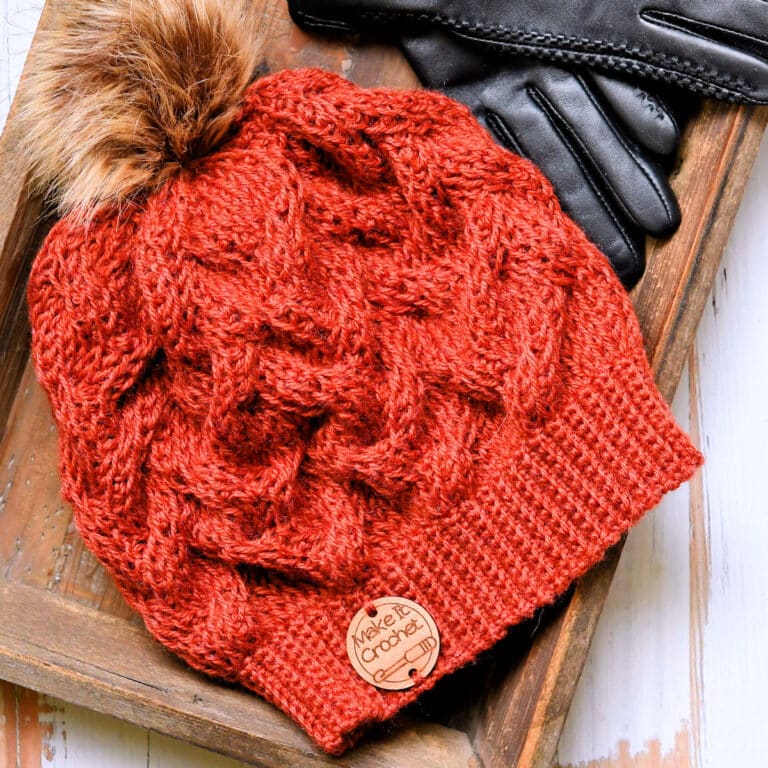
The Raised Diamonds Beanie Crochet Pattern is for a highly textured and warm crochet hat with intricate stitchwork to create a luxurious and comforting stitch pattern. The beanie has almost a double layer, for double the warmth in chilly weather.
“Raised Diamonds Beanie” free crochet pattern by Kim Guzman © Jun. 2023. All rights reserved.
Technique: Regular Crochet.
Skill Level: Intermediate.

Crochet Pattern At A Glance

Raised Diamonds Beanie Crochet Pattern
Designer: Kim Guzman © 2022-2026. All rights reserved.Rate the Pattern
Yarn
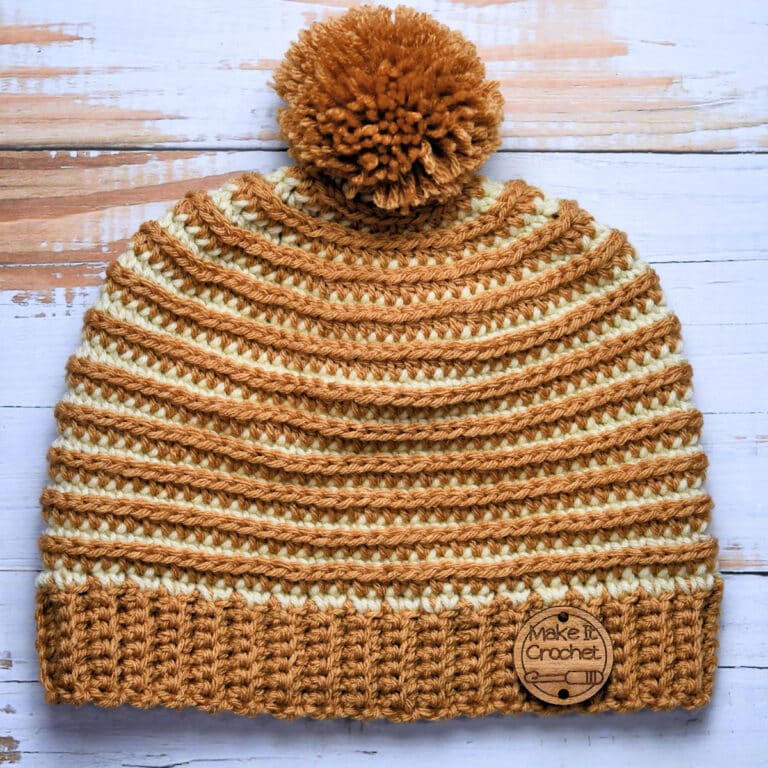
- Lion Brand “Re-Spun Bonus Bundle” yarn, size 4 weight, 100% recycled polyester, 658 yds/602m per 10 oz/284g skein: 1 skein, approx. 280 yards used, 1 shown in color Cornsilk and 1 shown in color Parchment.
Other Materials
- Suggested Crochet Hook Size J-10 (6mm), or size needed to meet gauge and Size I-9 (5.5mm) for ribbing
- Yarn Needle for weaving ends
- Faux Pom Pom, optional
Instructions
- Starting at the top, make a small ring of chain stitches and work the foundation directly into the ring.
- Increase the stitches, in a multiple of 8, until round 12.
- Begin the stitch pattern repeat of rounds 13-17.
- Repeat the stitch pattern to round 29.
- Work 2 rounds of ribbing, to tighten up the bottom a little. Fasten off, weave in all loose ends and attach faux fur pom, if desired.
Full Free Crochet Pattern Below

This is a free crochet pattern and the written instructions are below. If you prefer a printable download, a PDF is also available for purchase.
My Crochet Pattern Notes
This beanie crochet pattern is made up of almost entirely post stitches which puts it at least at the intermediate level. You’ll need to be able to “read” your stitches, especially those times when the single crochet sits so closely to the post stitches that it looks buried. It’s easy to miss.
This beanie is worked from top down. Although the hat has a 22″ circumference, it’s still intended for the same as most of my other hats which is adult female. Modifications may be required for other sizes.
Most of my other free crochet hat patterns are made in size 3 DK weight yarn. This means that you don’t need as much ease as a big, bulky size 4 aran weight hat. A bulky hat like this simply needs more fabric in order to fit the same size head. But, it may surprise you with its stretchiness. It’s a little loose on me but a man, for instance, may find the tight fit to be perfect.
The hat is made in a multiple of 8. Each of the 8 sections measures about 2.75″, close to 3″. This makes it difficult to increase or decrease the size through simple math.
If you need to make changes, you may be better off determining the best hook to make the stated size so you have a baseline. Then, move up or down in hook size from your baseline to get a smaller or larger beanie.
What is a Crochet Front Post Stitch?
Ordinarily, when you work crochet stitches, you use the top two loops. You simply stitch into those loops and create a flat fabric.
When using post stitches, on the other hand, you wrap your hook around the stitch itself (the “post). This creates a very distinct ridge that poufs out.
A front post stitch requires that you insert your hook around the back of the post and out the other side before yarning over and pulling through. A back post stitch requires that you insert your hook from the front, around the post and out the back before pulling through your loop.
As you might guess, a back post stitch is slightly more difficult. Either way, you need to be careful about not splitting your yarn.
What Stitches Can Be Post Stitches?
Most of the time, I tend to see front and back post stitches made of double crochets. But, you don’t always need to use double crochet. You can also make post stitches in treble crochet, single crochet, or really anything. You can even make them in Tunisian crochet!
In addition to the stitch itself, you can also work around the post of any stitch. Usually, it’s a double crochet but you certainly have nothing to worry about. You can just as easily work a post stitch around a single crochet, like the start of the ribbing in this pattern.
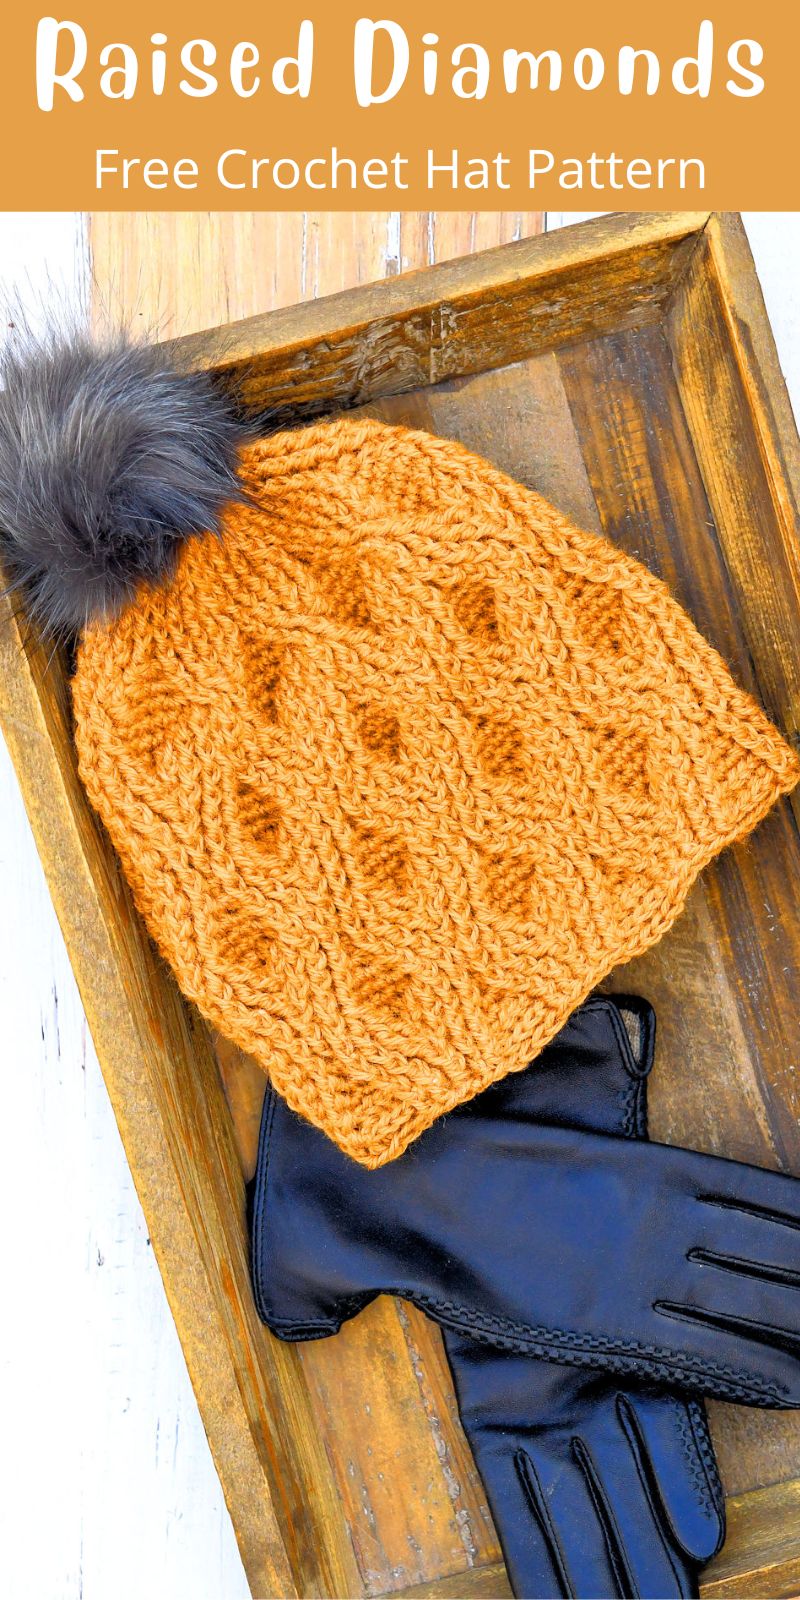
Pin It For Later
Finished Size
Before Ribbing: Height 8.5″, Circumference 22″ at bottom.
After Ribbing: Height 9″, Circumference 19″ at bottom.
Yarn
Lion Brand “Re-Spun Bonus Bundle” yarn, size 4 weight, 100% recycled polyester, 658 yds/602m per 10 oz/284g skein: 1 skein, approx. 280 yards used, 1 shown in color Cornsilk and 1 shown in color Parchment.

At the time of writing this pattern, “Re-Spun Bonus Bundle”, an aran/worsted weight yarn, is available in 18 shades.
I was able to find it at Michaels.
If you are unable to use Re-Spun, any acrylic or acrylic blend in size 4 should be close enough.
Other Materials
Suggested Crochet Hook Size J-10 (6mm), or size needed to meet gauge and Size I-9 (5.5mm) for ribbing.
Yarn Needle for weaving ends.
Faux Pom Pom, optional.
Remember my tip to fluff the pom pom with a blow dryer, if necessary!
Gauge
To make sure you are working at the same tension, you can measure your circle at different intervals. This isn’t your standard gauge, but I don’t think a standard gauge works for a top down hat, worked in rounds.
When making a gauge swatch, you usually work in flat rows, back and forth. That gauge is going to be different when working in the round like this. And, well, the top down issue means that you start with a round disk. It’s easier to measure it as a disk.
Just don’t go stretching out the disk to try to force it to work. Pull it out and start again with another hook, as necessary. No gauge system is perfect, though. You are, after all, trying to replicate the tension of an unknown stranger. 🙂
Keep your measuring tape and variety of hooks handy and everything will work out.
Approximate measurements:
After round 4, 3″ across.
After round 6, 4″ across.
After round 10, 6″ across.

Special Stitches
Front Post Double Crochet (FPdc): Yarn over, insert hook to the side of the indicated stitch, move hook around the back of the stitch and out the other side of same stitch, yarn over, pull loop through, [yarn over, pull through 2 loops on hook] twice.
Single Crochet 2 Together (sc2tog): Insert hook in indicated stitch, yarn over, pull loop through, insert hook in next stitch, yarn over, pull loop through, yarn over, pull through 3 loops on hook.
Front Post Double Crochet 2 Together (FPdc2tog): This is a little different than you might think, so read carefully. This stitch is worked on a span of 3 stitches. Insert hook under indicated stitch, skip the center stitch then insert it under the next stitch. Just weave your hook in there. It’s actually easier than a post stitch around only one stitch. The skipped stitch disappears to the back. Once you have the hook under the back of the 2 double crochets, yarn over, pull the loop through and complete the double crochet as normal, tightening up the loop to make sure the 2 stitches come together at a point.
Back Post Double Crochet (BPdc): Yarn over, with hook in back of work, insert hook to the side of the indicated stitch, move hook around the front of the stitch and out the other side of same stitch with the hook now again on the back of work, yarn over, pull loop through, [yarn over, pull through 2 loops on hook] twice.
Other Abbreviations
This free crochet hat pattern is written in US crochet terminology.
ch=chain; dc=double crochet; rep=repeat; sc=single crochet; sl=slip; sk=skip; st(s)=stitch(es).
All numbers after the colon at the end of an instruction are stitch counts. Use the stitch count to check your work.
Free PDF Download Weekend

The PDF download for the Raised Diamonds Beanie pattern is available for free this weekend only. This promotion ends at 11:59pm CST, Monday, September 2.
This promotion is concluded. Please sign up for the email newsletter to make sure you don’t miss any weekly promotions. Scroll down for the free online pattern.
Free Crochet Pattern Instructions
Start with the top of the hat, worked in a circle, then work down toward the ribbing. The hat is long enough to form a cuff. If you don’t want a cuff, you could omit the repeat or simply stop crocheting when you have reached the length you want.
Hat
Round 1: With larger hook (see Materials list above), ch 3, sl st to first ch to form a ring, ch 1, 8 sc in ring, sl st to first sc: 8 sc.
Round 2: Ch 1 (does not count as a stitch here and throughout), 2 dc in each sc around, sl st to first dc: 16 dc.
Round 3: Ch 1, [FPdc (see Special Stitches above) around next dc, 2 FPdc around next dc] around, sl st to first dc: 24 dc.
Round 4: Ch 1, [FPdc around next 2 dc, 2 FPdc around next dc] around, sl st to first dc: 32 dc.
Round 5: Ch 1, [FPdc around next 3 dc, 2 FPdc around next dc] around, sl st to first dc: 40 dc.
Round 6: Ch 1, [sc in next dc, FPdc around same dc, FPdc in next 4 dc] around, sl st to first sc: 48 sts.
Round 7: Ch 1, [2 sc in next sc, FPdc around next 5 dc] around, sl st to first sc: 56 sts.
Round 8: Ch 1, [2 sc in each of next 2 sc, FPdc around next 2 dc, sk next dc, FPdc around next 2 dc] around, sl st to first sc: 64 sts.
Round 9: Ch 1, *2 sc in next sc, sc in next 2 sc, 2 sc in next sc, sk 2 dc, FPdc around next 2 dc, with hook in front of work, FPdc around first skipped dc and in second skipped dc (crossing the stitches, 2 over 2), rep from * around, sl st to first sc: 80 sts.
Note: When working the FPdc in the next round, you may need to dig around to find the first 2 dc of each section of crossed stitches.
Round 10: Ch 1, *sc in next 6 sc, FPdc around next 4 dc, rep from * around, sl st to first sc: 80 sts.
Round 11: Ch 1, *sc2tog (see Special Stitches above), sc in next 2 sc, sc2tog, 2 FPdc around next dc, FPdc around next 2 dc, 2 FPdc around next dc] around, sl st to first sc: 80 sts.
Round 12: Ch 1, *sc2tog twice, 2 FPdc around next dc, FPdc around next 2 dc, sc in next dc, FPdc around same dc, FPdc around next dc, 2 FPdc around next dc, rep from * around, sl st to first sc: 88 sts.
Round 13: Ch 1, *sc2tog, FPdc around next 4 dc, 2 sc in next sc, FPdc around next 4 dc, rep from * around, sl st to first sc and sl st in next 2 dc: 88 sts.
Round 14: Ch 1, *FPdc around each of next 3 dc, 2 sc in each of next 2 sc, FPdc around next 3 dc, FPdc2tog (see Special Stitches above), rep from * around, sl st to first dc and sl st in next dc: 88 sts.
Round 15: Ch 1, *FPdc around next 2 dc, 2 sc in next sc, sc in next 2 sc, 2 sc in next sc, FPdc around next 2 dc, FPdc2tog, rep from * around, sl st to first dc and sl st in next dc and in next sc: 88 sts.
Round 16: Ch 1, *sc2tog, sc in next 2 sc, sc2tog, 2 FPdc around next dc, FPdc around next 3 dc, 2 FPdc around next dc, rep from * around, sl st to first sc: 88 sts.
Round 17: Ch 1, *sc2tog twice, 2 FPdc around next dc, FPdc around next 2 dc, sc in next dc, FPdc around next 2 dc, 2 FPdc around next dc, rep from * around, sl st to first sc: 88 sts.
Rounds 18-27: Rep rounds 13-17.
Rounds 28-29: Rep rounds 13-14.
Ribbing
Round 30: With smaller hook (see Materials above), ch 1, *FPdc around next 2 dc, BPdc around next 4 sc, FPdc around next 2 dc, FPdc2tog, rep from * around, sl st to first dc: 72 sts.
Round 31: Ch 1, FPdc in each FPdc and BPdc in each BPdc, sl st to first dc: 72 sts. Fasten off.
Finishing
Weave in all ends securely. Attach faux pom pom, if desired.
Twitter | Facebook | Pinterest
All the patterns at Make It Crochet are free. Since many of you have asked how to help with the costs of running a site like this, I’ve made all the patterns into print-ready PDFs and the cost is about the same as a cup of coffee. Every little bit helps.
TERMS: To my fellow crafters, you have my permission to use my patterns to make and sell your projects* anywhere you like. You cannot use my images to sell your projects, though. You must take photos of your own work. All patterns have been tested but mistakes can happen. If you find a mistake, please let me know. Everything at MakeItCrochet.com is protected by copyright to Kim Guzman. Other than the permissions previously given, no one other than Kim Guzman has permission to: reproduce, copy, publish or distribute this pattern, its parts or photos in any way or form, including, but not limited to, translations into foreign languages & video production.
*Not intended to be blanket permission for mass production.


This looks warm where i live i need it -25to -50 some times .Thank-you very much:):)Old people like me love your patterns hugs xxx
Wow, that’s some low temperatures! I don’t think I’ve ever experienced that low before. I hope the hat keeps you toasty warm. Enjoy!
gut beschrieben, schönes Muster, eignet sich für jeden
Thank you!
Love this pattern. Thank!
This is gorgeous!!! As a long time beginner (I definitely wouldn’t call myself an advanced beginner yet lol) I do think I’ll give this a go, thank you so much for taking the time to make a video too for people like me lol.
Sharon xx
Hi Kim
Re raised Diamonds Beanie
Row 14 has 3FPDC then a Dec then another 3FPdC making 7 sts
In Row 15, it is 2FPdC then Fpdc2tog then 2FPDC, HAVING WORKED A TOTAL,OF 6 sts, should it possibly be FPDC3Tog to make stitch count work
I am an advanced crocheter and have read and re read the instructions
Thankyou
Barb Turner
I’m having a hard time following so I’ll just rewrite the two rounds here:
Round 14: Ch 1, *FPdc around each of next 3 dc, 2 sc in each of next 2 sc, FPdc around next 3 dc, FPdc2tog (see Special Stitches above), rep from * around, sl st to first dc and sl st in next dc: 88 sts.
This is FPdc, FPdc, FPdc, 4 sc, FPdc, FPdc, FPdc, then FPdc2tog for a total of 11 stitches, repeated 8 times.
Make sure to sl st to the first dc AND into the next dc when closing.
Round 15: Ch 1, *FPdc around next 2 dc, 2 sc in next sc, sc in next 2 sc, 2 sc in next sc, FPdc around next 2 dc, FPdc2tog, rep from * around, sl st to first dc and sl st in next dc and in next sc: 88 sts.
This is FPdc, FPdc, 6 sc, FPdc, FPdc, FPdc2tog for a total of 11 stitches, repeated 8 times.
A lot of times rewriting like this will work, but, if this doesn’t help, please let me know. I can grab some yarn and see if I can figure out any mistakes I’ve made.
I’m having the same issue. I have the right count (11) but “FPdc, FPdc, FPdc2tog” leaves me with 3 fpdc to start crocheting into in the next repeat. i think there’s a fpdc missing after the fpdc2tog, or, as the other commenter suggested, a 3tog. So far apart from this, it’s great though
Apologies! forgot in row 15 that the fpdc2tog is still skipping a middle stitch! i think that also solves the original commenters issue, too? it works now. silly me!
I’m so glad you were able to get it to line up. I hope the rest will work out smoothly for you. If you’re able, you may want to check the height of the hat as you go since there have been some crocheters who wanted a beanie, but I designed this as more of a long beanie, or slouchie. I haven’t had a chance to add this in notes in the pattern, for anyone who wanted the alternative.