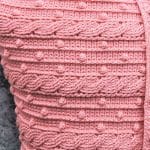
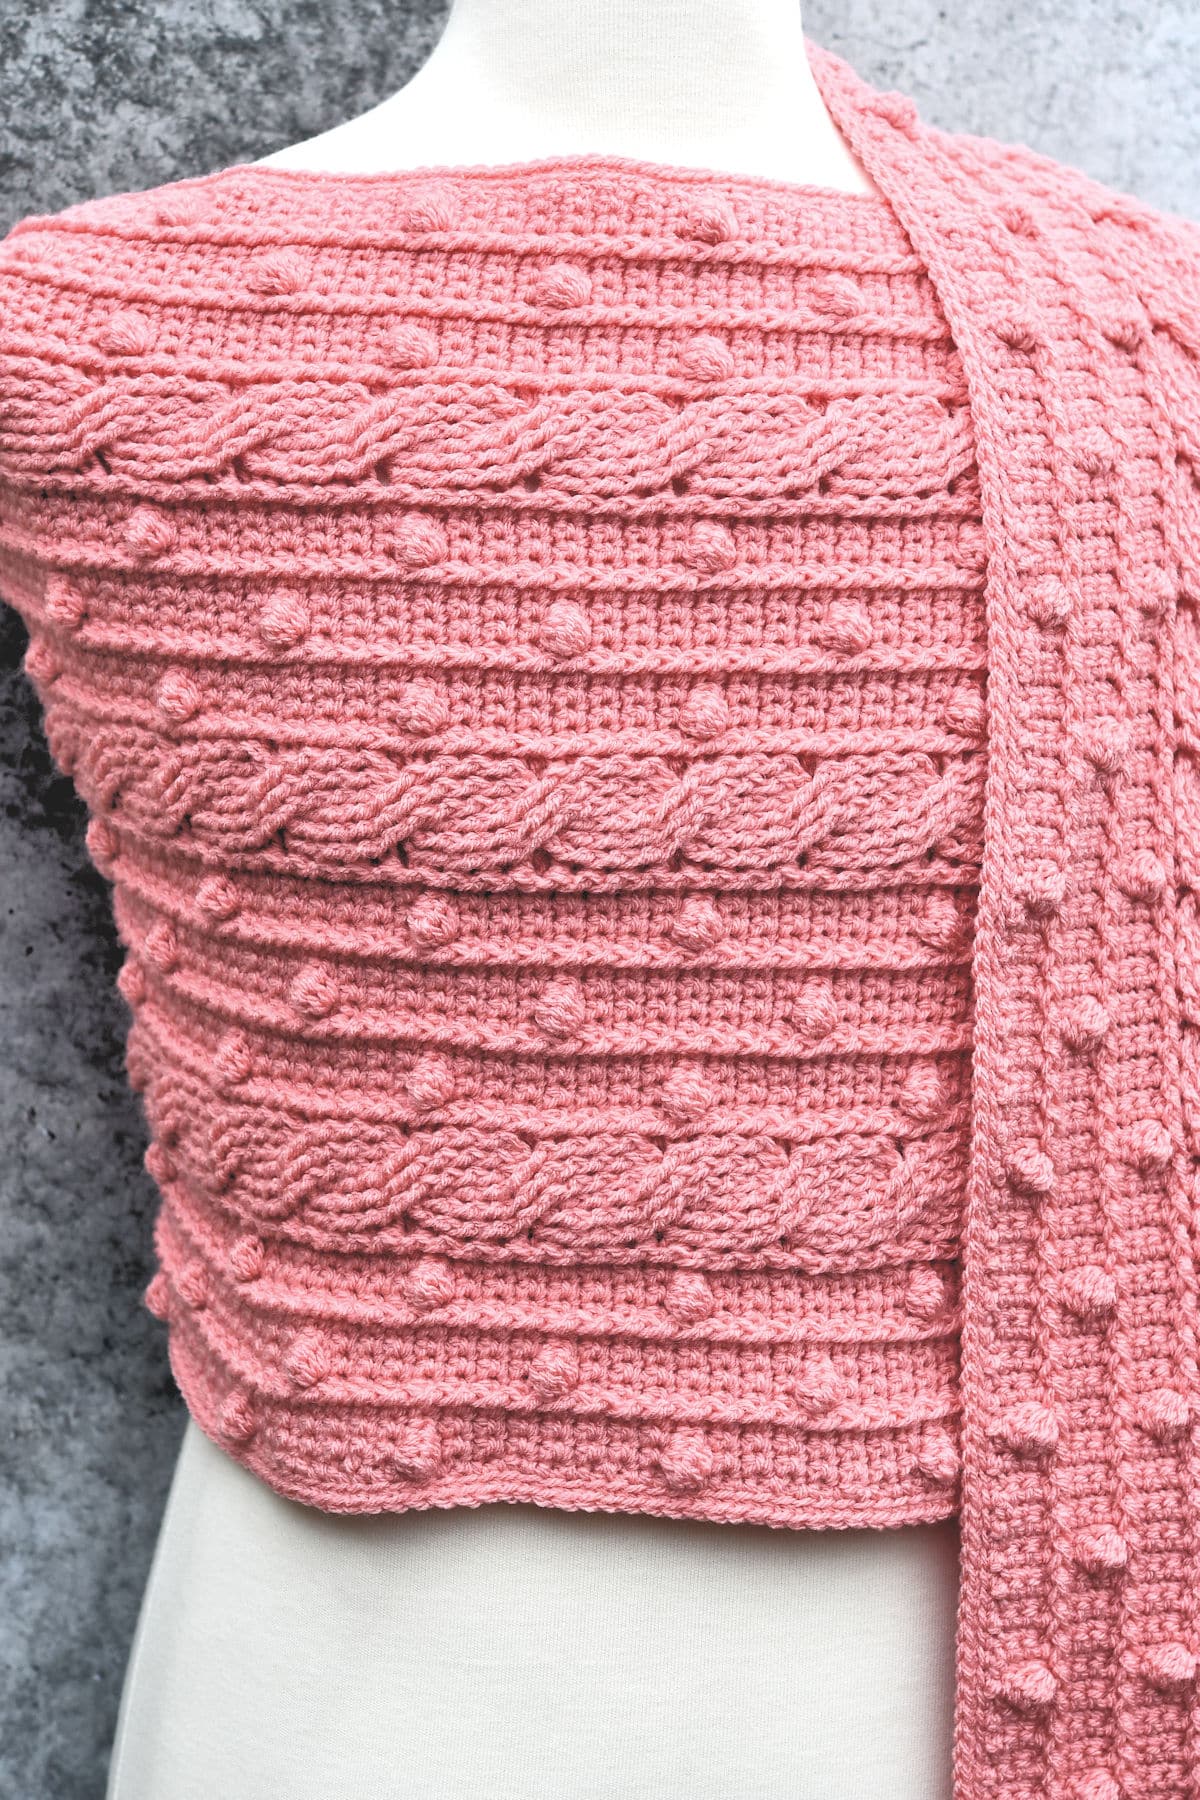
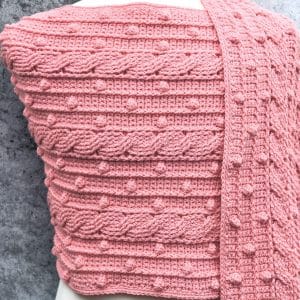
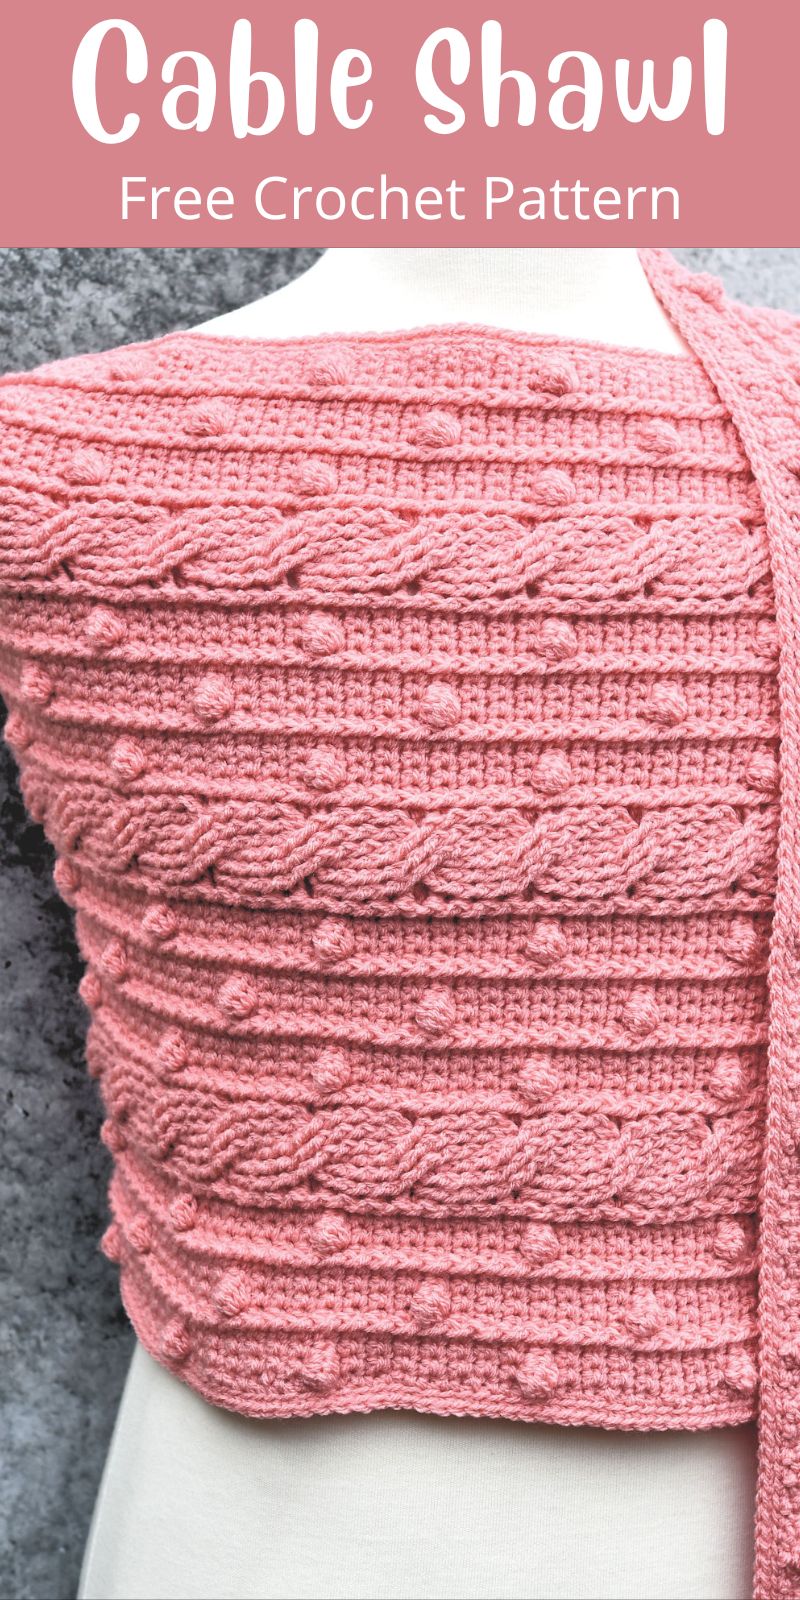
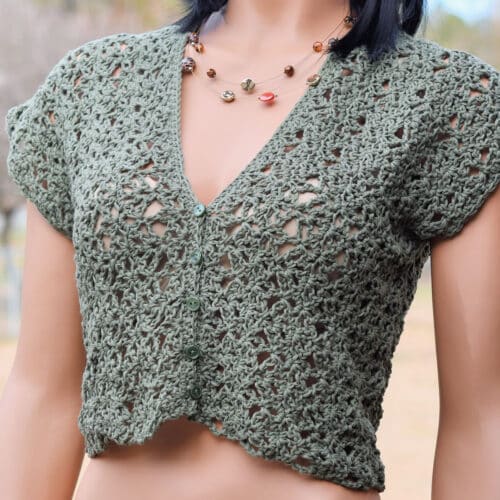
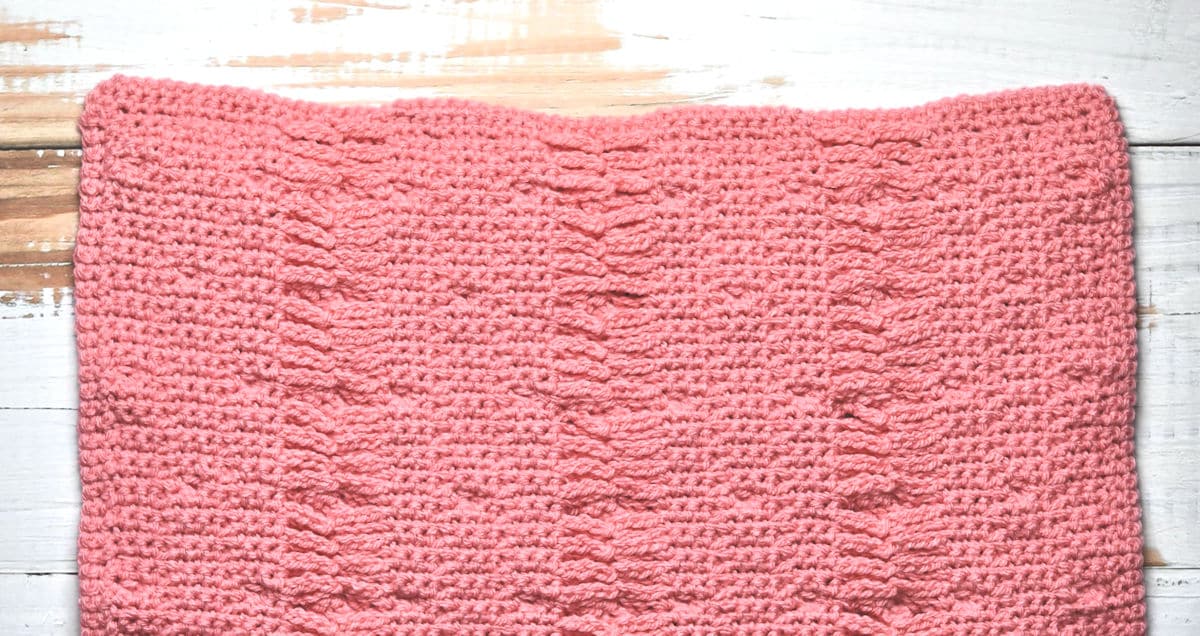
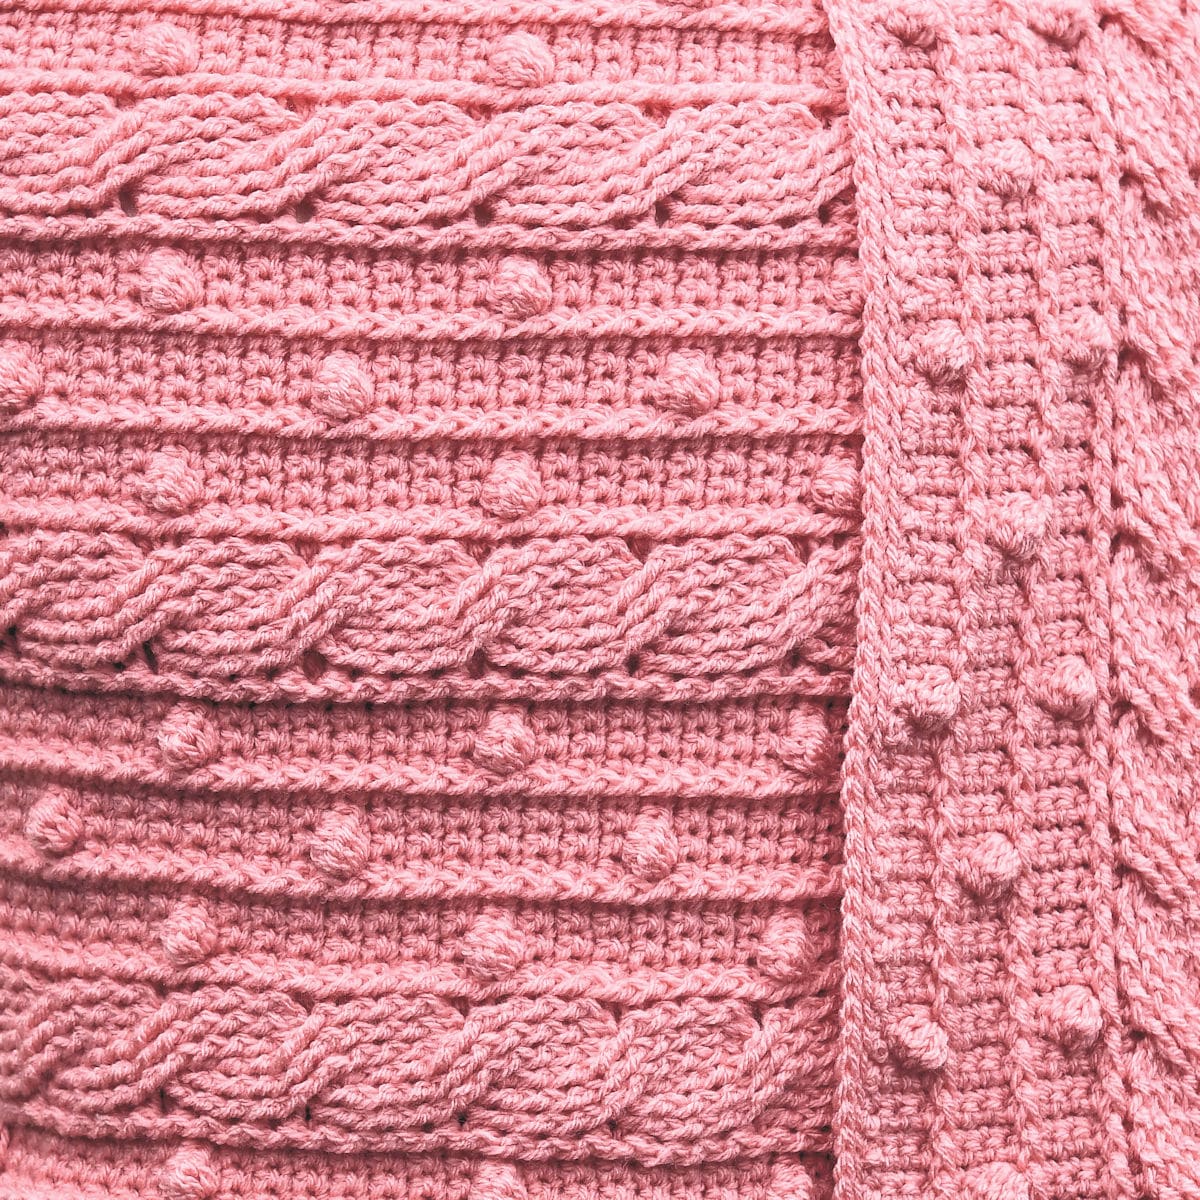
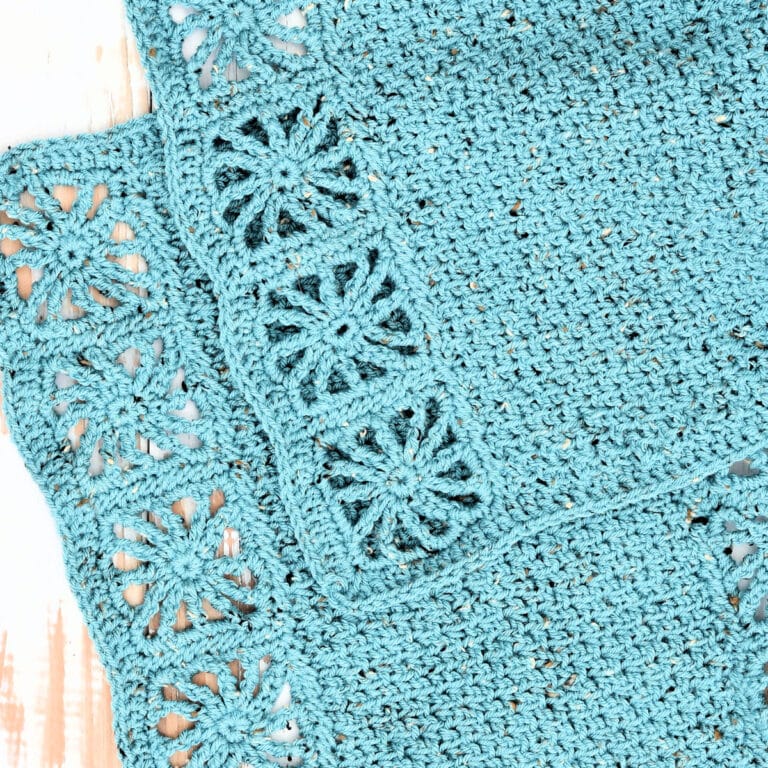
This luxurious Crochet Cable Stitch Shawl features 3 braided cables separated by offset bobbles. Soft and comfortable, perfect for extra warmth and elegance.
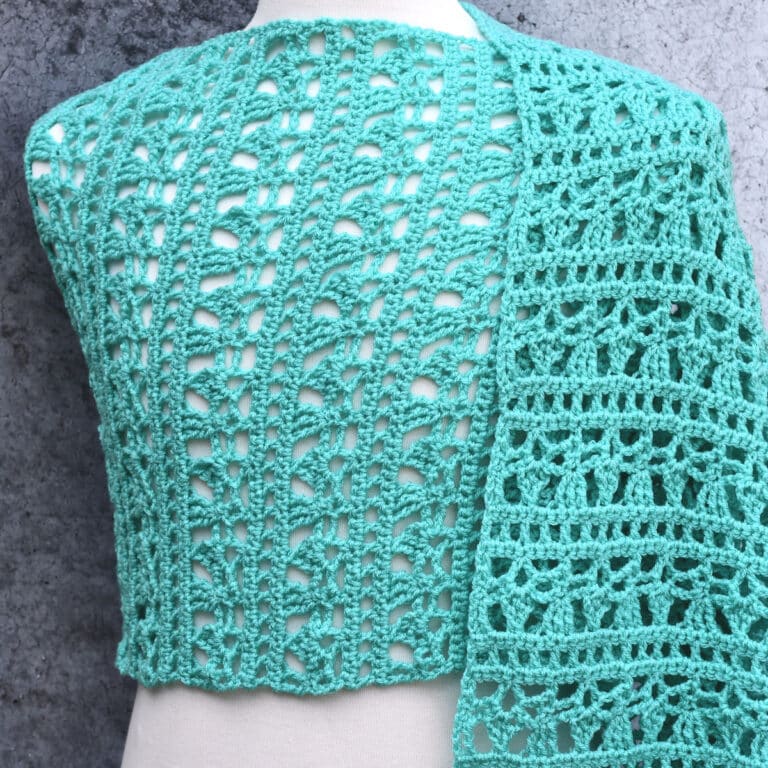
Once you fall in love with the look, easily convert to a larger project. It will be just as beautiful in a full size throw for your home or as a breathtaking afghan for a wedding gift.
“Starlight Cable Shawl” free crochet pattern by Kim Guzman © Dec. 2022. All rights reserved.
Technique: Regular Crochet.
Skill Level: Intermediate.

Crochet Pattern At A Glance
Crochet Cable Stitch Shawl Pattern
Designer: Kim Guzman © 2022-2026. All rights reserved.Rate the Pattern
Yarn
- Stylecraft “Special DK”, 100% acrylic, 322 yds/295m per 3.5 oz/100g per skein 6 skeins (1900 yards used) of Blush
Other Materials
- Suggested Crochet Hook Size I-9 (5.5mm) or hook needed to meet gauge
- Optional Crochet Hook for Trim Only Size H-8 (5mm)
- Yarn Needle for weaving ends
Instructions
- Work Rows 1-6 as the initial set up.
- Work rows 7-22 to establish the 16-row repeat.
- Work the established 16-row repeat 20 times more.
- Work 5 rows of repeat to mirror the beginning.
- Work 2 rounds of trim.
Full Free Crochet Pattern Below

This is a free crochet pattern and the written instructions are below. If you prefer a printable download, a PDF is also available for purchase.
My Crochet Pattern Notes
I’ve marked this as an intermediate skill level due to the crochet cable stitch of the shawl. Crossing stitches and working them out of order will require that you are able to read the stitches or at least be prepared to concentrate fully. It’s the row immediately after the crossing that can be a little tricky.
This crochet cable stitch shawl is worked from short edge to short edge. Although the cable stitch is an 8-row repeat, because of the alternating bobbles, it’s written as a 16-row repeat.
Pin It For Later
Finished Size
16.5″ wide. 69″ long.
Yarn
Stylecraft “Special DK”, 100% acrylic, 322 yds/295m per 3.5 oz/100g per skein: 6 skeins (1900 yards used) of Blush.

“Special Double Knit” is classified as a DK weight (size 3) yarn and is currently available in over 120 shades.
Available at LoveCrafts (aff link).
See more projects in Stylecraft Special DK yarn.
Yarn Substitution
I‘ve used DK weight yarn (size 3) because I love this size. There’s a lot of yardage on a 100g skein of Stylecraft Special DK. You could use any yarn you like, using the hook size you prefer. You may need to make changes to the number of stitches and the amount of yarn required.
If you are unable to use Stylecraft Special DK, any acrylic or acrylic blend in size 3 lightweight yarn will be close enough.
You can also use a heavier weight yarn, if you prefer. You’ll need more yarn and a larger hook. The project will be bigger. Or, adjust the stitch count.
Other Materials
Suggested Crochet Hook Size I-9 (5.5mm) or hook needed to meet gauge.
Optional Crochet Hook for Trim Only Size H-8 (5mm).
Yarn Needle for weaving ends.
Special Crochet Post Stitch Technique
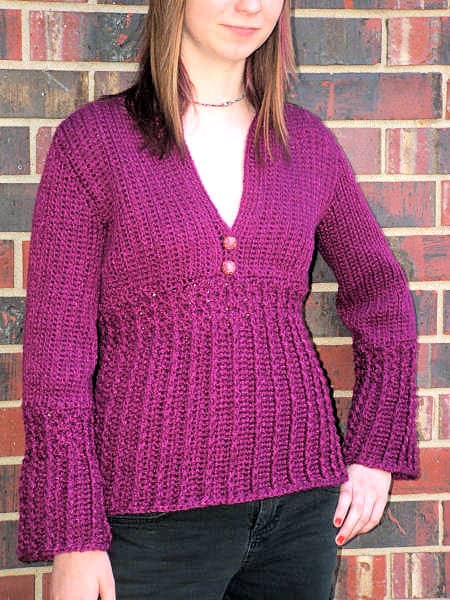
In about 2007, I designed this sweater. It’s a little big on Brianna here because it was going to a publisher who required a different size.
I wanted nice vertical lines to decorate the lower portion. When I placed those front post stitches, I felt that it made the sweater too bulky and I needed to find a different way.
When you think about it, the single crochets behind a post stitch are unnecessary. They’re not seen at all. Having both the single crochet and the post stitch in the same position was the guilty party making the sweater too bulky.
After thinking about it for awhile, I thought that, if I could just remove the single crochet and replace it with something else, it might do the trick.
I removed the entire bottom half of the sweater and then restitched it with a chain behind the post stitches. I didn’t work into them. They were there solely to live behind the post stitch.
Benefits of Using This Technique
Once I reworked this portion of the sweater, I discovered some interesting things about this Front Post Stitch Technique.
- It made the sweater less bulky.
- Stitching up the sweater didn’t take as long.
- It didn’t use as much yarn!
I love all three of these surprises so I try to use this technique whenever possible and I’ve used it in this cable stitch shawl in both the lines of post stitches and in the cable itself.
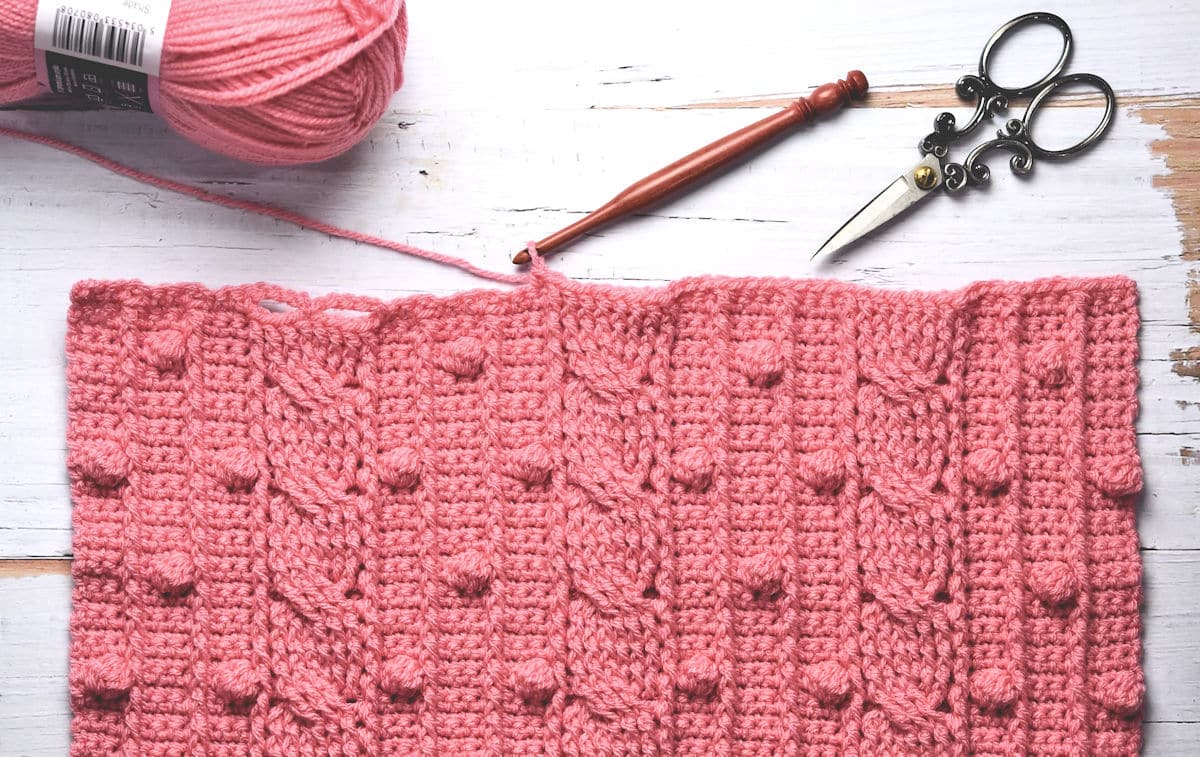
Since this is an unsual technique, I know you’ll want to see the back of the post stitches, especially the cables.
The cable section is 8 stitches across, which would mean making 8 chains across. That seemed like a lot of chains to have loose in the back so I “anchored” it by making a slip stitch in about the center of the cable section. The chains and that slip stitch can’t be seen from the front.
This chain technique is solely to maintain the softness and drape of the shawl, but also has the added benefits of using less yarn and making the project more quickly. Both of these characteristics are great, especially when working on a crochet cable project which traditionally, is a tremendous yarn eater, taking a lot of time to complete.
Special Stitches
Front Post Double Crochet (fpdc): Yarn over, insert hook to the side of the indicated stitch, move hook around the back of the stitch and out the other side of same stitch, yarn over, pull loop through, [yarn over, pull through 2 loops on hook] twice.
Front Post Treble Crochet (fptr): Yarn over twice, insert hook to the side of the indicated stitch, move hook around the back of the stitch and out the other side of same stitch, yarn over, pull loop through, [yarn over, pull through 2 loops on hook] 3 times.
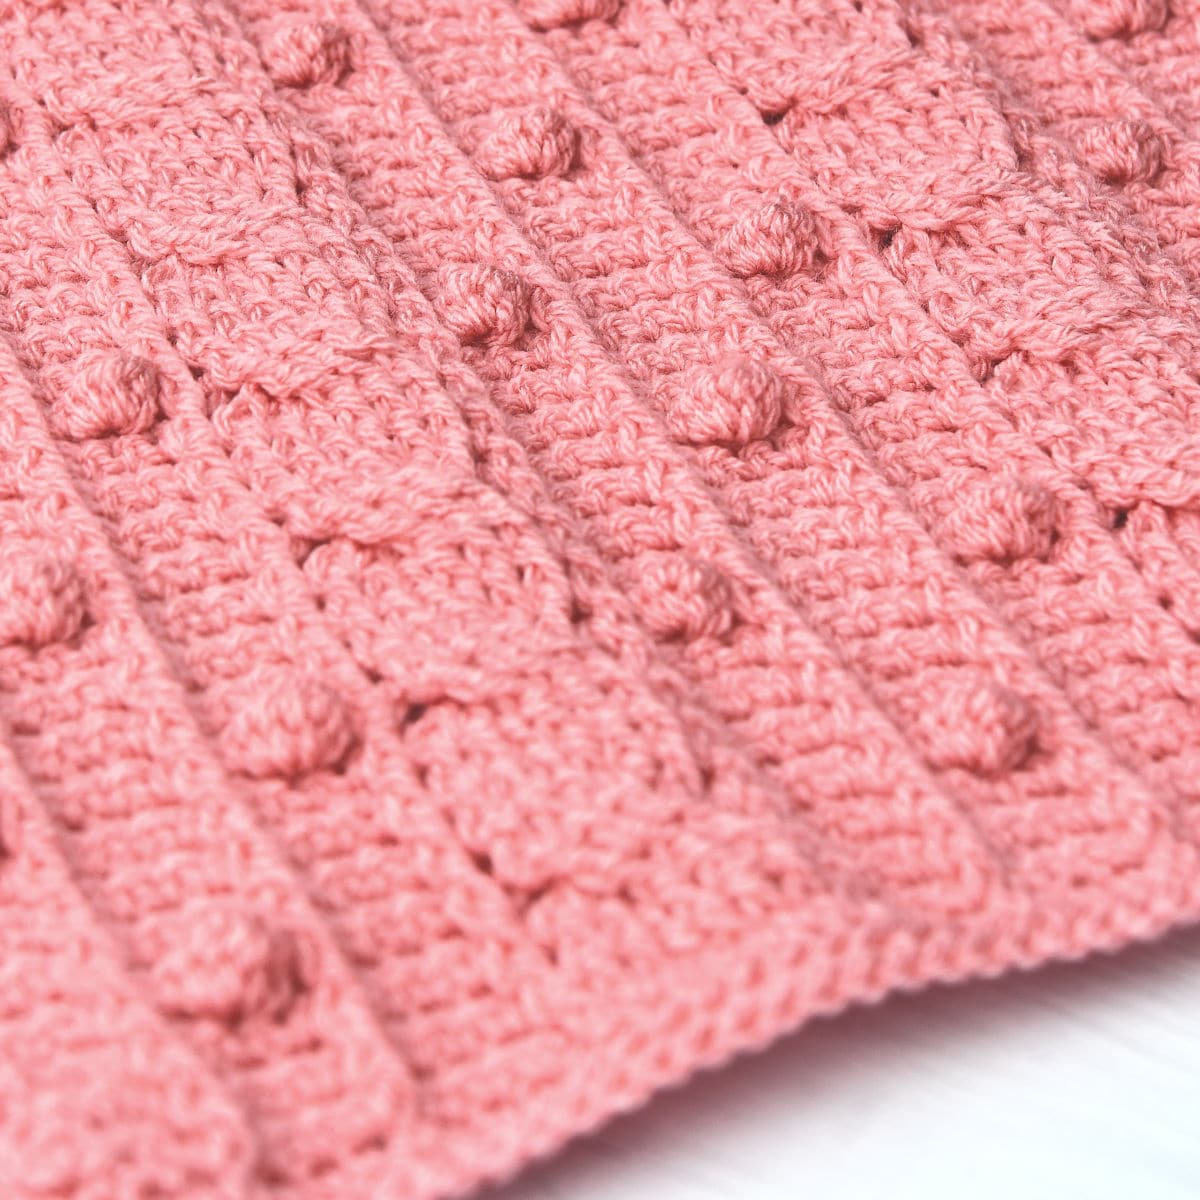
Bobble: Yarn over, insert hook in stitch indicated, yarn over, pull loop through, yarn over, pull through 2 loops on hook, *yarn over, insert hook in same stitch, yarn over, pull loop through, yarn over, pull through 2 loops on hook, rep from * twice more, yarn over, pull through 5 loops on hook. The Bobble is worked on the wrong side but will show on the right side.

Other Abbreviations
This crochet cable stitch shawl is written in US crochet terminology.
ch=chain; RS=right side; rep=repeat; sc=single crochet; sk=skip; sl=slip; st(s)=stitch(es).
Difference Between Right-Handed and Left-Handed
I write all my patterns for right-handed and left-handed crocheters. Left-handers can make cables too! It’s just confusing when the post stitches are written using terms that don’t work for left-handers. I purposely avoid instructions that are right-hand centric.
Usually the look is the same when you crochet something up, but cables are different. The only difference will be the direction of the cable. A right-hander will have a left-leaning cable, but a left-hander will have a right-leaning cable. Nothing wrong with that. It could cause some confusion, so it’s better to know ahead of time.
Gauge
In stitch pattern, 17 stitches for 20 rows measures 4″ x 4″.
Stitch Multiple
To change the width, make your initial chain any multiple of 19, then add 31.
Free PDF Download Weekend

The PDF download for the Starlight Cable Shawl pattern is available for free this weekend only. This promotion ends at 11:59pm CST, Monday, November 25.
This promotion is concluded. Please sign up for the email newsletter to make sure you don’t miss any weekly promotions. Scroll down for the free online pattern.
Free Crochet Pattern Instructions
Row 1 (RS): Ch 69, sk first ch, sc in each ch across, turn.
Row 2: Ch 1, sc in first and next 2 sc, [ch 1, sk next sc, sc in next 3 sc] 2 times, *ch 4, sk 3 sc, sl st in next sc, ch 4, sk 4 sc, sc in next 3 sc, [ch 1, sk next sc, sc in next 3 sc] 2 times, rep from * across, turn.
Note: When the instruction says to work in “row below”, skip the present row and work in the one directly below it. For example, in row 3, it states to work in “row below” which means to work in the stitch from row 1, skipping over row 2. When working the post stitches, ignore the chains behind them. You won’t be working into them at all throughout.
Row 3: Ch 1, sc in first and next 2 sc, [fpdc (see Special Stitches above) around sc in row below, sc in next 3 sc] 2 times, *[fpdc around sc in row below] 8 times, sc in next 3 sc, [fpdc around sc in row below, sc in next 3 sc] 2 times, rep from * across, turn.
Row 4: Ch 1, sc in first and next 2 sc, [ch 1, sk next st, sc in next 3 sc] 2 times, *ch 4, sk 3 sts, sl st in next st, ch 4, sk 4 sts, sc in next 3 sc, [ch 1, sk next st, sc in next 3 sc] 2 times, rep from * across, turn.
Row 5: Ch 1, sc in first and next 2 sc, [fpdc around fpdc, sc in next 3 sc] 2 times, *[fpdc around fpdc] 8 times, sc in next 3 sc, [fpdc around fpdc, sc in next 3 sc] 2 times, rep from * across, turn.
Row 6: Rep row 4.
Row 7: (Cable Crossing) Ch 1, sc in first and next 2 sc, [fpdc around fpdc, sc in next 3 sc] 2 times, *fpdc around fpdc, sk 3 fpdc, fptr (see Special Stitches) around each of next 3 fpdc, working in front of 3 fptr just worked, reach back a little and work fptr around each of the 3 fpdc just skipped, fpdc around fpdc (at the end of the crossing), sc in next 3 sc, [fpdc around fpdc, sc in next 3 sc] 2 times, rep from * across, turn.
Note: Try to make the single crochet after a Bobble a little tight so the Bobble stays pronounced on the right side of the work.
Row 8: Ch 1, sc in first and next 2 sc, ch 1, sk next st, sc in next sc, Bobble (see Special Stitches) in next sc, sc in next sc, ch 1, sk next st, sc in next 3 sc, *ch 4, sk 3 sts, sl st in next st, ch 4, sk 4 sts, sc in next 3 sc, ch 1, sk next st, sc in next sc, Bobble in next sc, sc in next sc, ch 1, sk next st, sc in next 3 sc, rep from * across, turn.
Note: The right side row after a Cable Crossing is a little tricky. The first 3 post stitches of the cable are worked into the post stitches which are underneath 3 others. You have to lift and separate the cable in order to see them. Be certain to work your post stitch around the prior post stitches and not around the ignored chain loops.
Row 9: Ch 1, sc in first and next 2 sc, [fpdc around fpdc, sc in next 3 sts] 2 times, *fpdc around fpdc, [fpdc around fptr] 6 times, fpdc around fpdc, sc in next 3 sts, [fpdc around fpdc, sc in next 3 sts] 2 times, rep from * across, turn.
Rows 10-13: Rep rows 4-5 twice.
Row 14: Rep row 4.
Row 15: Rep row 7.
Row 16: Ch 1, sc in first sc, Bobble in next sc, sc in next sc, ch 1, sk next st, sc in next 3 sc, ch 1, sk 1 st, sc in next sc, Bobble in next sc, sc in next sc, *ch 4, sk 3 sts, sl st in next st, ch 4, sk 4 sts, sc in next sc, Bobble in next sc, sc in next sc, ch 1, sk next st, sc in next 3 sc, ch 1, sk 1 st, sc in next sc, Bobble in next sc, sc in next sc, rep from * across, turn.
Row 17: Ch 1, sc in first and next 2 sts, [fpdc around fpdc, sc in next 3 sts] 2 times, *fpdc around fpdc, [fpdc around fptr] 6 times, fpdc around fpdc, sc in next 3 sts, [fpdc around fpdc, sc in next 3 sts] 2 times, rep from * across, turn.
Rows 18-21: Rep row 4-5 twice.
Row 22: Rep row 4.
Rows 23-342: Rep rows 7-22.
Rows 343-347: Rep rows 7-11. Do not fasten off after last row. Begin working in the round for Trim.
Trim
Note: For best results, I liked using the smaller hook (see Materials above) for the Trim. At the short edges, I worked in each stitch and ch-1 sp behind the post stitches. At the long edges, I worked in each 4 rows, then skipped a row. Try this first to see if it works for you and decide if you need extra stitches or going back to the larger hook.
Round 1: Ch 1, 3 sc in corner, sc evenly across long edge, 3 sc in corner, sc across bottom, 3 sc in corner, sc evenly across long edge, 3 sc in corner, sc evenly across top, sl st to first sc.
Note: The next round is worked in back loops only. When looking at the top 2 loops of a single crochet, the back loop is the one furthest away from you.
Round 2: Ch 1, working in back loops only, sc in each sc around, except work 2 sc in each second sc of 3-sc corner, sl st to first sc, fasten off.
Finishing
Weave in all ends securely with yarn needle.

Twitter | Facebook | Pinterest
All the patterns at Make It Crochet are free. Since many of you have asked how to help with the costs of running a site like this, I’ve made all the patterns into print-ready PDFs and the cost is about the same as a cup of coffee. Every little bit helps.
TERMS: To my fellow crafters, you have my permission to use my patterns to make and sell your projects* anywhere you like. You cannot use my images to sell your projects, though. You must take photos of your own work. All patterns have been tested but mistakes can happen. If you find a mistake, please let me know. Everything at MakeItCrochet.com is protected by copyright to Kim Guzman. Other than the permissions previously given, no one other than Kim Guzman has permission to: reproduce, copy, publish or distribute this pattern, its parts or photos in any way or form, including, but not limited to, translations into foreign languages & video production.
*Not intended to be blanket permission for mass production.

I love this. My daughter has asked for an afghan, and I’ve been looking for the right pattern. I think this shawl might just grow up to be a blanket. As always, I enjoy your patterns . They’re thoroughly explained and your videos are great. Thank you!
Thank you so much! It would make a gorgeous afghan. Please let me know if you make one. 🙂
hi kim
as a subscriber to Moogly Newsletter i discovered you and this beautiful pattern.
it looks like a challenge but i’d like to try.
where can i find instructions to make a throw vs shawl.
cheers
constance
portland oregon
Thank you for visiting! The Gauge, Stitch Multiple, Yarn and Special Stitches are in separate sections above the written Instructions. This will make an outstanding throw! Enjoy the pattern. Kim Guzman
I don’t understand. In the instructions for fpdc and fptc you say to insert hook ‘next’ to the indicated stitch. “Where is ‘next’? Thanks! I always want to learn something new.
I’m trying to locate what you mean. Do you mean where I say to “insert hook to the side of the indicated stitch”? If so, you will be inserting your hook from front to back on one side of the stitch, around the back of that stitch, out the front of the side of the same stitch, yarn over and pull a loop through. In other words, you stick the hook in there, wrap it around the back, out the front and pull the yarn all the way through. You are working around the stitch rather than on top of it, like you do normally. Let me know if that helps. If not, I can probably grab a link to a youtube.
Yes, that’s what I mean. And thanks for the thorough explanation. But I’m still not ‘seeing’ it. I’m so sorry, I know I’ll be embarrassed when I finally figure it out. Is there something on youtube that will help me? I really want to understand this. Thanks!!
See if this helps. https://youtu.be/yonNg8aUBUs?t=46
Alright, yes! Now I get it. Thanks so much for clearing this up, and educating me. I just want to add that I’m very familiar with you and your work, and I love it. I’ll be back for more. Also, I’m 73 and started crocheting last year. It’s a wonderful challenge.
That’s great! I look forward to hearing how it goes. 🙂
My daughter wants a shawl like this but I have a question. when doing the chain, slip stitch, chain in row 4 does the slip stitch go into the previous slip stitch or does it go into the 4th fpdc?
thanks for this beautiful pattern and for your reply
Cheryl
I put it in top of the fpdc. I hope that helps. 🙂
perfect….i am on my way then… will try to post a pic when i get it finished.
thanks for the speedy reply
have a great day
I look forward to seeing it!
The bobbles are such a fun touch to pair with a cozy cable.
Thank you! So glad you like it. 🙂
Does the pdf pattern come with a crochet chart. I find them so very helpful.
Thanks!
Elisabeth
No, I’m sorry. I don’t know how to make a digital chart for this. If I am ever able to learn how to use the software, I’ll post here.