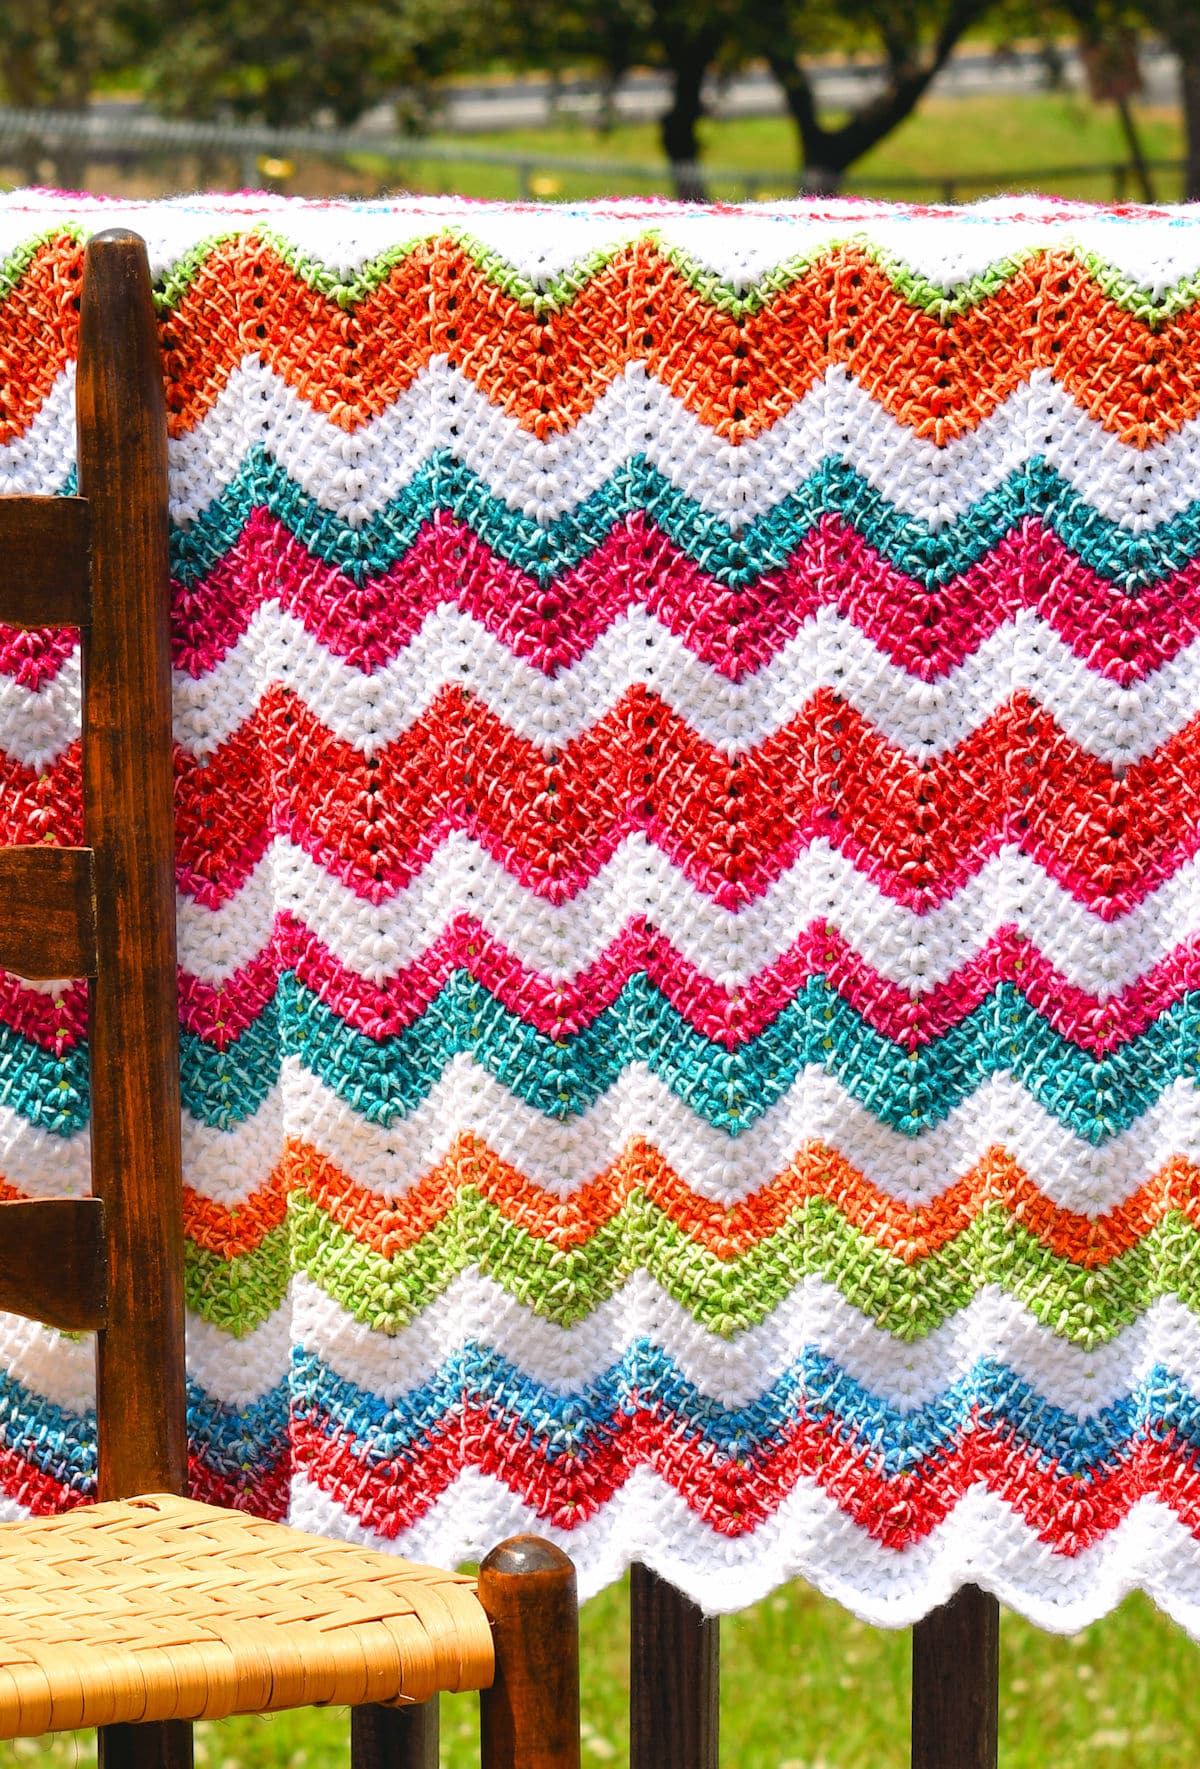
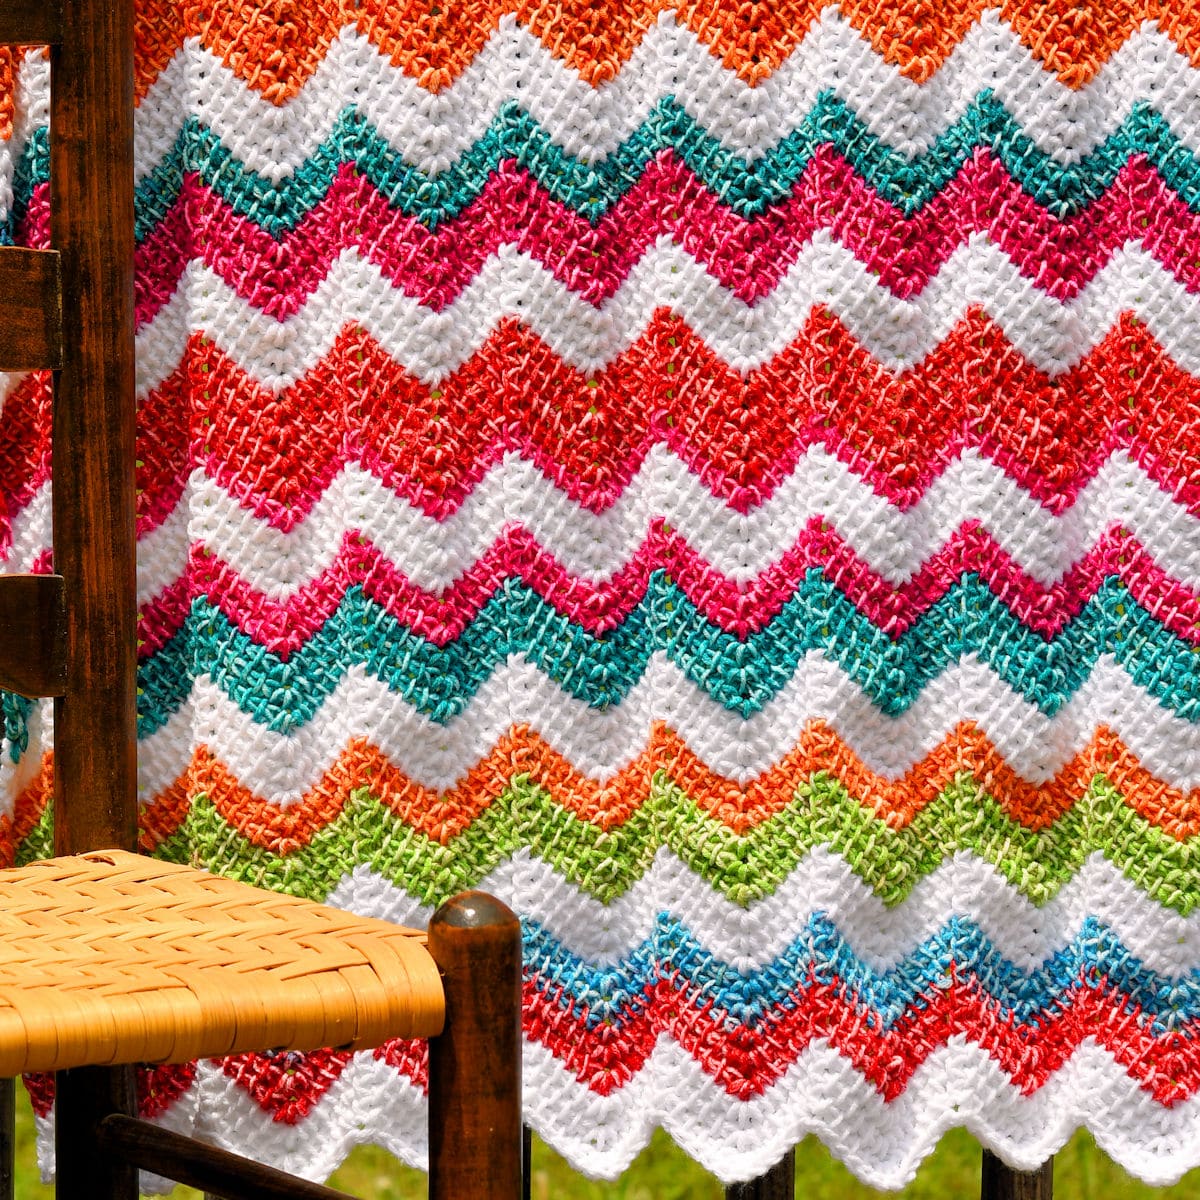
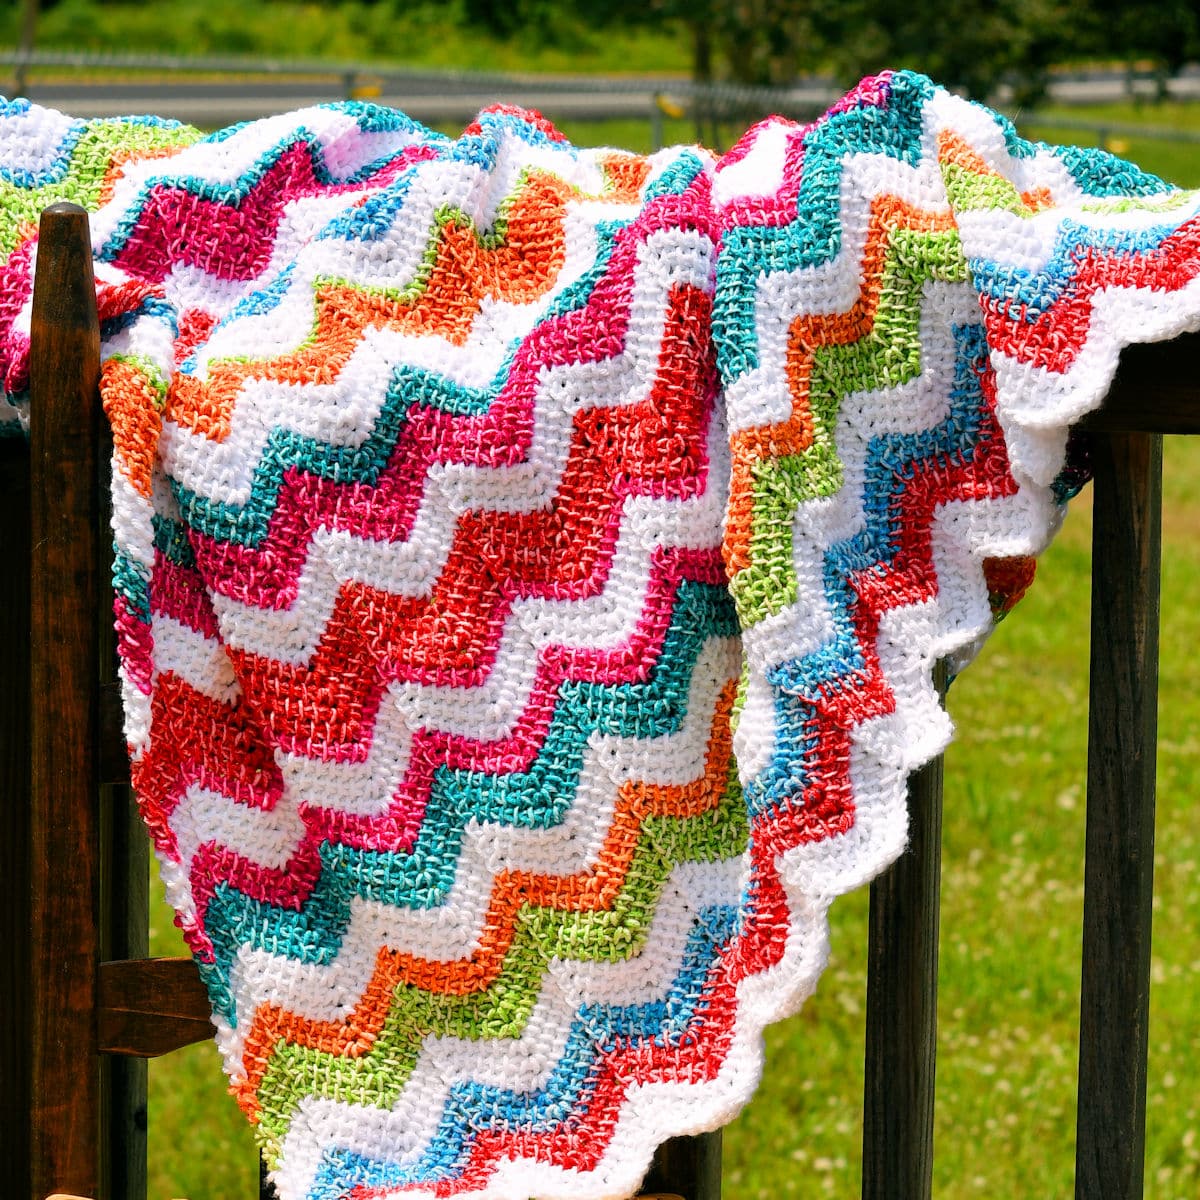
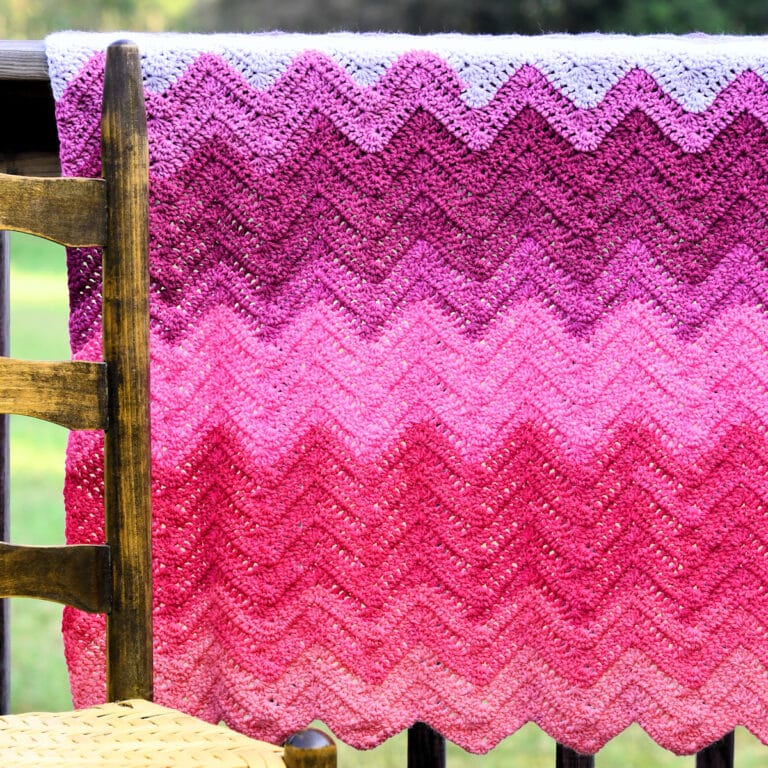
This unique Tunisian Crochet Ripple Baby Blanket is made in a vibrant rainbow of colors with self-striping Mandala yarn. Stretch your skills with easy stitches, letting the yarn do the work.
“Happy Tunisian Baby Blanket” free Tunisian crochet pattern by Kim Guzman © May 2023. All rights reserved.
Technique: Tunisian crochet.
Skill Level: Intermediate.

Crochet Pattern At A Glance
Tunisian Crochet Ripple Baby Blanket
Designer: Kim Guzman © 2022-2026. All rights reserved.Rate the Pattern
Yarn
- Lion Brand “Mandala Ombre”, self-striping, size 4 medium, 150g/5.3 oz, 315m/344 yd, 100% acrylic, 3 cakes of colorway Happy, approx. 990 yds used. Note that this worked up as more of a DK weight for me. Take this into consideration when planning your project.
- Lion Brand “Pound of Love”, size 4 medium, 454g/16 oz, 932m/1020 yd, 100% acrylic, 1 skein of colorway White, approx. 600 yds used
Other Materials
- Suggested Tunisian Crochet Hook Size 9mm, or size needed to meet gauge, extending cord optional
- Yarn Needle for weaving ends
Instructions
- Work Foundation.
- Establish 1-row repeat.
- Establish color sequence, separating the Mandala and coordinating solid.
- Work up to 90 rows in same 1-row repeat.
- Work a slip stitch bind off row.
Full Free Crochet Pattern Below

This is a free crochet pattern and the written instructions are below. If you prefer a printable download, a PDF is also available for purchase.
My Crochet Pattern Notes
If you already know how to do Tunisian crochet, you can expect this baby blanket to be fairly easy. If you’re new to Tunisian crochet, it’s more of an Intermediate project.
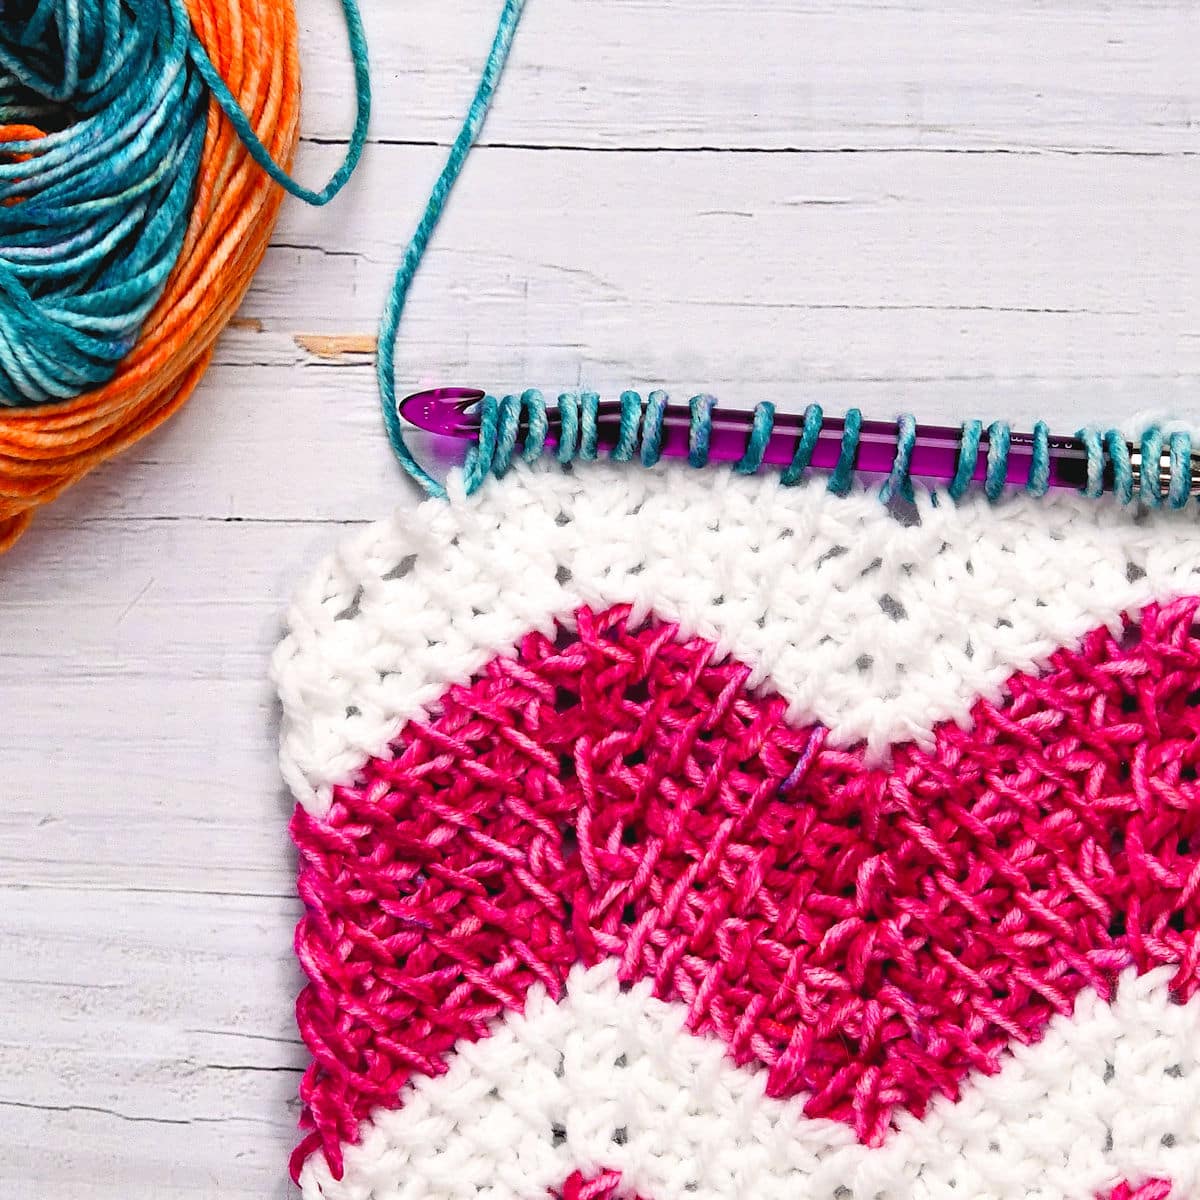
This project is made from bottom to top, row by row. The colorful sections are made in a self-striping yarn and they are separated by a solid white.
I like the look of the stripes going all the way out to the edge so I cut off after each row instead of carrying the color changes up the side. That usually requires a border which would have interrupted the striping at the edge I wanted. This added one additional hour of work, in order to weave in all the ends.
If you prefer a border, a nice single crochet border in the same solid color will work well.
Can You Make A Ripple In Tunisian Crochet?
Many people think that, because the Tunisian crochet hook is a long straight piece of metal, you can’t make a ripple afghan. But, you can!
The yarns stretch enough to get up and over the afghan hook (Tunisian hook) just fine.
My First Tunisian Crochet Ripple
I remember it well. I designed my first Tunisian Crochet Ripple, Denim Ripples Throw, in 2008.
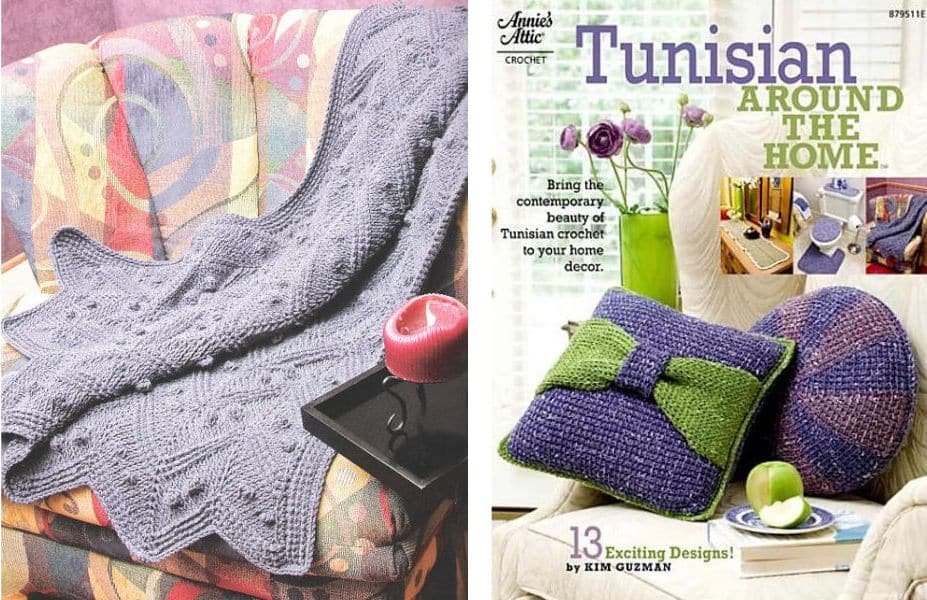
My book, Tunisian Around the Home, was published by Annie’s Attic in 2009 with 12 other of my Tunisian crochet designs. You can find more information on my About page.
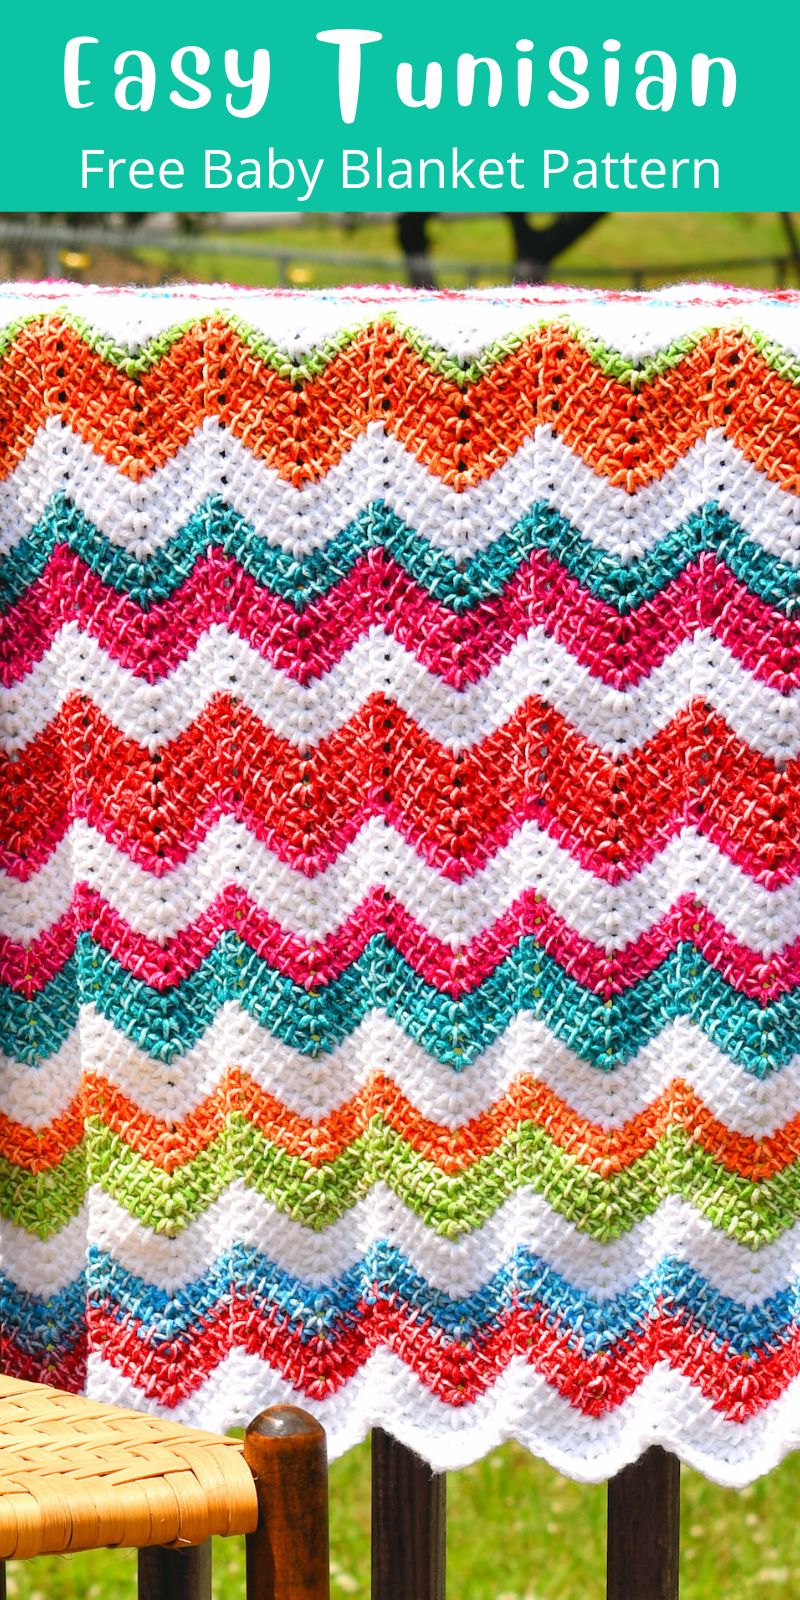
Pin It For Later
Finished Size
39″ x 41″.
Yarn

There are two different Lion Brand yarns used in this project. Both are labeled as Size 4 medium weight.
Lion Brand “Pound of Love”, size 4 medium, 454g/16 oz, 932m/1020 yd, 100% acrylic, 1 skein of color White, approx. 600 yds used.
Lion Brand “Mandala Ombre”, self-striping, size 4 medium, 150g/5.3 oz, 315m/344 yd, 100% acrylic, 3 cakes of colorway Happy, approx. 990 yds used. Note that this worked up as more of a DK weight for me. Take this into consideration when planning your project.
The baby blanket is made as the yarn came out of the cake. No special color planning other than trying to match the color sequence when starting a new cake.
Other Materials
Suggested Tunisian Crochet Hook Size 9mm, or size needed to meet gauge, extending cord optional but recommended.
Yarn Needle for weaving ends.
Although I’m fairly certain that a 40″ blanket like this will fit on a metal 13″ or 14″ length Tunisian crochet hook, it would be much more comfortable if using a hook with a flexible cord.
I used a size 9mm hook to best match the tension and drape I needed with the Pound of Love. Because the weight of Mandala Ombre seemed to be more of a DK weight, it made that section more open and lacy feeling.
If you feel more comfortable with an 8mm hook, you will need to make more chains (see Stitch Multiple) to get the same width. You may also need to add a thick border row in regular crochet along the bottom or one of your other favorite techniques to stop curling.
Gauge
Due to the ripple nature of the stitch pattern, trying to measure gauge is difficult. Each ripple section measures a little over 3″. The row measurement is about 9 rows=4″.
Special Stitches
Puff (puff): insert hook in indicated chain, yarn over, pull loop through, yarn over, insert hook in same chain, yarn over, pull loop through, 3 loops now on hook.
Tunisian Simple Stitch (tss): insert hook in a side to side motion (right to left for right-handers, left-to-right for left-handers) under vertical bar, yarn over, pull loop through.
Slip Stitch 2 Together (slst2tog): Insert hook under indicated vertical bar as for tss, skip the horizontal bar of the 3 stitches together, AND insert hook under next vertical bar as for tss, yarn over, pull loop through the 2 vertical bars AND pull the loop all the way through the loop on hook. (Slip stitch made.)
Other Abbreviations
This crochet pattern is written in US crochet terminology.
ch=chain; lp(s)=loop(s); rep=repeat; sl=slip; st(s)=stitch(es); yo=yarn over.
All numbers after the colon at the end of an instruction are stitch counts. Use the stitch count to check your work.
Stitch Multiple
If you would like to change the width of the afghan, you’ll need to start with any multiple of 12. To change the length, continue with the row repeat until desired length.
Free Crochet Pattern Instructions
Note: When using the back horizontal bar of the chain, it isn’t necessary to chain an extra chain and then skip that extra chain. This simply means that the first row doesn’t skip a chain, on purpose. It begins the shaping of the ripple.
Each row includes two parts: Forward (A) and Reverse (B).
With White, ch 144.
Row 1
A: (Forward) Working in the back horizontal bar of each ch across, [insert hook in next ch, yo, pull lp through, leave lp on hook] 5 times, *puff in next ch (see Special Stitches), [insert hook in next ch, yo, pull lp through, leave lp on hook] 11 times, rep from * to last 7 ch, puff in next ch, [insert hook in next ch, yo, pull lp through, leave lp on hook] 6 times: 145 sts.
B: (Return) Yo, pull through 2 lps on hook (closing 2 sts), [yo, pull through 2 lps] 11 times, *yo, pull through 4 lps (closing 3 sts), [yo, pull through 2 lps] 11 times, rep from * to last 2 sts, yo, pull through 3 lps (closes last 2 sts): 1 lp remains on hook here and throughout.
Note: When all stitches are closed during the Return, one loop remains, which counts as the first stitch of the next row.
Row 2
A: (Forward) Sk 2 vertical bars, tss (see Special Stitches above) in next 5 sts, *pull up lp in top-most bar of closing ch (right before the vertical bar) (yellow), tss in next vertical bar (orange), pull up lp in top-most bar of closing ch (right after the vertical bar just stitched) (blue), tss in next 5 sts, pull up lp in horizontal bar of 3-sts together, tss in next 5 sts, rep from * to last 8 sts, pull up lp in top-most bar of closing ch, tss in next vertical bar, pull up lp in top-most bar of closing ch, tss in next 5 sts, insert hook as for tss under last 2 vertical bars together, yo, pull lp through: 169 sts.
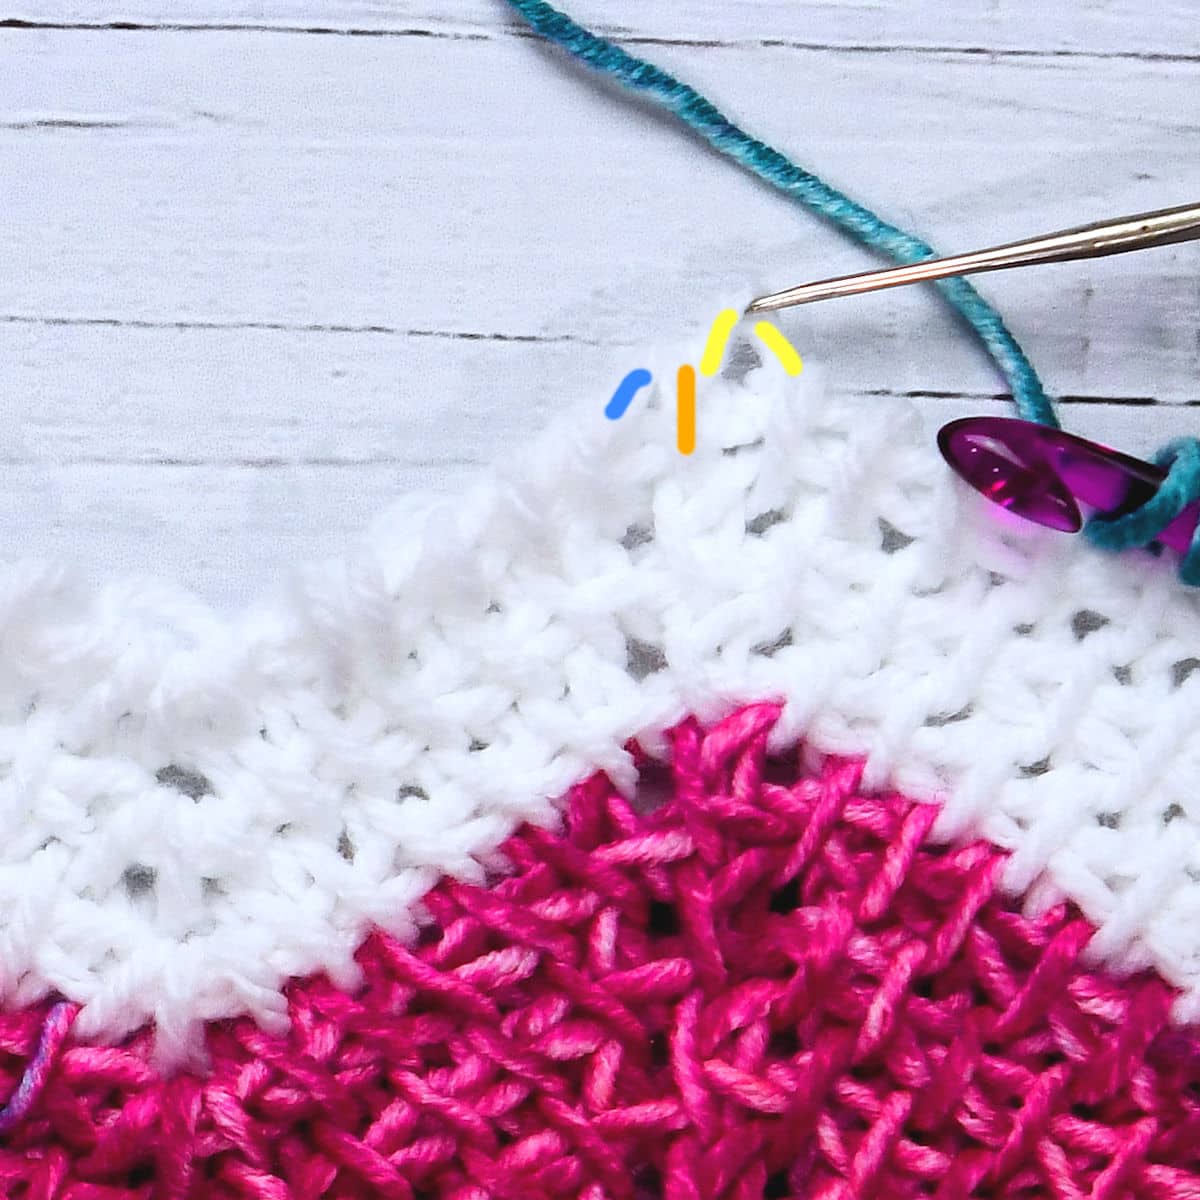
B: (Return) Yo, pull through 2 lps on hook (closing 2 sts), [yo, pull through 2 lps] 11 times, *yo, pull through 4 lps (closing 3 sts), [yo, pull through 2 lps] 11 times, rep from * to last 2 sts, yo, pull through 3 lps (closes last 2 sts).
Note: Row 2 is repeated throughout. The extra instruction is for establishing and maintaining the color sequence for the stripes.
Row 3: Rep row 2 except when closing the last 3 sts, yo and pull through the new color (Happy) and cut off the unused color.
Note: When changing colors, cut off unused color to weave in later.
Rows 4-8: Rep row 2, except change to White on the final row.
Rows 9-11: Rep row 2, except change to Happy on the final row.
Rows 12-83: Rep rows 4-11.
Rows 84-88: Rep rows 4-8.
Rows 89-90: Rep rows 9-10.
Slip Stitch Bind Off
Sk 2 vertical bars, sl st as for tss in next 5 sts, *sl st in top-most bar of closing ch, sl st as for tss in next vertical bar, sl st in top-most bar of closing ch, sl st as for tss in next 4 sts, slst2tog (see Special Stitches above), sl st as for tss in next 4 sts, rep from * to last 8 sts, sl st in top-most bar of closing ch, sl st as for tss in next vertical bar, sl st in top-most bar of closing ch, sl st as for tss in next 5 sts, sl st as for tss under last 2 vertical bars together, fasten off.
Finishing
Weave in all ends securely.

Twitter | Facebook | Pinterest
All the patterns at Make It Crochet are free. Since many of you have asked how to help with the costs of running a site like this, I’ve made all the patterns into print-ready PDFs and the cost is about the same as a cup of coffee. Every little bit helps.
TERMS: To my fellow crafters, you have my permission to use my patterns to make and sell your projects* anywhere you like. You cannot use my images to sell your projects, though. You must take photos of your own work. All patterns have been tested but mistakes can happen. If you find a mistake, please let me know. Everything at MakeItCrochet.com is protected by copyright to Kim Guzman. Other than the permissions previously given, no one other than Kim Guzman has permission to: reproduce, copy, publish or distribute this pattern, its parts or photos in any way or form, including, but not limited to, translations into foreign languages & video production.
*Not intended to be blanket permission for mass production.

Can’t wait, just what I needed!
Wonderful! I hope you enjoy it 🙂