A delicate and lightweight crochet baby blanket pattern is a wonderful project for creating a soft and airy blanket perfect for keeping a baby cozy without overheating.
The row repeat gives the look and elegance of a classic knit baby blanket. Options are provided to make alterations in height and width.
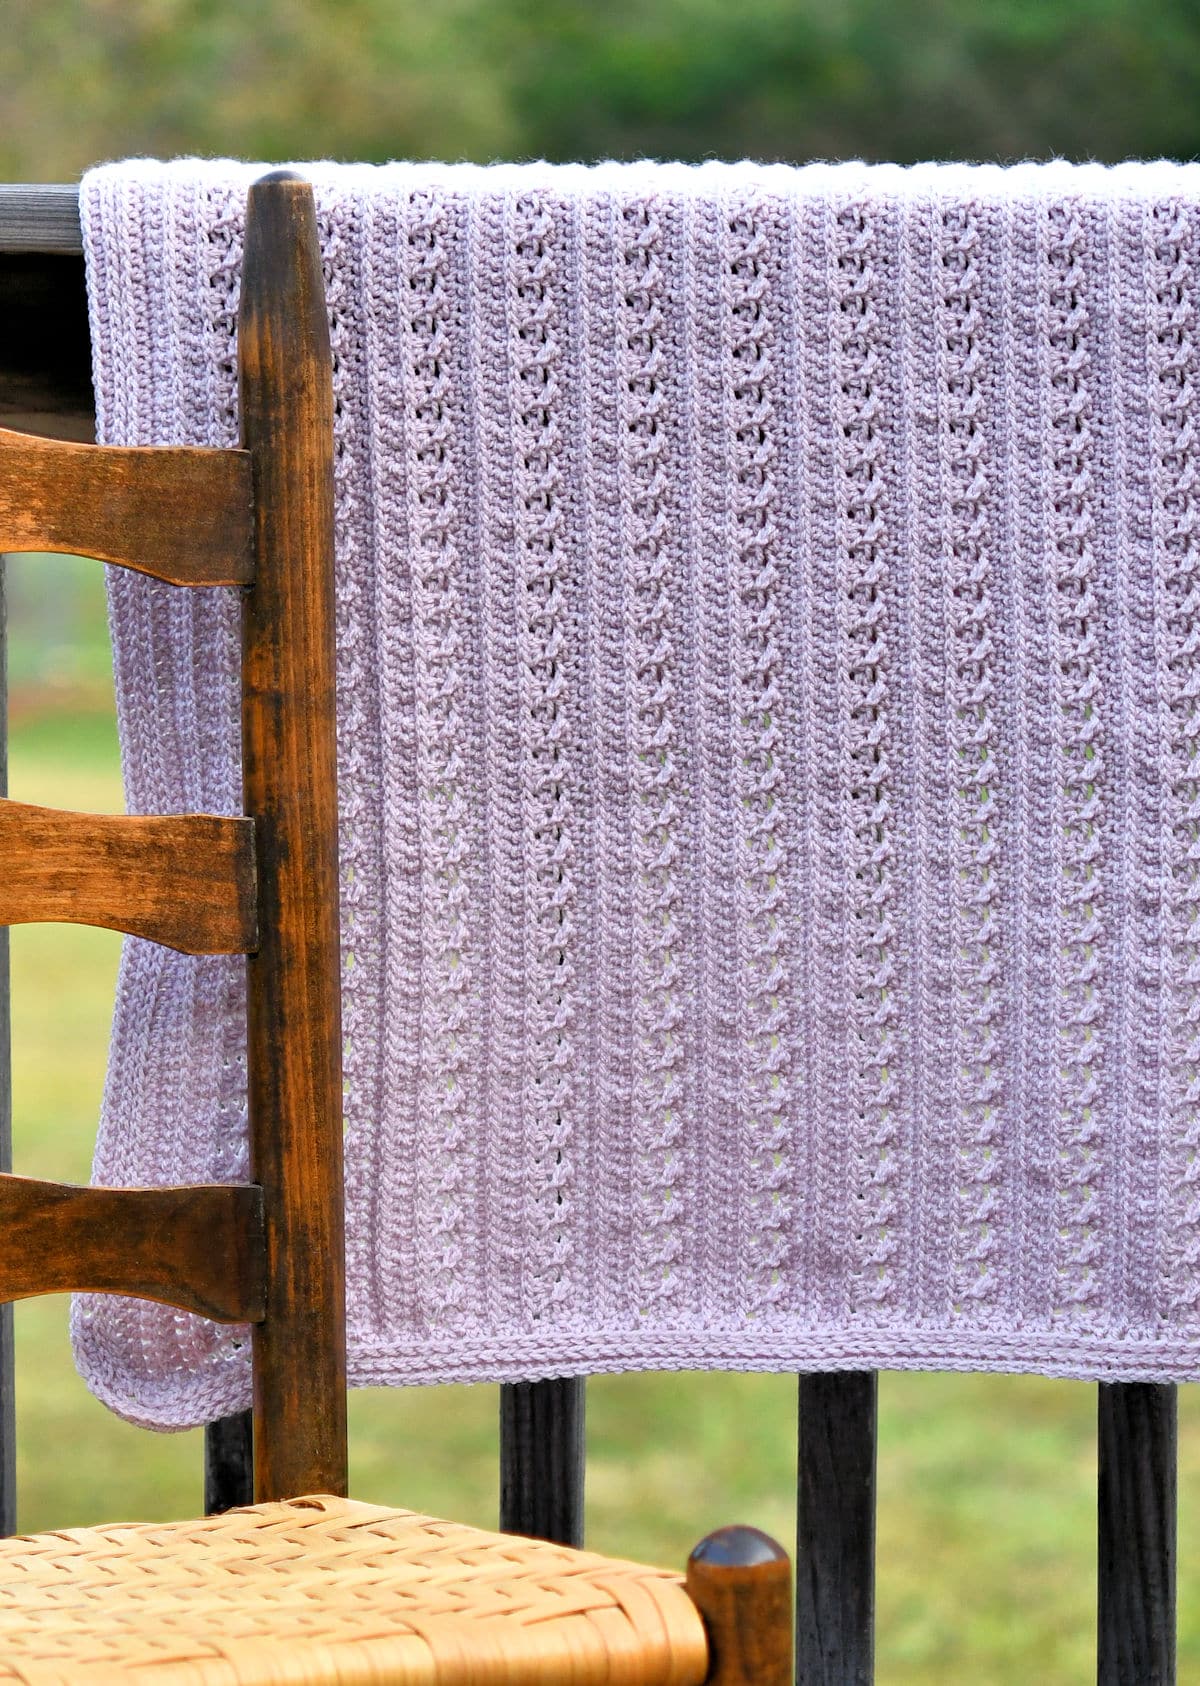
“Sweet Pea Baby Blanket” free crochet pattern by Kim Guzman © Sep. 2023. All rights reserved.
Technique: Regular crochet.
Skill Level: Intermediate.

Crochet Pattern At A Glance
Sweet Pea Baby Blanket Crochet Pattern
Designer: Kim Guzman © 2022-24. All rights reserved.Rate the Pattern
Yarn
- Stylecraft “Special DK”, 100% acrylic, Size 3 weight, 322 yds/295m per 3.5 oz/100g per skein: 4 skeins (1288 yards used) of color Mushroom (One more skein may be needed, if there is a stray from gauge.)
Other Materials
- Suggested Crochet Hook Size H-8 (5mm) or hook needed to meet gauge
- Yarn Needle for weaving ends
Instructions
- Set up established stitches with a chain of 150 then 149 sc across. If you prefer, foundation single crochet can be used instead.
- Work row 2 to complete a RS row.
- Work rows 3-8 to set up row repeat.
- Repeat rows 3-8 16 times more.
- Work 4 more rows to mirror the beginning.
- Work 3 rounds of Border. Fasten off.
Full Free Crochet Pattern Below
This is a free crochet pattern and the written instructions are below. If you prefer a printable download, a PDF is also available for purchase.
My Crochet Pattern Notes
I prefer the look of this crochet baby blanket when it’s displayed as a side-to-side instead of a horizontal orientation. It has the same elegance of a classic knit lace baby blanket. You can, of course, change the width or height easily.
I’ve labeled this pattern at an intermediate skill. It’s not difficult. It just means that the stitches can be a little tough and there may be some orientations you’ve not used before.
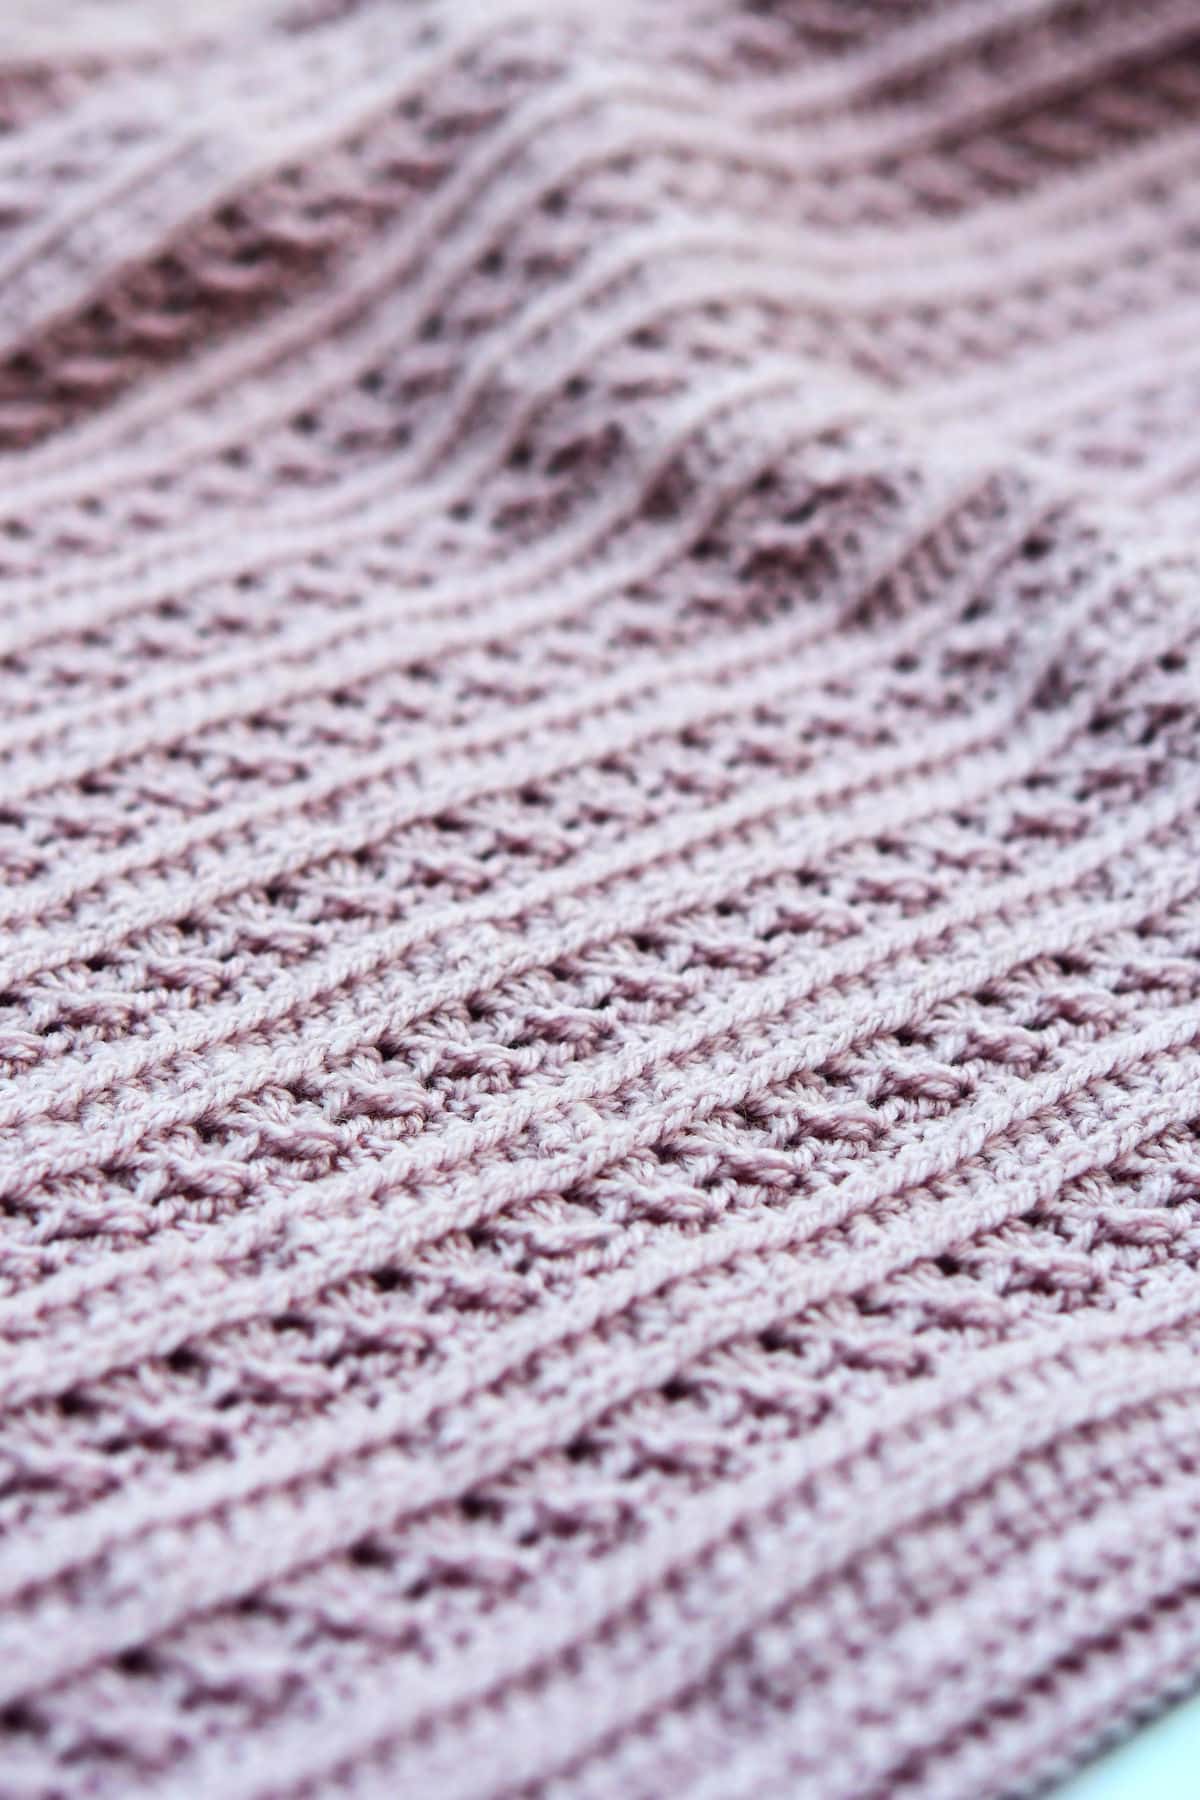
If you prefer an easier project, work all the stitches in the top loops like normal instead of in front loops or third loops. It will be faster and easier, but you will lose that texture in between the crossed doubles.
Pin It For Later

Finished Size
32″ x 33″.
Yarn
Stylecraft “Special DK”, 100% acrylic, Size 3 weight, 322 yds/295m per 3.5 oz/100g per skein: 4 skeins (1288 yards used) of color Mushroom.
Note that I used almost every bit of the 4 skeins of yarn. It wouldn’t hurt to get an extra skein, just in case.
The color I’ve chosen is a sort of blend of grey and lavender. Some of the photos may show it as more lavender than it actually is, due to the green of my backyard. If you want a true lavender without the grey tone, you may want to choose a different color.
“Special Double Knit” is classified as a DK weight (size 3) yarn and is currently available in 100 shades.
Available at LoveCrafts (aff link). If you’re in the US, look up at the top right to switch to US Dollars. I’ve purchased from them for years and love the selection.
Yarn Substitution
If you are unable to use Stylecraft Special DK, any acrylic or acrylic blend in size 3 lightweight yarn will be close enough.
You can also use a heavier weight yarn, if you prefer. You’ll need more yarn and a larger hook. The project will be bigger. Or, adjust the stitch count.
Other Materials
Suggested Crochet Hook Size H-8 (5mm) or hook needed to meet gauge.
Yarn Needle for weaving ends.
Special Stitches
Third Loop. The third loop, whether using a half double crochet or a single crochet, is the loop directly under the top two loops on the back of the stitch. Just take a look at the top two loops you usually use when crocheting. There’s a horizontal bar under them on the back of the stitch. The half double crochet makes this third loop fairly easy to find and use. When working in rows, insert your hook from bottom to top in that loop before completing the stitch. When working in the round, insert your hook from top to bottom. Both are used in this pattern. For more information on working in the Third Loop, have a look at the Sweet Pea Beanie here.
Front Loop. If the instruction says to work in front loops only, insert your hook from bottom to top under the loop closest to you of the top two loops.
Double Crochet Crossed Stitch (Cross): Skip 2 single crochets, double crochet in next single crochet, chain 1, working in front of that double crochet, work a double crochet in the first skipped stitch. Do not work around the first double crochet, enclosing it. Push the first double crochet out of the way, if necessary. You want it to stand alone and the double crochets are literally crossed, one on top of the other. The center skipped stitch is left unworked.
Other Abbreviations
This crochet pattern is written in US crochet terminology.
ch=chain; dc=double crochet; hdc=half double crochet; lp(s)=loop(s); RS=right side; rep=repeat; sc=single crochet; sk=skip; sl=slip; st(s)=stitch(es).
All numbers after the colon at the end of an instruction are stitch counts. Use the stitch count to check your work.
Gauge
Working in stitch pattern, 19 stitches for 14 rows measures approximately 4″ x 4″.
Stitch Multiple
You can easily change the stitch count by making your initial chain any multiple of 3, plus 3. In other words, choose any multiple of 3 then add 3 for the beginning and end stitches.
If you prefer foundation single crochet, choose any multiple of 3 then add 2.
Add rows as desired.
Free Crochet Pattern Instructions
Row 1: Ch 150, sc in 2nd ch from hook and in each remaining ch, turn: 149 sc.
Row 2 (RS): Ch 2 (does not count as a st), hdc in same sc, hdc in each remaining sc across, turn: 149 hdc.
Row 3: Ch 1, working in third lps only (see Special Stitches above), sc in each hdc to last hdc, working in both lps (to stabilize the last st), sc in last st, turn: 149 sc.
Row 4: Ch 2 (does not count as a st), hdc in same sc, hdc in each remaining sc across, turn: 149 hdc.
Row 5: Ch 1, working in third lps only, sc in each hdc to last hdc, working in both lps, sc in last hdc, turn: 149 sc.
Row 6: Ch 1, working in front lps only (see Special Stitches above), sc in each sc to last sc, working in both lps, sc in last sc, turn: 149 sc.
Row 7: Ch 3 (counts as first dc), sk same st, *cross (see Special Stitches above) worked across next 3 sc, rep from * to last sc, dc in last sc, turn: 49 cross.
Row 8: Ch 2 (counts as first hdc), *3 hdc in each ch-1 sp of cross, hdc in last dc, turn: 149 hdc.
Rows 9-104: Rep rows 3-8.
Rows 105-107: Rep rows 3-5.
Row 108: Ch 1, sc in each sc across: 149 sc. Do not fasten off. Begin working in rounds.
Border
Round 1: Ch 1 (does not count as a st), 3 hdc in corner, hdc evenly around blanket with 3 hdc in each corner, sl st to first hdc.
Note: To maintain appearance of the next 2 rounds, sl st to the “third loop” instead of the top of the hdc.
Rounds 2-3: Ch 1 (does not count as a st), working in third lps only, hdc in each hdc with 3 hdc in second hdc of each corner, sl st to first hdc. Fasten off after final round.
Finishing
With yarn needle, weave in all ends securely.

Twitter | Facebook | Pinterest
All the patterns at Make It Crochet are free. Since many of you have asked how to help with the costs of running a site like this, I’ve made all the patterns into print-ready PDFs and the cost is about the same as a cup of coffee. Every little bit helps.
TERMS: To my fellow crafters, you have my permission to use my patterns to make and sell your projects* anywhere you like. You cannot use my images to sell your projects, though. You must take photos of your own work. All patterns have been tested but mistakes can happen. If you find a mistake, please let me know. Everything at MakeItCrochet.com is protected by copyright to Kim Guzman. Other than the permissions previously given, no one other than Kim Guzman has permission to: reproduce, copy, publish or distribute this pattern, its parts or photos in any way or form, including, but not limited to, translations into foreign languages & video production.
*Not intended to be blanket permission for mass production.


Let Me Know What You Think!