The Thunderbird Mandala Blanket is perfectly matched for a Western-themed room, in any size project from baby to adult. Find your favorite Mandala colorway for even more cozy themes.
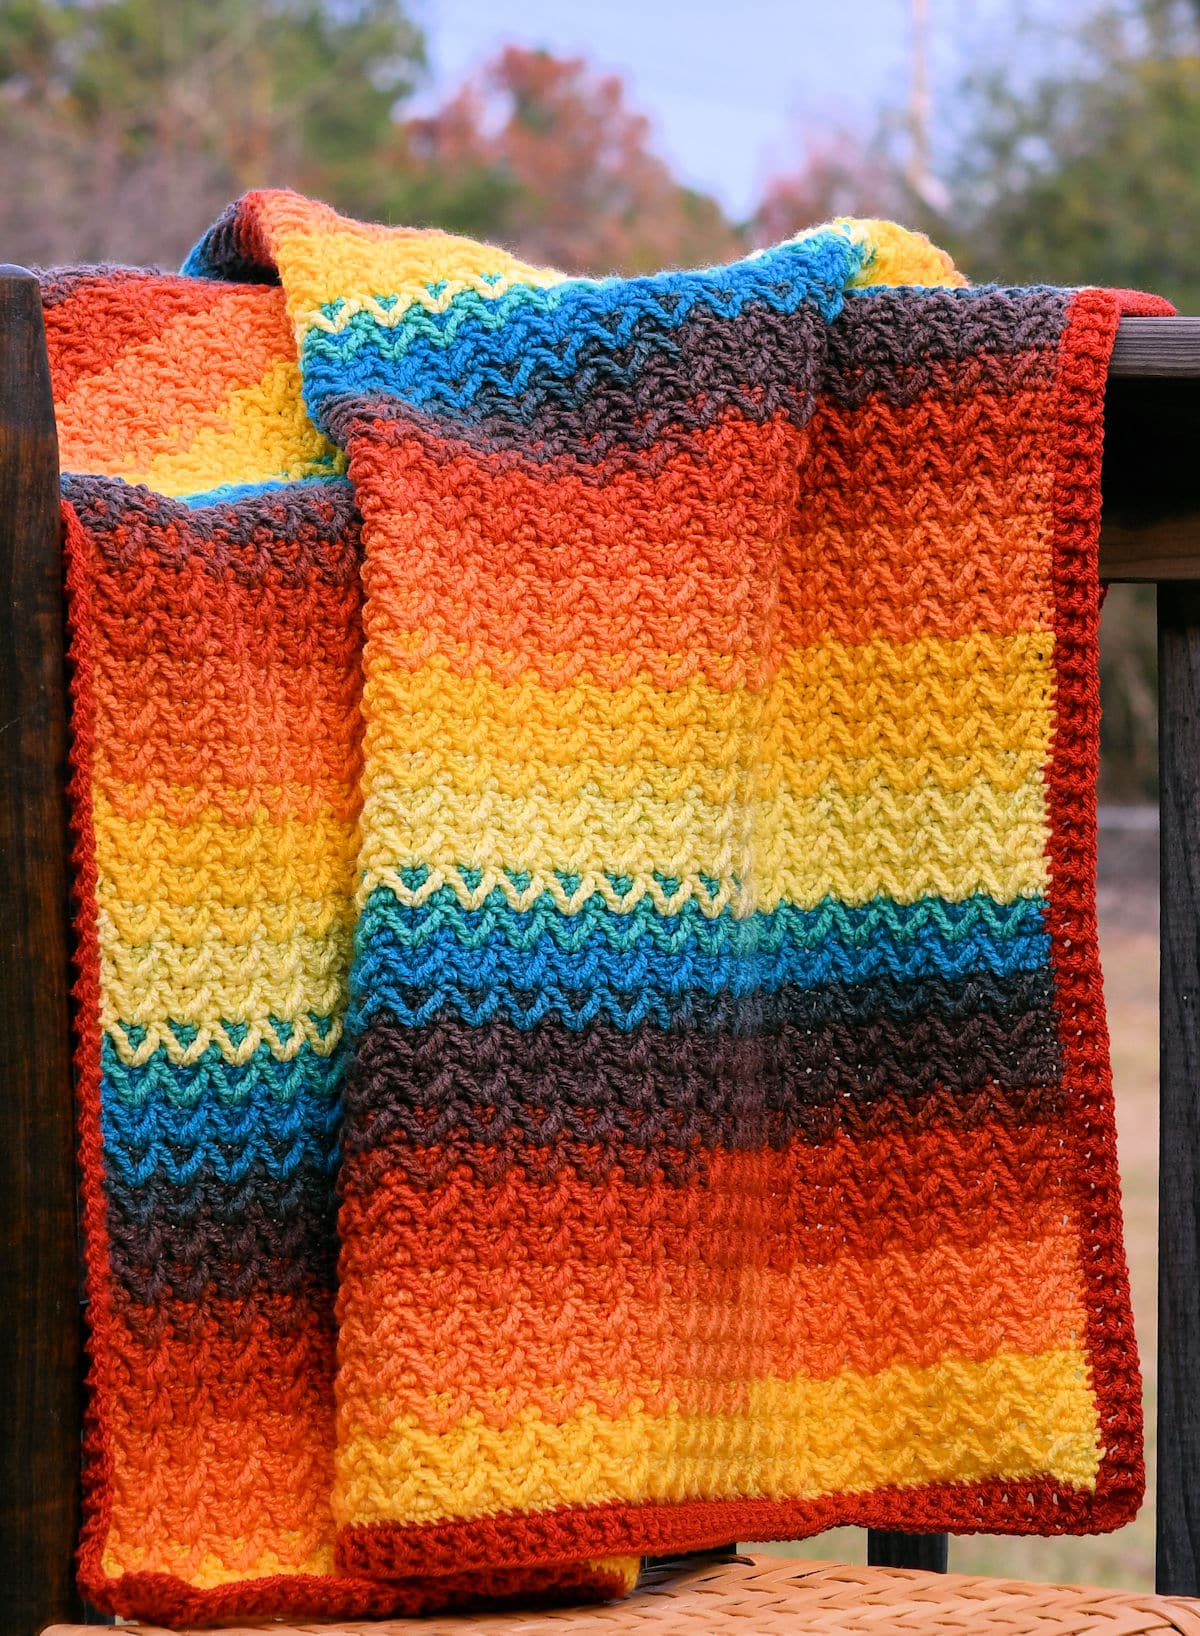
“Thunderbird Mandala Blanket” free crochet pattern by Kim Guzman © Nov. 2023. All rights reserved.
Technique: Regular Crochet.
Skill Level: Intermediate.

Crochet Pattern At A Glance
Thunderbird Mandala Blanket
Designer: Kim Guzman © 2022-24. All rights reserved.Rate the Pattern
Yarn
- Lion Brand “Mandala”, size 3 (DK weight) yarn, 100% acrylic, 590 yds/540m per 5.3 oz/150g per skein: 3 cakes of colorway Thunderbird. AND
- Stylecraft “Special DK”, size 3 (DK weight) yarn, 100% acrylic, 322 yds/295m per 3.5 oz/100g per skein: 1 skein of color Tomato, about 160 yards used.
Other Materials
- Suggested Crochet Hook Size H-8 (5mm) or hook needed to meet gauge
- Yarn Needle for weaving ends
Instructions
- Work the first 3 rows to establish a foundation.
- Work the next 2 rows as the repeat.
- Continue working the 2-row repeat until 109 total rows have been completed.
- With solid color, work a 3-round border.
Video (will not show with adblocker)
Full Free Crochet Pattern Below
This is a free crochet pattern and the written instructions are below. If you prefer a printable download, a PDF is also available for purchase.
My Crochet Pattern Notes
This crochet blanket is made in one piece, in rows. The border is made in the round once the blanket is complete.
Although this colorway of Lion Brand Mandala yarn may not be everyone’s favorite for a baby blanket, I wanted to give something a little different for the new decor coming out. I think it’s the influence of the popular series, Yellowstone, that’s bringing out the Western look. This colorway is perfect for that charming rustic look. There are many other colorways including a line of more pastels called Mandala Baby.
I used the Mandala as it came out of the center of the cake. I didn’t do any color planning other than make sure that the center of each cake started with the same color.
Why So Many Baby Blankets?
In relaunching this website last year, my self-imposed goal is to release a new pattern each week. I find it necessary to set goals for myself or I get a little procrastination-tied.
I know that my favorite items to make are afghans and throws, but it’s really tough to produce these on such a strict deadline. Add to it that my favorite yarn weight is size 3 and you’ve got a strenuous schedule.
Because I want you to be able to make any size blanket you want, all of my patterns provide a stitch multiple. In addition to that, I have found that using a size 4 weight yarn and keeping the same number of stitches is often all that needs to be done in order to have a standard size blanket.
One of these days, I will probably switch to a heavier weight yarn to expand the possibilities. But, for now, please feel free to use my patterns as your guides instead of something written in stone. This blanket, in particular, would be truly amazing as a full size throw as well.
Pin It For Later
Finished Size
35″ x 35″
Yarn
Lion Brand “Mandala”, size 3 (DK weight) yarn, 100% acrylic, 590 yds/540m per 5.3 oz/150g per skein: 3 cakes of colorway Thunderbird. AND
Stylecraft “Special DK”, size 3 (DK weight) yarn, 100% acrylic, 322 yds/295m per 3.5 oz/100g per skein: 1 skein of color Tomato, about 160 yards used.
“Mandala” is classified as a DK weight (size 3) yarn and is currently available in 27 colorways.
“Special Double Knit” (aff link) is classified as a DK weight (size 3) yarn and is currently available in 100 shades.
Matching A Solid Color With Mandala
I have looked for quite some time to find a matching solid color to work with Lion Brand Mandala. I had wanted to find the perfect match with a Lion Brand product. But, as it turns out, Stylecraft Special DK is the perfect size and with 100 colors, I had no problem finding a match.
Other Materials
Suggested Crochet Hook Size H-8 (5mm) or hook needed to meet gauge.
Yarn Needle for weaving ends.
Abbreviations
This crochet blanket pattern is written in US crochet terminology.
ch=chain; dc=double crochet; lp(s)=loop(s); rep=repeat; sc=single crochet; sk=skip; sl=slip; st(s)=stitch(es); tr=treble crochet; yo=yarn over.
All numbers after the colon at the end of an instruction are stitch counts. Use the stitch count to check your work.
Special Stitches
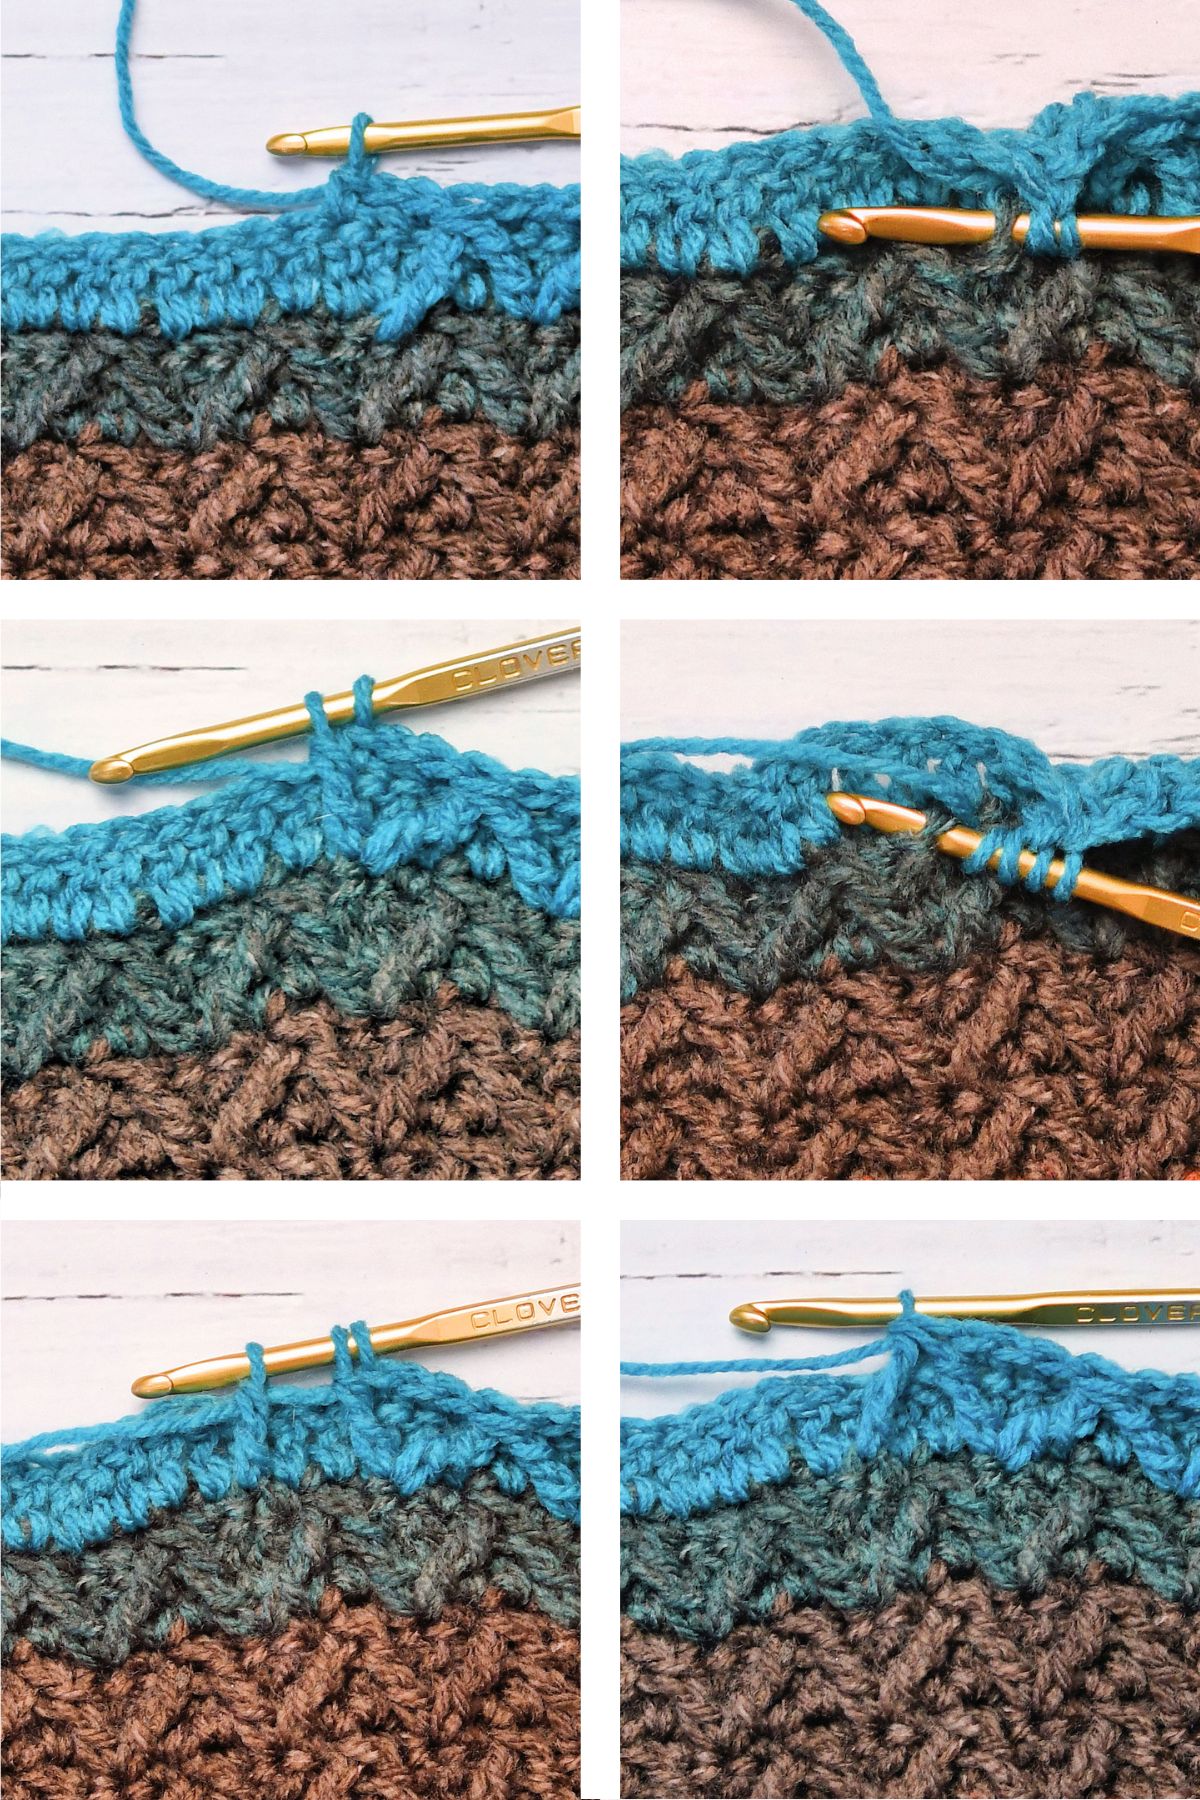
Note: The Treble Crochet Spike is a cluster worked in treble crochet with the first part in one skipped stitch and the second part in the next skipped stitch for the look of an upside-down V. When you insert your hook into the skipped stitch, insert your hook under the top two loops, just like normal, but bring it back up to the front of the work before continuing the stitch.
Treble Crochet Spike (tr-spike): Yo twice, in second row below, insert hook in same skipped ch/sc as last tr (reach back a little bit), yo, pull lp through, [yo, pull through 2 lps on hook] twice (2 lps remain on hook), yo twice, in second row below, insert hook in next skipped ch/sc (reach forward a little bit), yo, pull lp through, [yo, pull through 2 lps on hook] twice, yo, pull through 3 lps on hook.
When the instruction says to “sk next dc in current row”, it means that the tr-spike counts as a stitch so you skip the double crochet directly behind it in the current row. Just pull the tr-spike toward you a little in order to see stitches behind it.
Front Post Double Crochet (FPdc): Yo, insert hook to the side of the indicated stitch, move hook around the back of the stitch and out the other side of same stitch, yo, pull lp through, [yo, pull through 2 lps on hook] twice.
Back Post Double Crochet (BPdc): Yo, with hook in back of work, insert hook to the side of the indicated stitch, move hook around the front of the stitch and out the other side of same stitch with the hook now again on the back of work, yo, pull lp through, [yo, pull through 2 lps on hook] twice.
Gauge
16 stitches for 13 rows measures approximately 4×4″. Use the stitch multiple to change the width, if you like.
Stitch Multiple
To change the width, make your initial chain any multiple of 4, then add 4.
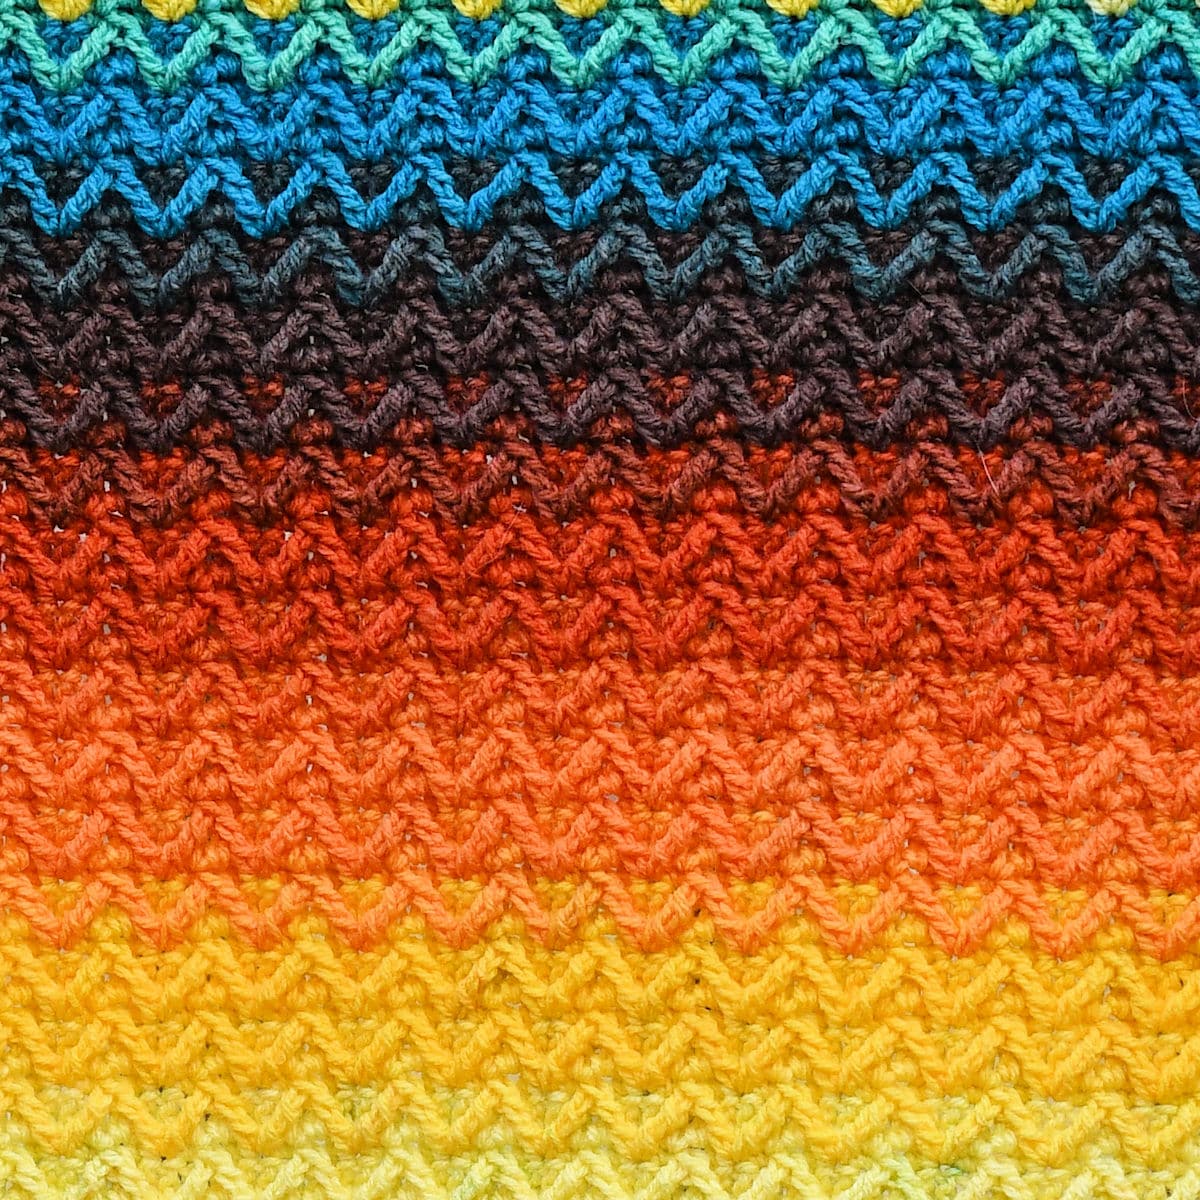
Free Crochet Pattern Instructions
Row 1: With Mandala, ch 136, work sc in second ch from hook and in next 2 ch, *ch 1, sk 1 ch, sc in next 3 ch, rep from * across, turn.
Note: For this blanket, on even rows, you won’t be working into the chain-1 spaces. You work directly into the chain itself.
Row 2: Ch 2 (counts as first dc here and throughout), sk first sc, dc in next 2 sc, *dc in CHAIN above the skipped ch (from the beginning chain), dc in next 3 sc, rep from * across, turn: 135 dc.
Row 3: Ch 1, sc in first dc, in second row below, tr in skipped ch (reach forward a little bit into the beginning ch), sk next dc in current row, sc in next dc, ch 1, sk next dc, sc in next dc, *tr-spike, worked into the skipped chains from the beginning ch (see Special Stitches above), sk next dc in current row, sc in next dc, ch 1, sk next dc, sc in next dc, rep from * to last 2 dc, in second row below, tr in same skipped ch as the second half of tr-spike (reach back a little), sk next dc, sc in last dc, turn.
Row 4: Ch 2, sk first sc, dc in next 2 sts, *dc in ch above the skipped dc, dc in next 3 sts, rep from * across, turn: 135 dc.
Row 5: Ch 1, sc in first dc, in second row below, tr in skipped dc, sk next dc in current row, sc in next dc, ch 1, sk next dc, sc in next dc, *tr-spike, sk next dc in current row, sc in next dc, ch 1, sk next dc, sc in next dc, rep from * to last 2 dc, in second row below, tr in same skipped dc as the second half of tr-spike, sk next dc in current row, sc in last dc, turn.
Rows 6-109: Rep rows 4-5. Fasten off after final row.
Border
Round 1: With RS facing, join Special DK, with sl st at any corner, ch 1, work evenly around entire blanket with 137 sc on top, bottom and sides, with 3 sc at each corner, sl st to first sc.
Round 2: Ch 2 (counts as first dc), *5 dc in second sc of 3-sc corner (corner made), dc in each sc to second sc of corner, rep from * twice more, 5 dc in second sc of 3-sc corner, dc in each sc to first dc, sl st to first dc.
Round 3: Ch 1, FPdc (see Special Stitches above) around same st as joining, BPdc (see Special Stitches above) around next dc, rep [FPdc, BPdc] around entire blanket, sl st to first dc, fasten off.
Finishing
With yarn needle, weave in ends securely.

Twitter | Facebook | Pinterest
All the patterns at Make It Crochet are free. Since many of you have asked how to help with the costs of running a site like this, I’ve made all the patterns into print-ready PDFs and the cost is about the same as a cup of coffee. Every little bit helps.
TERMS: To my fellow crafters, you have my permission to use my patterns to make and sell your projects* anywhere you like. You cannot use my images to sell your projects, though. You must take photos of your own work. All patterns have been tested but mistakes can happen. If you find a mistake, please let me know. Everything at MakeItCrochet.com is protected by copyright to Kim Guzman. Other than the permissions previously given, no one other than Kim Guzman has permission to: reproduce, copy, publish or distribute this pattern, its parts or photos in any way or form, including, but not limited to, translations into foreign languages & video production.
*Not intended to be blanket permission for mass production.


Diane says
Thank you so much for this beautiful free pattern. I really love the bright colors and plan on making it with these colors.
Kim Guzman says
That’s great. I’m so glad you like it and hope you enjoy making it. Thank you for writing!
Rochelle says
I love your patterns! I’ve made the “tread” pattern as a baby blanket twice and the dragon scales once, and now I’m just gearing up to choose my colors for the thunderbird pattern. Would love patterns that include popcorn or puff stitches as well!
Kim Guzman says
That’s really great! I’m glad you’re enjoying them. I actually have designs I’ve already started with both popcorn and puff stitches. I’m not sure when I’ll have them finished but stay tuned. Thanks so much for writing!
Jane says
Is there a video tutorial
Kim Guzman says
I am not able to provide video tutorials at this time. I have the detailed photo tutorial only.