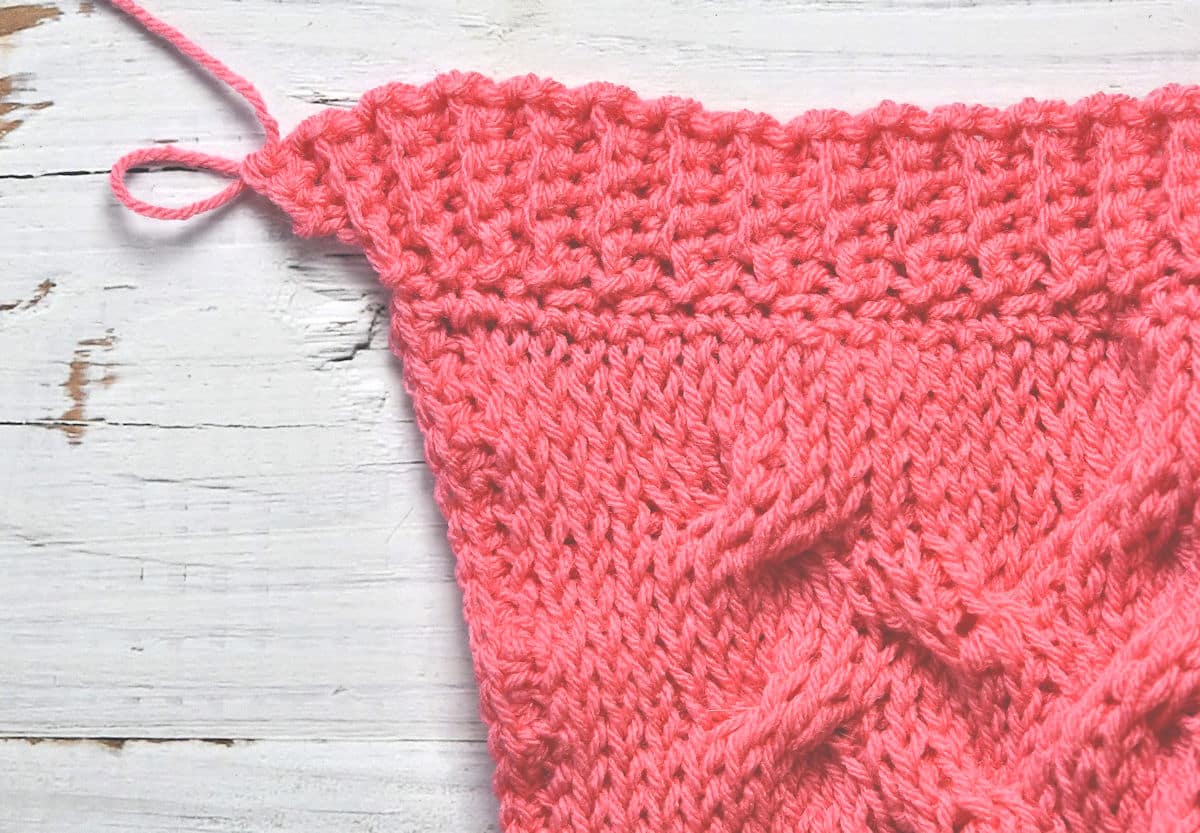
The Wandering Cables Baby Blanket pattern features large, knit-look Tunisian crochet cables, making it a heavily textured, warm design. It will quickly become a family favorite.

“Wandering Cables Baby Blanket” free Tunisian crochet pattern by Kim Guzman © Jul. 2023. All rights reserved.
Technique: Tunisian Crochet.
Skill Level: Intermediate.

Crochet Pattern At A Glance
Wandering Cables Crochet Baby Blanket
Designer: Kim Guzman © 2022-2026. All rights reserved.Rate the Pattern
Yarn
- JoAnn “Big Twist Value” yarn, size 4 weight, 100% acrylic, 380 yds/347m per 6 oz skein: 4 skeins, approx. 1520 yards used, color Watermelon
Other Materials
- Suggested Tunisian Crochet Hook Size 8mm, or size needed to meet gauge
- Suggested Crochet Hook Size K-10 1/2 (6.5mm), for border
- Cable Stitch Holder
- Stitch Marker, or small piece of contrasting yarn
- Yarn Needle for weaving ends
Instructions
- Work the Foundation Row as a typlcal Tunisian project. Work 3 plain rows of Tunisian Knit Stitch.
- Establish the cable repeat in the next 6 rows.
- Work the 6-row repeat 15 more times.
- Work 4 more rows to mirror the beginning.
- Bind off all stitches.
- Change to the regular crochet hook to work the Ribbing border.
- Seam the 5 stitches of the first and last rows of the border, then weave in all ends securely.
Full Free Crochet Pattern Below

This is a free crochet pattern and the written instructions are below. If you prefer a printable download, a PDF is also available for purchase.
My Crochet Pattern Notes
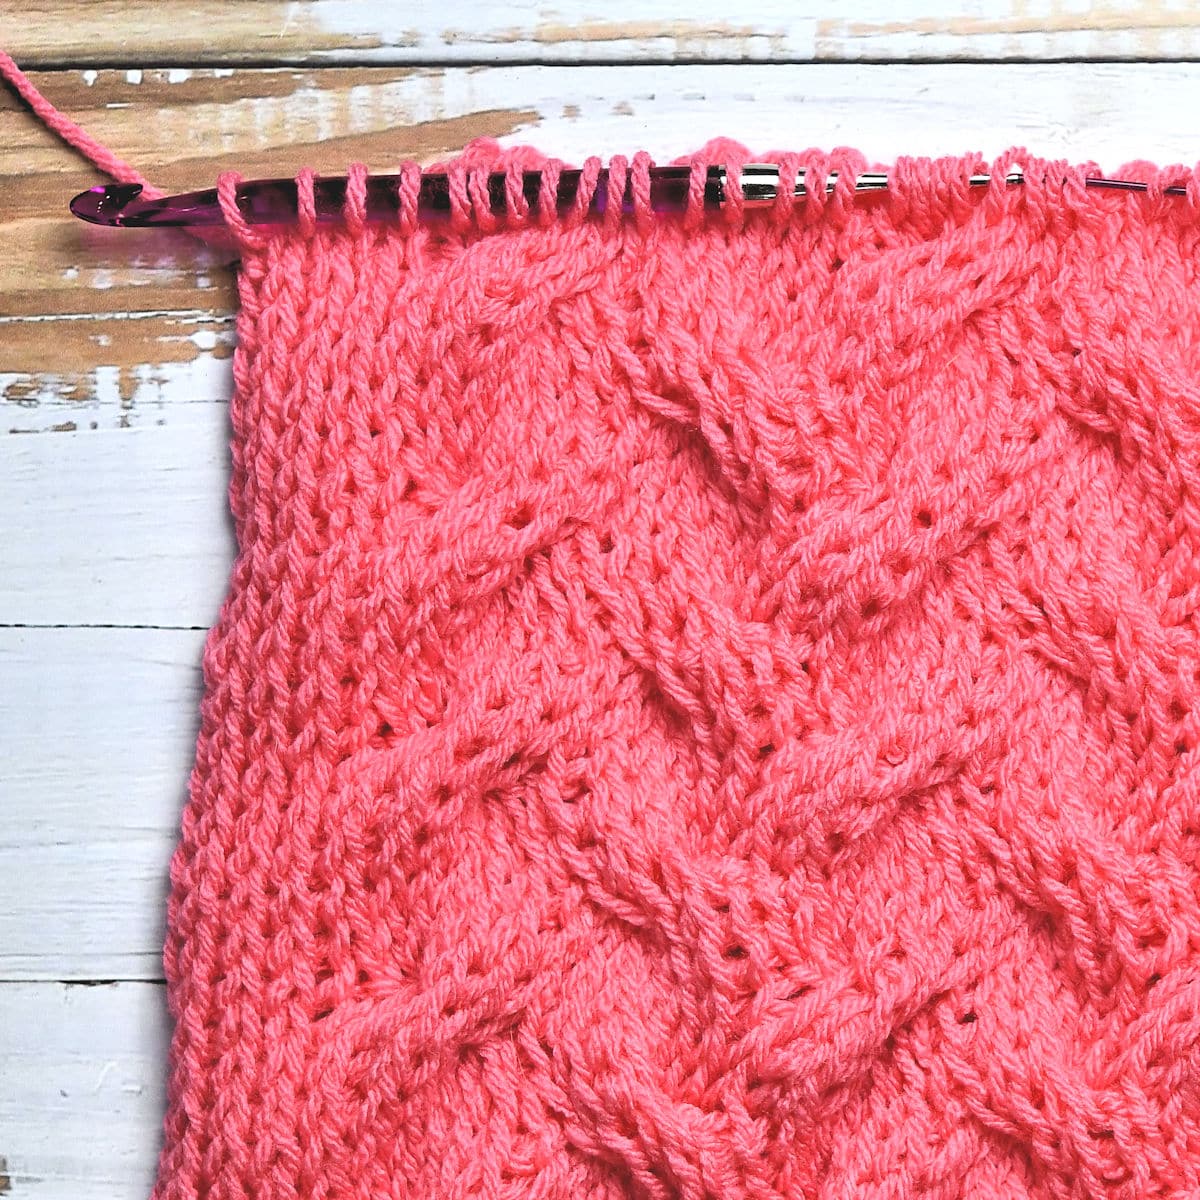
This is a more challenging Tunisian crochet technique. You’re simply working the stitches out of order but it warrants a higher skill level solely because of how fiddly it is. This is all in Tunisian Knit Stitch, but switching the loops around to create the cables takes some patience.
Working the border may also be a new technique. It’s not difficult but working at a different orientation may trip you up a bit at first.
This baby blanket is worked flat from bottom to top. The border is a standard single crochet ribbing but it’s worked in a perpendicular orientation, rather than the typical stitches made on top of other stitches.
If you love Tunisian crochet as much as Kim, you won’t want to miss this curated roundup of over 100 Free Tunisian Crochet Patterns available on the internet.
Pin It For Later
How To Make Tunisian Crochet Cables
When I first starting making Tunisian Crochet cables, there was no significant documentation for them. This part of crochet design was more of the wild, wild west and, in many ways, still is.
I started out by learning how to make cables in knitting. And, even in knitting, there are many different ways to make the same cable. It was all a matter of preference and which way was easier. All ways led to the same conclusion, though.
Tunisian crochet is no different and I went on a journey myself, trying to figure out which way was easiest to switch the loops out of order on the hook.
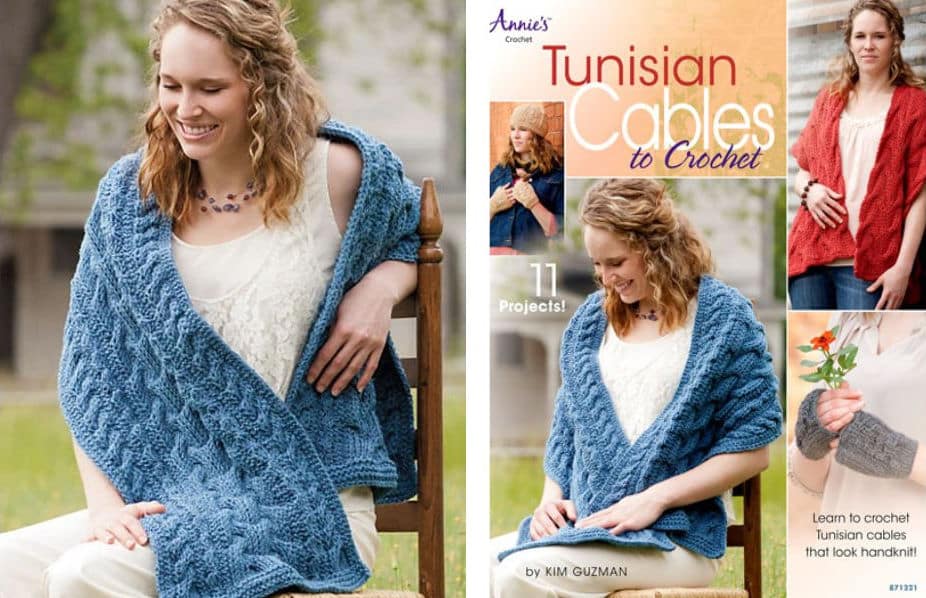
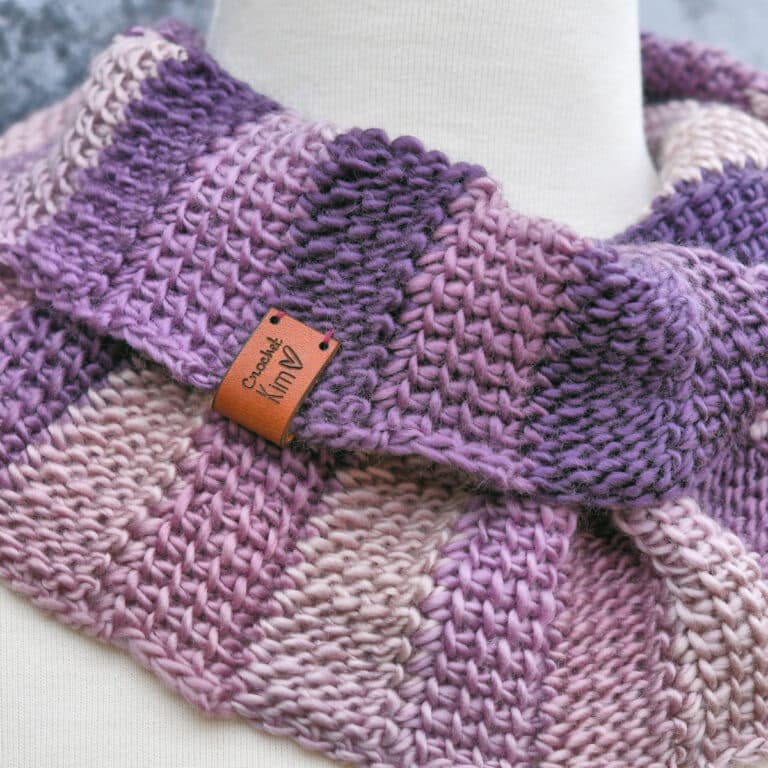
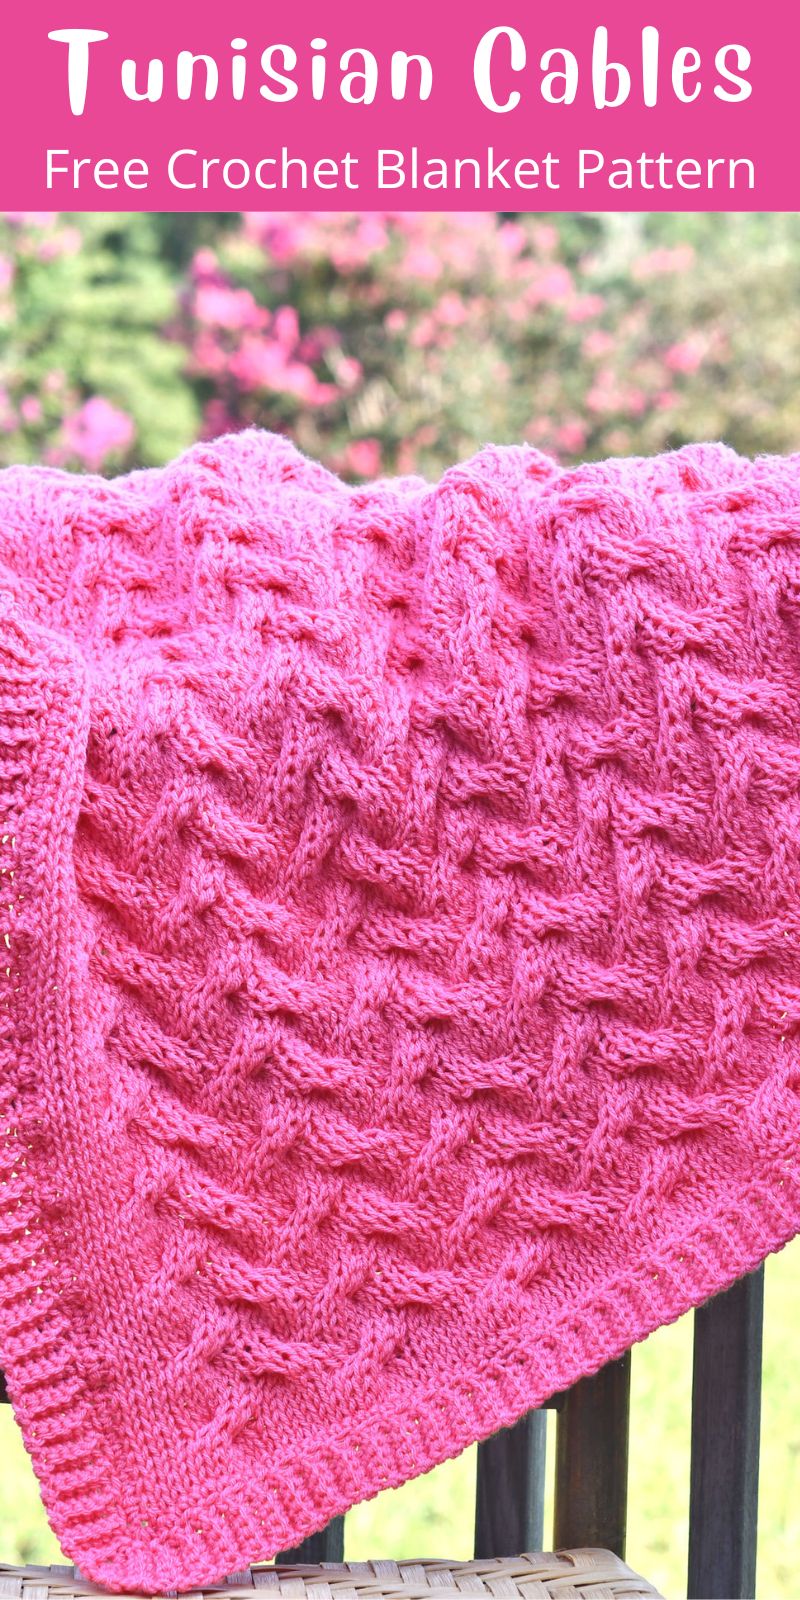
I fell in love with designing and writing Tunisian Crochet Patterns and I even went as far as writing a book for Annie’s Attic called Tunisian Cables to Crochet. See my About Page for more information on my published books.
I started out with many different methods of switching the loops but I finally settled on one way that seemed the easiest for me.
If you’ve done Tunisian cables before, you may have seen these different methods. I don’t consider any one way better than another.
Most of the time, I’ve seen the loops switched during the forward pass (pulling up loops portion). Personally, I no longer like that method because it caused such a drag on the hook that it made it difficult to move the loops.
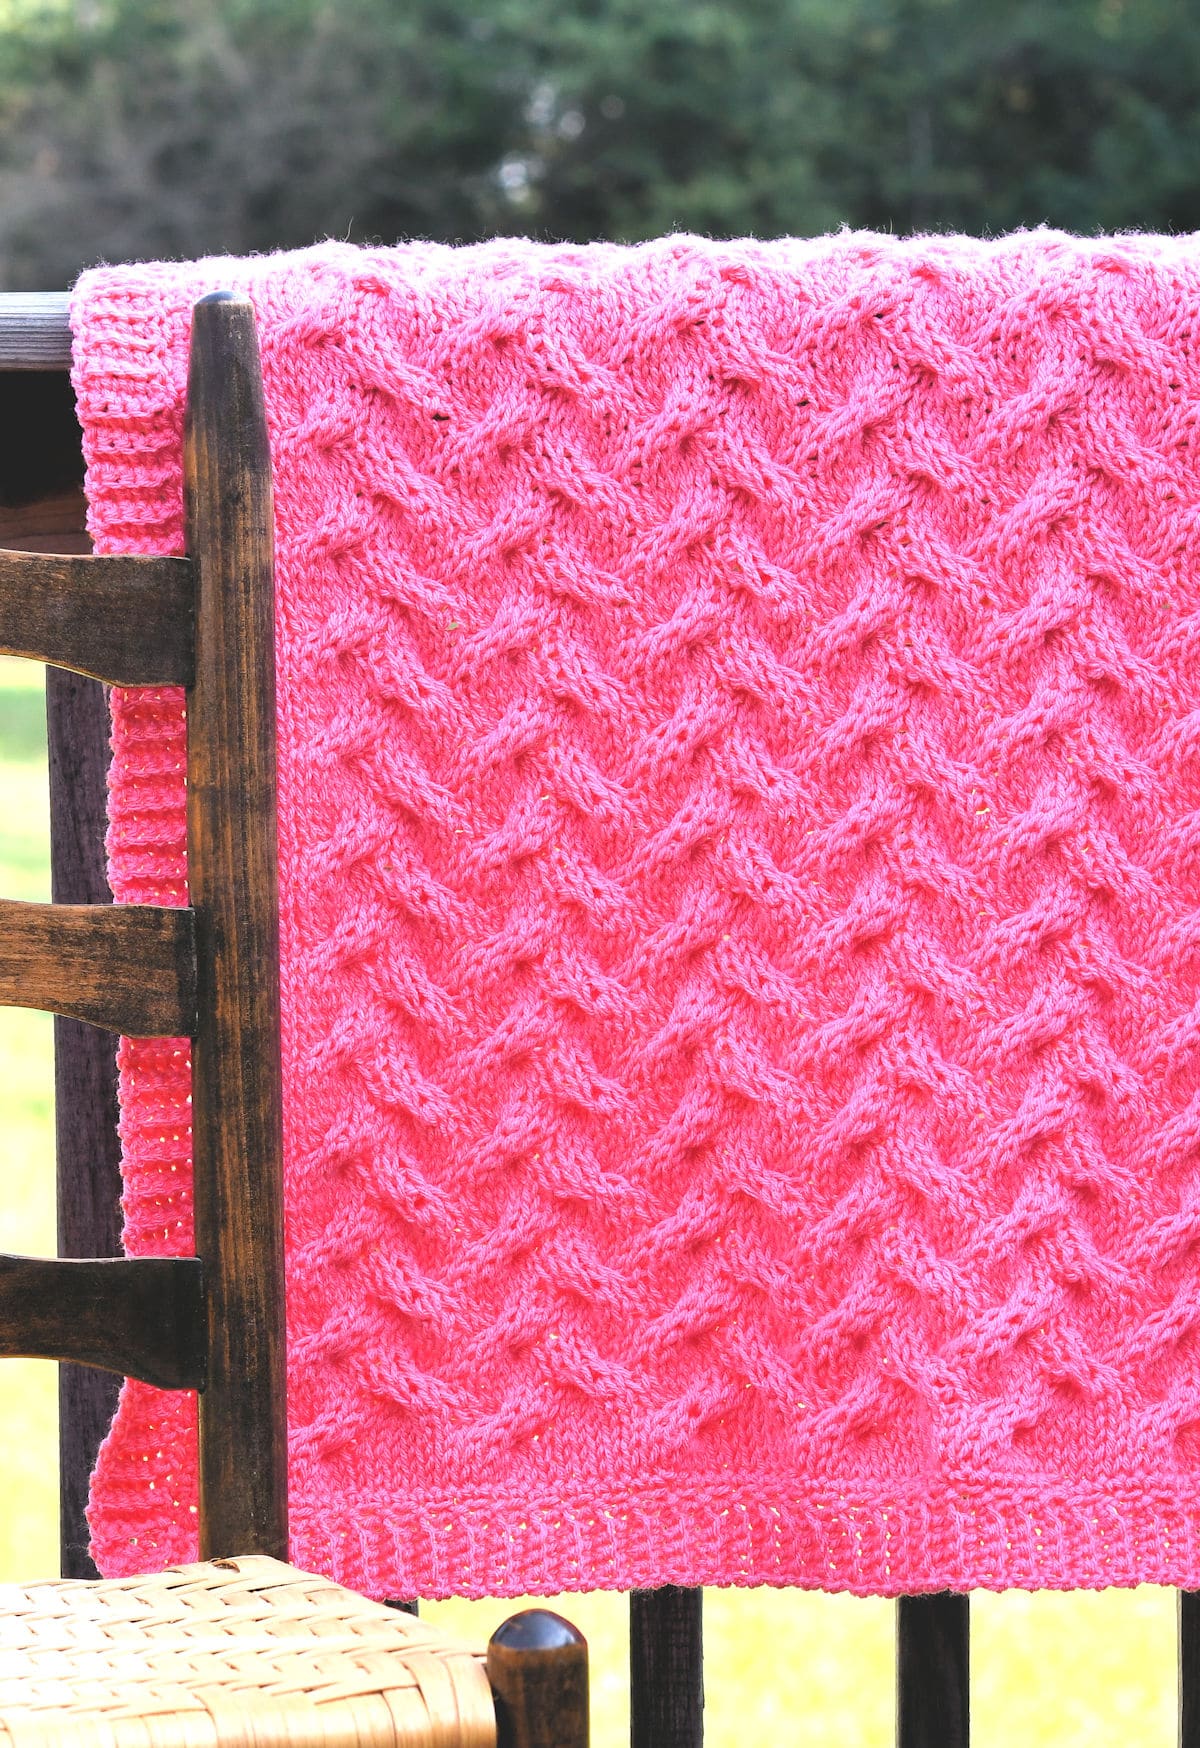
Finished Size
Width: 32″, Length: 34″ (including border).
Yarn
JoAnn “Big Twist Value” yarn, size 4 weight, 100% acrylic, 380 yds/347m per 6 oz skein: 4 skeins, approx. 1520 yards used, color Watermelon.

The yarn I’ved used in this pattern is Big Twist Value and I purchased it from JoAnn. When JoAnn closed, Michaels purchased the intellectual property. You can now purchase Big Twist Value at Michaels directly. I believe it’s the same weight and yardage.
Other Materials
Suggested Tunisian Crochet Hook Size 9mm, or size needed to meet gauge.
Suggested Crochet Hook Size K-10 1/2 (6.5mm), for border.
Cable Stitch Holder.
Stitch Marker, or small piece of contrasting yarn.
Yarn Needle for weaving ends.
Gauge
In stitch pattern, 15 stitches for 12 rows measures 4″ x 4″.

Stitch Multiple
The blanket is worked in any multiple of 12, then add 15.
You’ll also need to make adjustments to the Border Set Up if you are changing the size.
Special Stitches
Foundation: For best results, turn the chain over and work into the back horizontal bar to pull up loops. Chain the number indicated, insert hook in second chain, yarn over, pull loop through (2 loops now on hook), *insert hook in next chain, yarn over, pull loop through, keep loop on hook, repeat from * across, ending with the same number of loops on the hook as the starting chain. Right-Handed Video | Left-Handed Video
Tunisian Knit Stitch (tks): Insert hook, from front of work to back of work, between the front and back vertical bars of the same stitch, yarn over, pull loop through, keeping loop on hook. Right-Handed Video | Left-Handed Video
Last Stitch of a Row: The last stitch of each row is worked into the outer 2 vertical bars. It’s basically a knit stitch with an extra loop. You don’t want to work under only one vertical bar since it will cause the loop to stretch too much. Working under both loops makes a nice, clean, sturdy edge. Right-Handed Video | Left-Handed Video
Tunisian Crochet Right Leaning Cable
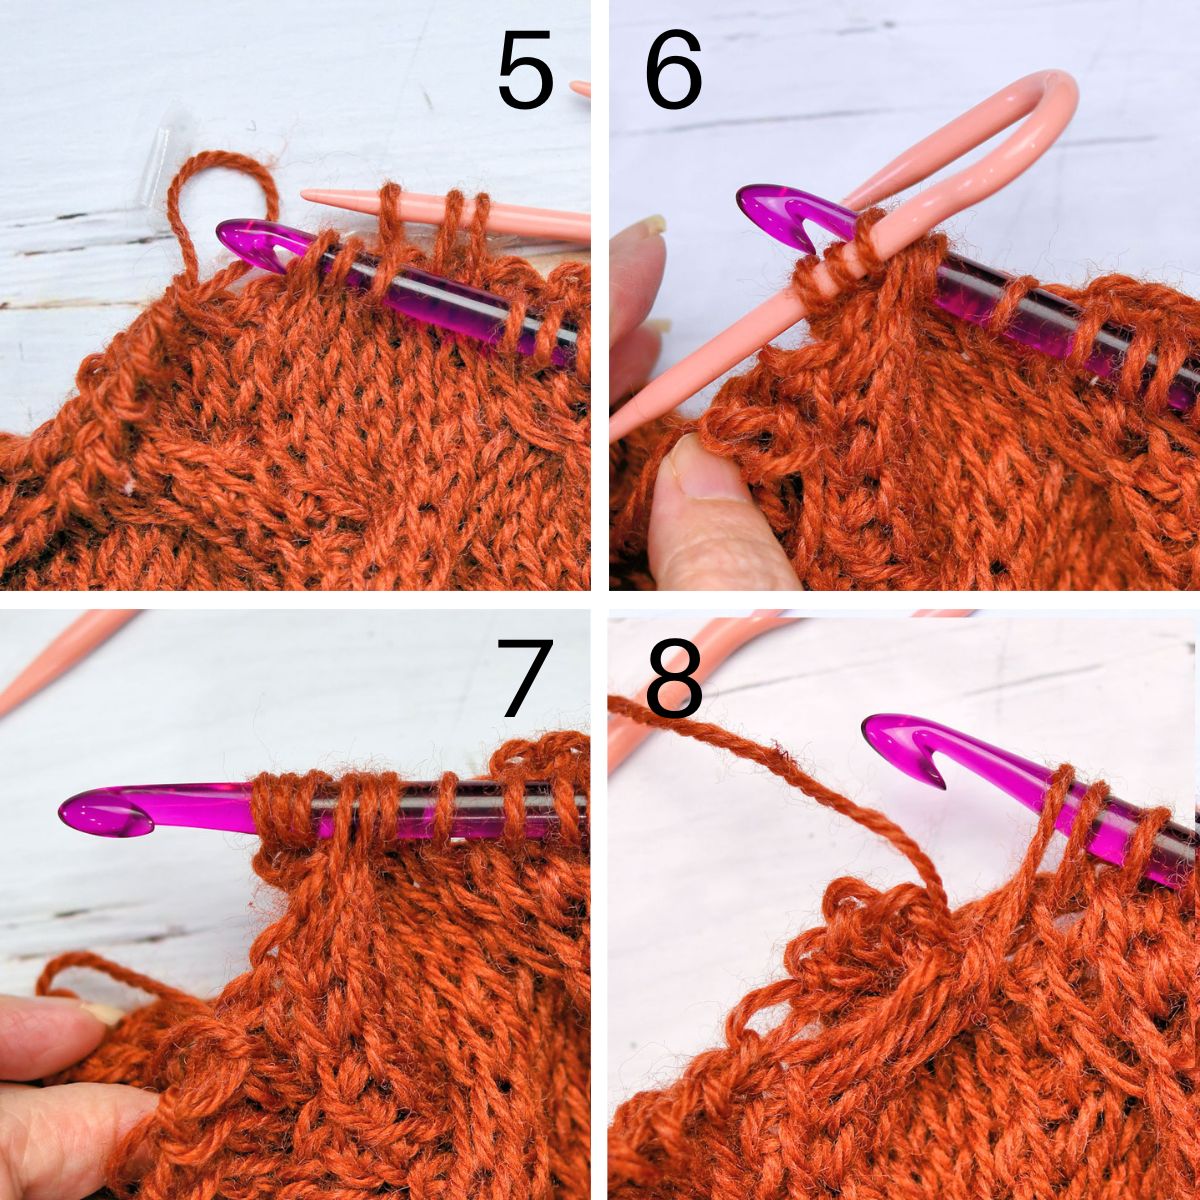
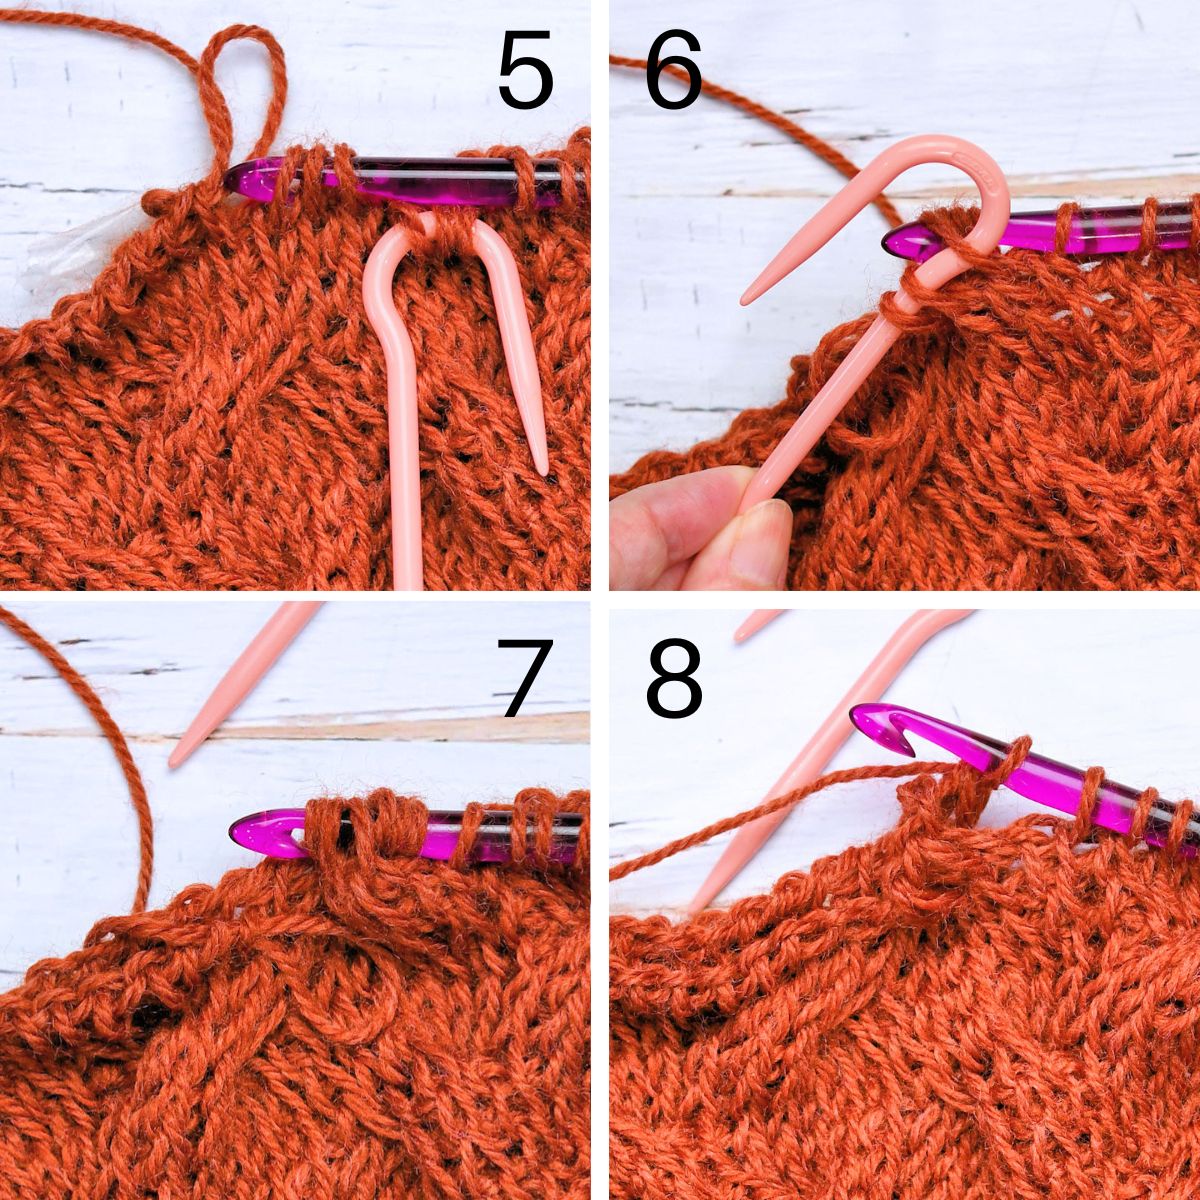
Right Leaning Cable (rlc): On closing, extend first loop (working loop) and remove from hook, with non-hook hand, pinch next three stitches and place cable holder through next three stitches, move cable holder to back of work, remove all six loops from hook, place pinched stitches back on hook, place stitches on cable holder back on hook (stitches are now crossed), place working loop back on hook and tighten as necessary, [yarn over, pull through two loops on hook] 3 times, chain one, [yarn over, pull through two loops on hook] 3 times.

Tunisian Crochet Left Leaning Cable
Left Leaning Cable (llc): On closing, extend first loop (working loop) and remove from hook, with non-hook hand, pinch next three stitches and place cable holder through next three stitches, drop cable holder to front of work, remove all six loops from hook, place pinched stitches back on hook, place stitches on cable holder back on hook (stitches are now crossed), place working loop back on hook and tighten as necessary, [yarn over, pull through two loops on hook] 3 times, chain one, [yarn over, pull through two loops on hook] 3 times.

Abbreviations
This Tunisian crochet pattern is written in US crochet terminology.
ch=chain; lp(s)=loop(s); rep=repeat; sc=single crochet; sk=skip; sl=slip; st(s)=stitch(es); yo=yarn over.
The border is made in standard back loop single crochet ribbing and the rest of the blanket is made in Tunisian crochet.
Tunisian Crochet Curling
The Knit stitch is going to curl. A LOT. It’s the nature of the beast. Not only does Tunisian crochet curl, but this project has an overwhelming amount of curling. It has so much curling that it was necessary for me to take extra steps.

After a few rows of curl annoyance, I took some spare yarn and a regular crochet hook to make a little bit of a temporary base at the bottom.
With the wrong side of the blanket facing me, I did a row of single crochet along the bottom edge. Then, I turned and did a row of back post single crochet. It was enough to help with the curl until I could get the blanket finished and put on the Ribbing border.
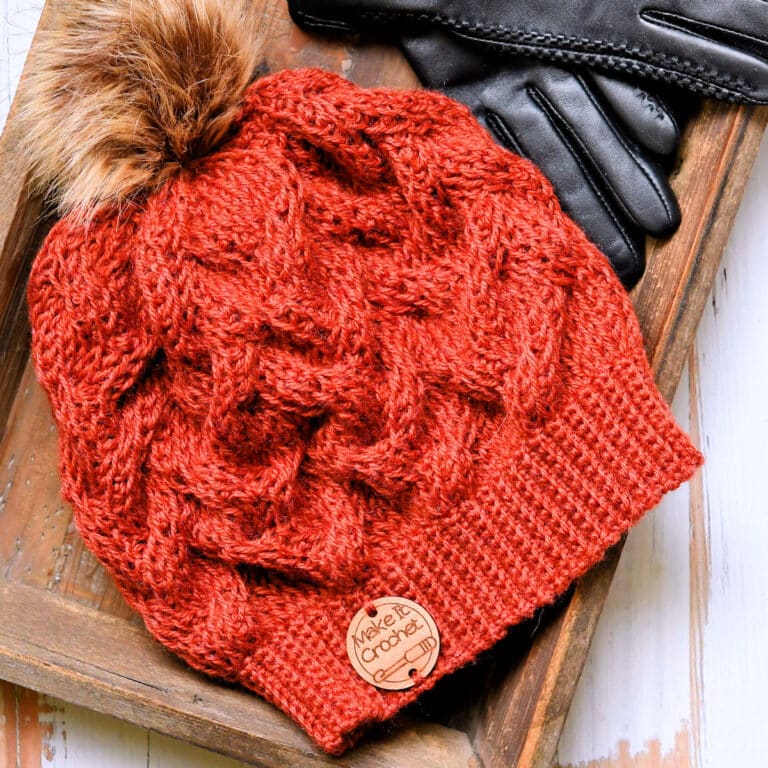
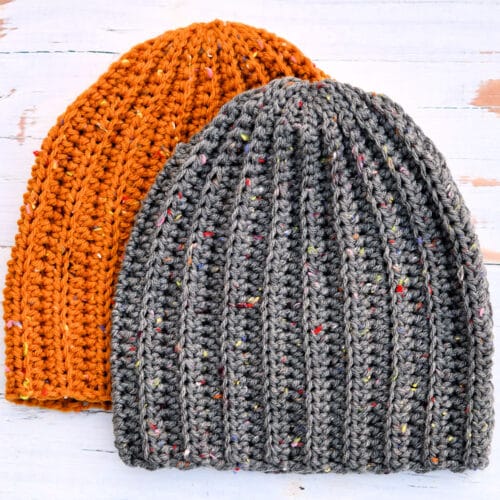
Another Tunisian Crochet Cable Project
If you’re not quite ready for a project this big, you can try out this technique in a Beanie instead. Get the Tunisian Crochet Pattern Cable Hat here.

Free Crochet Pattern Instructions
Row 1:
A: With Tunisian crochet hook, ch 111, work Foundation (see Special Stitches above): 111 sts now on Tunisian Crochet hook.
B: Ch 1, [yo, pull through 2 lps on hook] across. 1 lp remains on hook which counts for the first st of the next row here and throughout.
Rows 2-4:
A: Sk first vertical bar, tks (see Special Stitches above) across.
B: Ch 1, [yo, pull through 2 lps on hook] across.
Row 5:
A: Sk first vertical bar, tks across.
B: Ch 1, [yo, pull through 2 lps on hook] 3 times, *rlc (see Special Stitches above), [yo, pull through 2 lps on hook] 6 times, rep from * until 6 lps remain on hook, [yo, pull through 2 lps on hook] 5 times.
Rows 6-7:
Note: On the first row after a cable crossing here and throughout, pull up on the stitches so you can see them and keep them in place. Ignore the extra chain in the center of the cable.
A: Sk first vertical bar, tks across.
B: Ch 1, [yo, pull through 2 lps on hook] across.
Row 8:
A: Sk first vertical bar, tks across.
B: Ch 1, [yo, pull through 2 lps on hook] 3 times, *[yo, pull through 2 lps on hook] 6 times, llc (see Special Stitches above), rep from * until 6 lps remain on hook, [yo, pull through 2 lps on hook] 5 times.
Rows 9-10:
A: Sk first vertical bar, tks across.
B: Ch 1, [yo, pull through 2 lps on hook] across.
Rows 11-100: Rep rows 5-10.
Row 101: Rep row 5.
Rows 102-104: Rep rows 2-4. Do not fasten off.
Binding Off
Work slip stitch as for Tunisian Knit Stitch across. (A slip stitch is made by inserting hook in stitch indicated in a Knit Stitch orientation, yarn over, pull through and pull through the loop on hook.) Do not fasten off.
Border Set Up
With regular crochet hook (you will no longer need the Tunisian crochet hook), ch 1, *3 sc in corner, work 99 sc evenly across the top, 3 sc in next corner, 103 sc evenly across side, 3 sc in next corner, 99 sc evenly across bottom, 3 sc in corner, 103 sc on opposite side, sl st to first sc and sl st into next sc. Do not fasten off.
The border is now worked in rows with only five stitches, worked perpendicular to the current border set up. These are just tiny little rows. Don’t try to turn the entire blanket over for each row. You just need to flip over a little bit of the blanket back and forth.
Note: In the following instructions, the initial round of sc is called the Border Set Up and the Ribbing Rows are called the Border.
Beginning Short Row Corner
A short row is a section of the Border that forms a little wedge to reach around a corner. It mimics the same type of increase that you would normally see in standard borders where each corner has increases.
If you continue with the Ribbing without this Short Row Corner, you will end up having too many rows and the lower portion of the ribbing could bubble up because, essentially, there are too many stitches there.
Row 1: Working in second sc of corner, ch 6, sc in second ch from hook and in remaining 4 ch, sl st in same sc of Border Set Up, turn: 5 sc.
Row 2: Working in back loops here and throughout all of Border Ribbing, sk 1 sc of Border, sc in remaining 4 sc of Border, turn: 4 sc.
Row 3: Ch 1, sc in 3 sc of Border, leaving remaining sc unworked, turn: 3 sc.
Row 4: Sk 1 sc of Border, sc in remaining 2 sc of Border, turn: 2 sc.
Row 5: Ch 1, sc in next 2 sc of Border, work 1 sc in each end st of previous 3 rows of Border, sl st in same second sc of Border Set Up and sl st in next sc of Border Set Up, turn. Do not fasten off.
Continue Ribbing
Row 6: Sc in 5 sc of Border, turn: 5 sc.
Row 7: Ch 1, sc in 5 sc of Border, sk 1 sc of Border Set Up, sl st in next sc of Border Set Up: 5 sc.
Rep rows 6-7 across one side, ending with sl st in first sc of next 3-sc corner of Border Set Up.
Next row: Sc in 5 sc of Border, turn: 5 sc.
Next row: Ch 1, sc in 5 sc of Border, sl st in next sc (second sc of corner) of Border Set Up: 5 sc. Do not fasten off.
Next Short Row Corner
Next row: Sk 1 sc of Border, sc in remaining 4 sc of Border, turn: 4 sc.
Next row: Ch 1, sc in 3 sc of Border, leaving remaining sc unworked, turn: 3 sc.
Next row: Sk 1 sc of Border, sc in remaining 2 sc of Border, turn: 2 sc.
Next row: Ch 1, sc in next 2 sc of Border, work 1 sc in each end st of previous 3 rows of Border, sl st in same second sc of Border Set Up and sl st in next sc of Border Set Up, turn. Do not fasten off.
Continue Ribbing and Short Row Corners around, ending with a sl st in 2nd sc of corner of the first corner of Border Set Up. Fasten off.
Finishing
With yarn needle, seam the first row of the border to the last row of the border. Weave in all ends securely.

Twitter | Facebook | Pinterest
All the patterns at Make It Crochet are free. Since many of you have asked how to help with the costs of running a site like this, I’ve made all the patterns into print-ready PDFs and the cost is about the same as a cup of coffee. Every little bit helps.
TERMS: To my fellow crafters, you have my permission to use my patterns to make and sell your projects* anywhere you like. You cannot use my images to sell your projects, though. You must take photos of your own work. All patterns have been tested but mistakes can happen. If you find a mistake, please let me know. Everything at MakeItCrochet.com is protected by copyright to Kim Guzman. Other than the permissions previously given, no one other than Kim Guzman has permission to: reproduce, copy, publish or distribute this pattern, its parts or photos in any way or form, including, but not limited to, translations into foreign languages & video production.
*Not intended to be blanket permission for mass production.