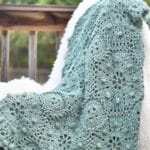
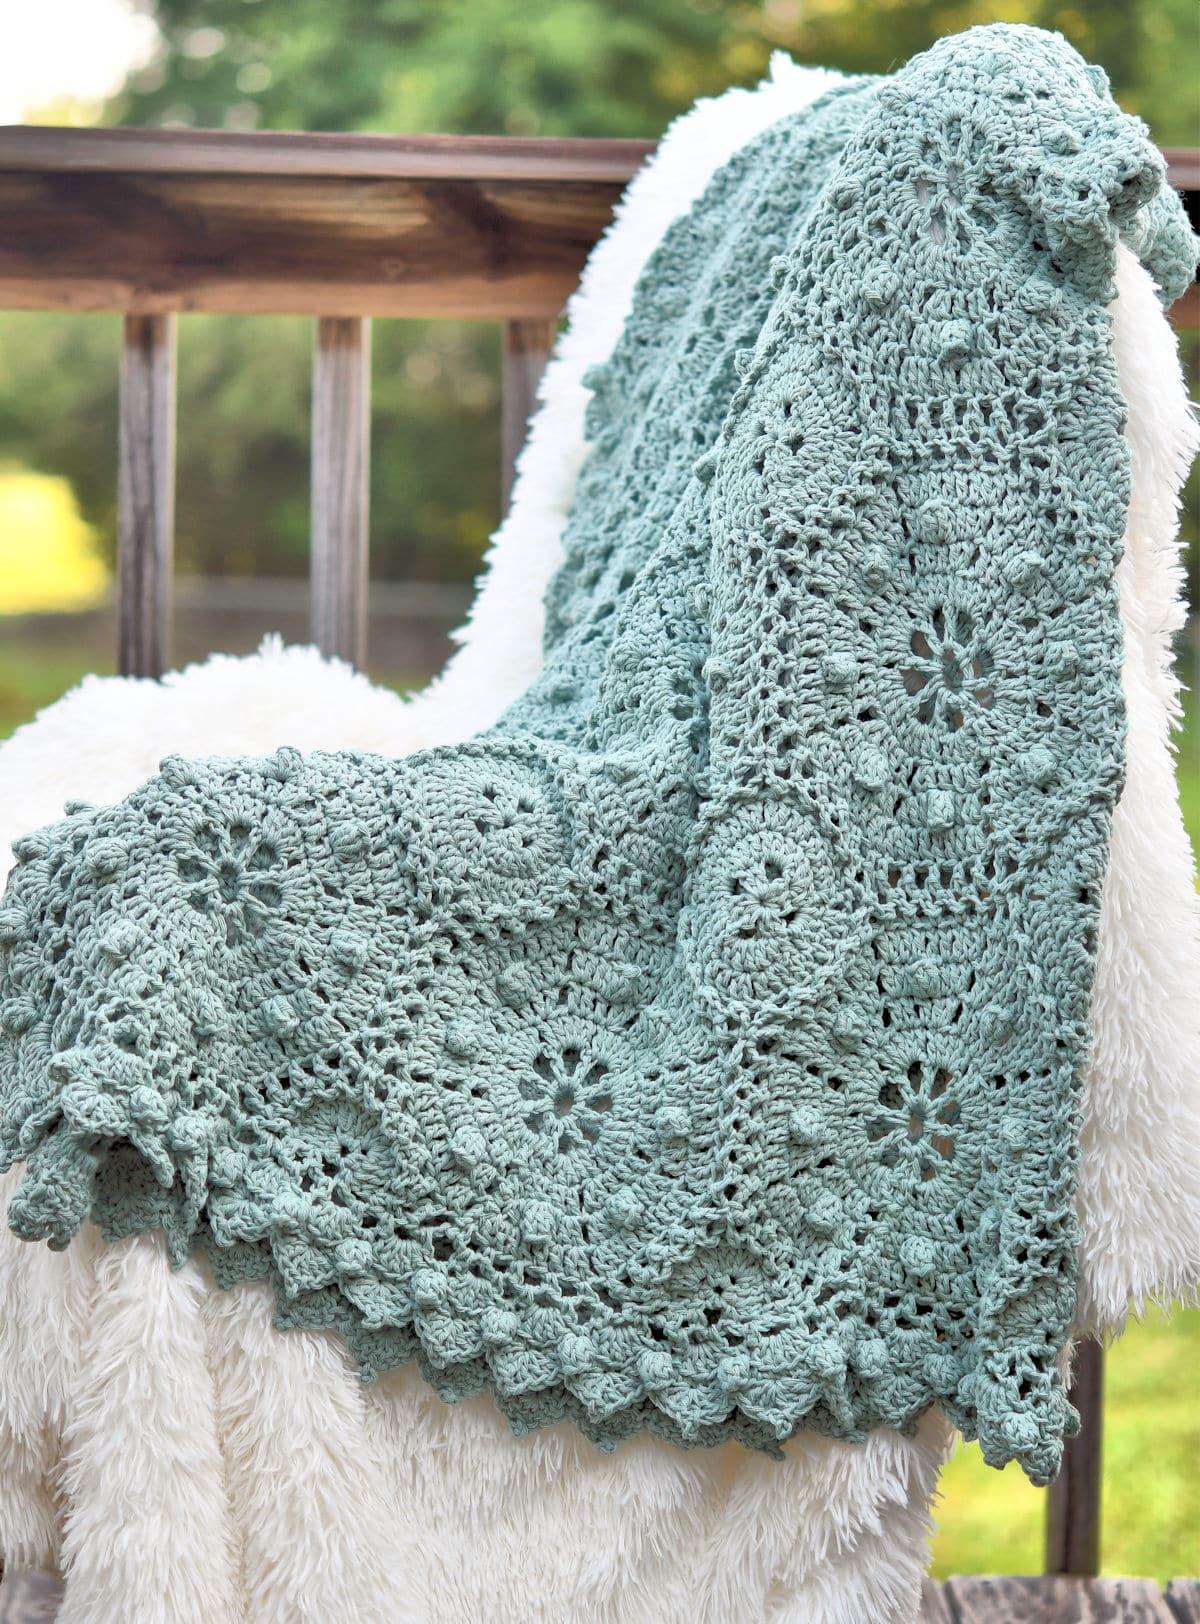
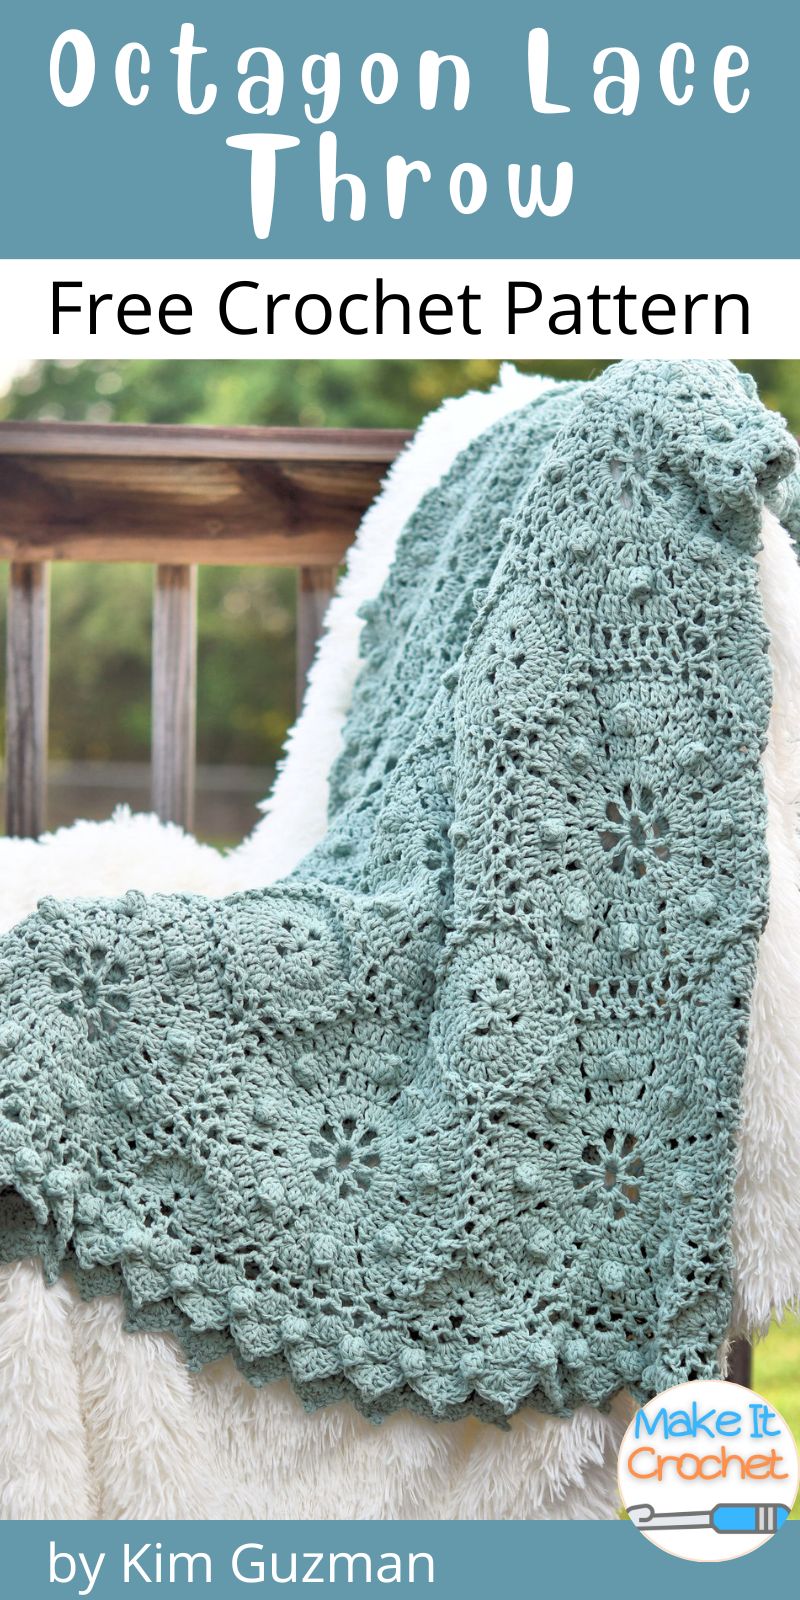
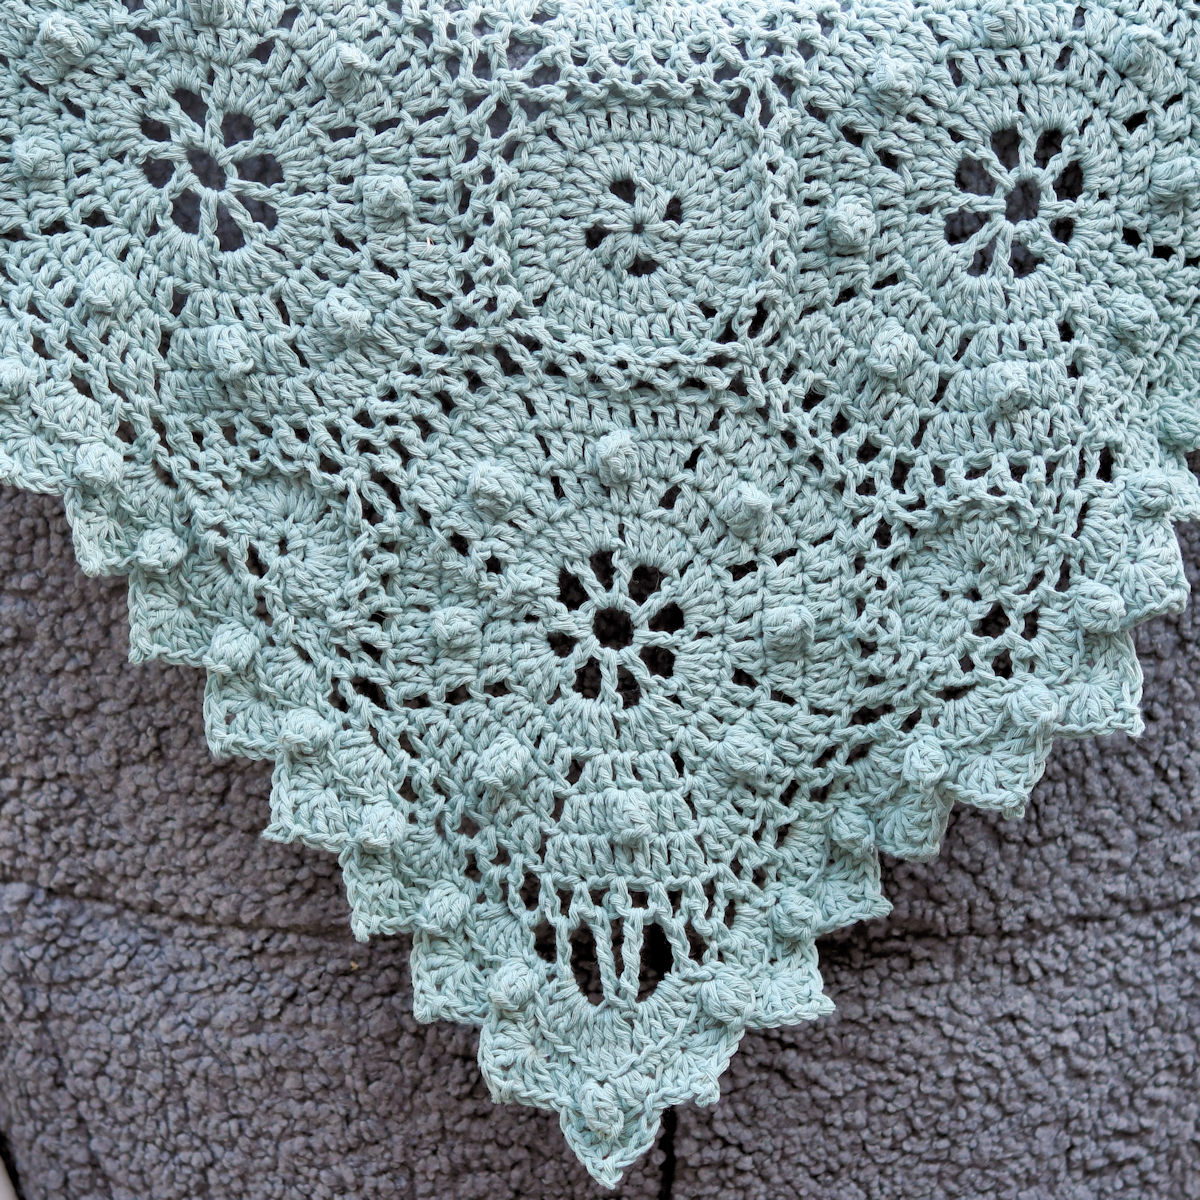
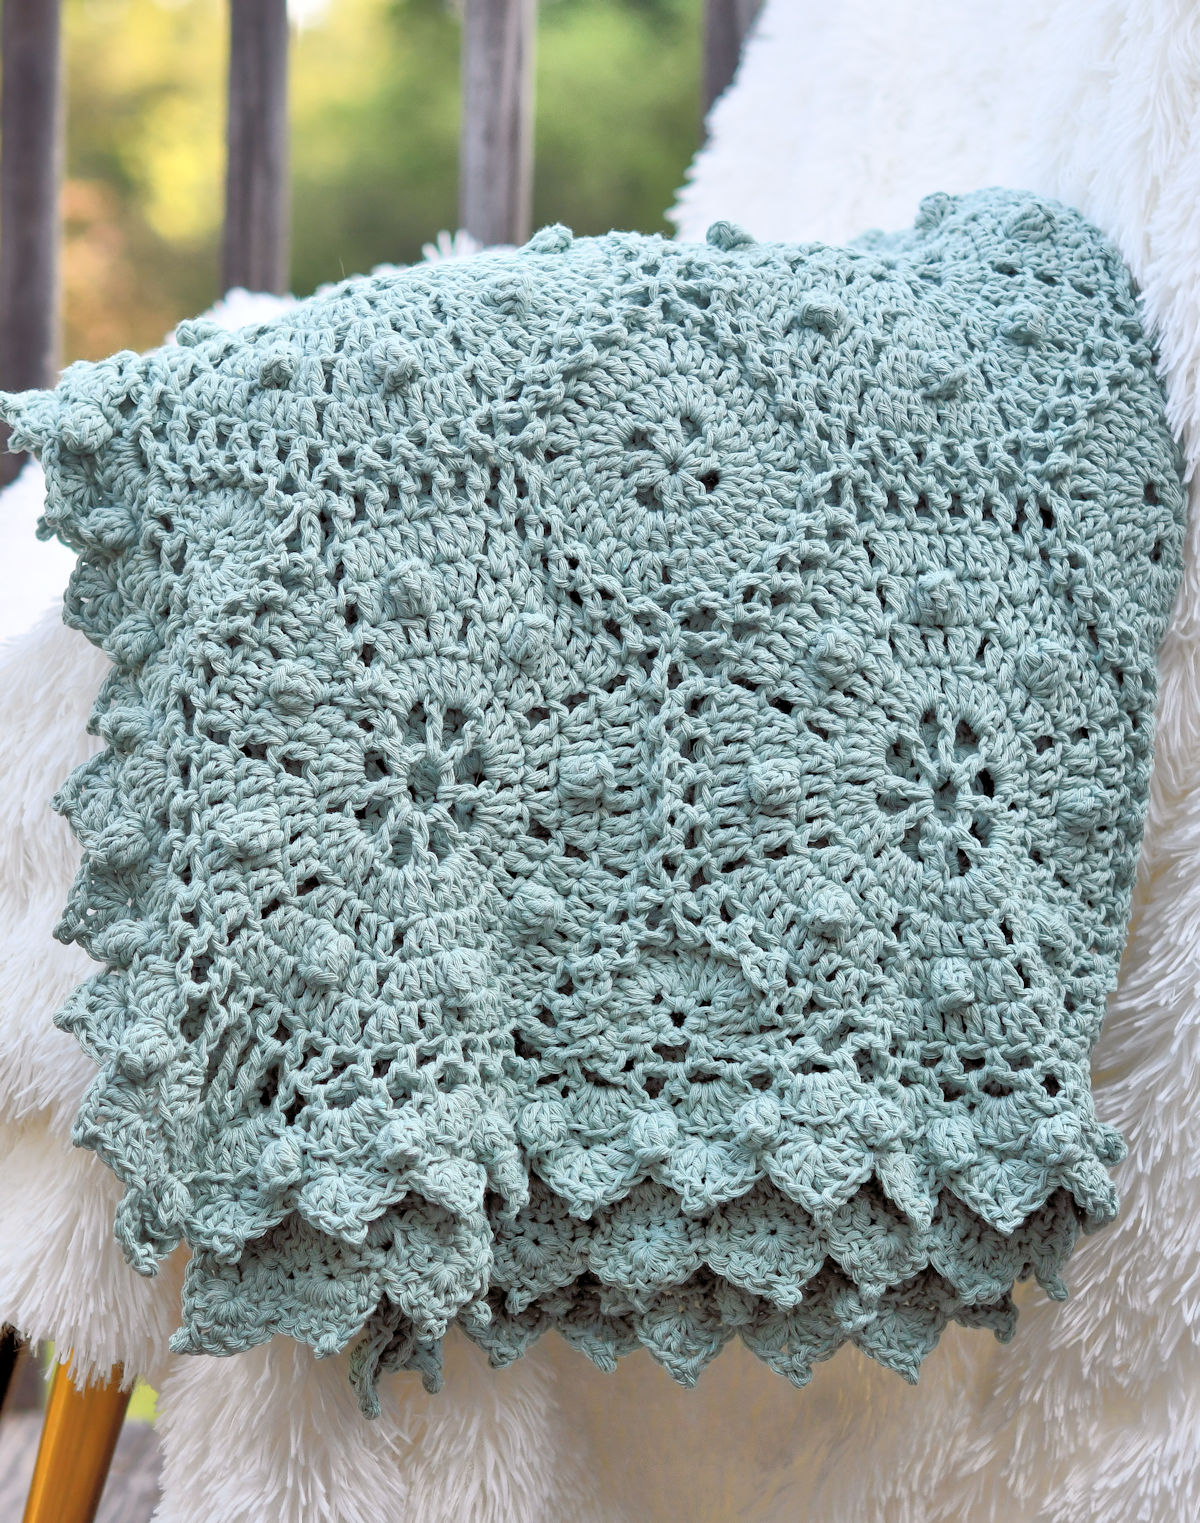
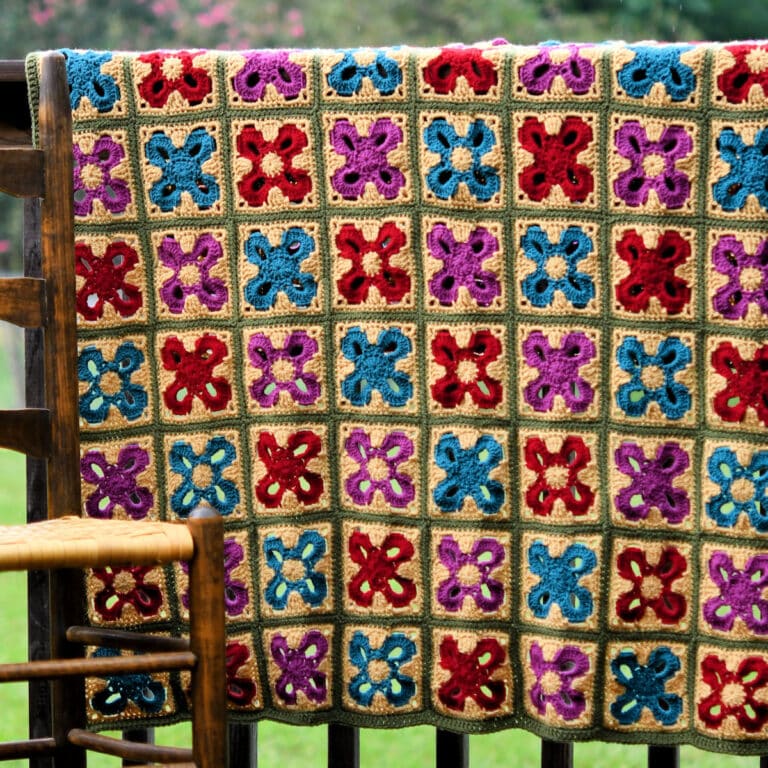
This romantic Octagon Lace Throw is a vintage-inspired free crochet pattern that stretches your creative wings. Three different motifs, using join-as-you-go (JAYGO) method, exemplifying crochet lace.
“Octagon Lace Throw” free crochet pattern by Kim Guzman, © Jun. 2026 All rights reserved.
Technique: Regular Crochet.
Skill Level: Challenging, requires patience.

Crochet Pattern At A Glance
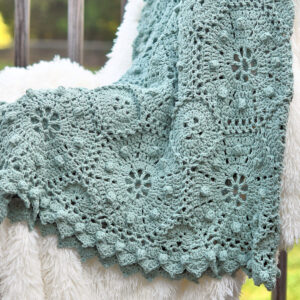
Octagon Lace Throw
Designer: Kim Guzman © 2022-2026. All rights reserved.Rate the Pattern
Yarn
- Lion Brand “Re-Up Bonus Bundle”, 70% recycled cotton and 30% recycled polyester, size 4 worsted weight yarn; 651 yds per cone: used 5 cones color Sea Glass. Note that I barely used the 5th cone.
Other Materials
- Suggested Crochet Hook Size I-9 (5.5mm) or hook needed to meet gauge.
- Yarn Needle for weaving ends.
Instructions
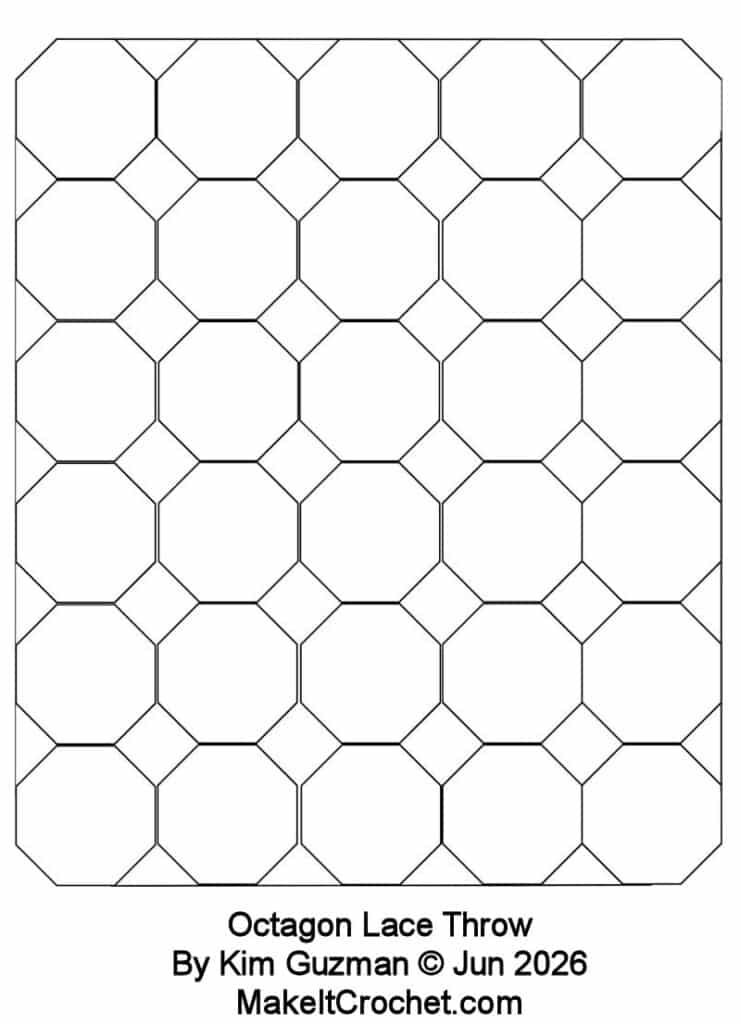
- Make the first Octagon with chain spaces around.
- Using the schematic line drawing, join the next Octagon on one side with join as you go (JAYGO) method.
- Add two more Octagons and then make the Square, joining all four sides in the opening created by joinign the four Octagons.
- Continue joining all the Octagons (30 total) and Squares (20 total).
- Work the Filler Triangles (20 total) along the openings on the side to "square off" the sides of the blanket.
- Work the Border, which will also fill in the four triangles at the corners of the Blanket.
- Fasten off and enjoy.
Full Free Crochet Pattern Below

This is a free crochet pattern and the written instructions are below. If you prefer a printable download, a PDF is also available for purchase.
My Crochet Pattern Notes
I’ll admit that, in the 80s, when I started getting Crochet Fantasy magazine, it was always the most challenging designs that caught my eye. They gave a skill level right on the photo page of each project. I have tried for years to make my designs more “mainstream” so more people could make them. But, I’m nearing the end of my design career and trying to just do what I want to do, no rules.
This blanket is quite heavy. It reminds me of a heavy cotton quilt. If you want something lighter, you’ll need a different fiber. Acrylic or perhaps a lovely cotton blend. Since this is made in motifs, you could also use a lighter weight yarn then simply make more motifs, as desired.
This is a project made of three different motifs. The motifs themselves are fairly easy. It’s the joining that requires patience and the reason for the skill level of challenging. The Border requires some patience as well.
If you’ve never done the join-as-you-go method, you’ll definitely need to practice. But, it’s easy enough to practice. If you don’t get it right the first time, you can simply take out that last round and give it another go. Joining a bunch of the same motif isn’t too bad, but this is three different shapes. Give yourself some time.
Please read everything before you get started.
Pin It For Later
Finished Size
47″ x 55″.
Yarn
Lion Brand “Re-Up Bonus Bundle”, 70% recycled cotton and 30% recycled polyester, size 4 worsted weight yarn; 651 yds per cone: used 5 cones color Sea Glass. Note that I barely used the 5th cone. It was only necessary for one side of the final round of the Border. Literally, one side. You may get lucky and not need the 5th cone at all.

“Re-Up Bonus Bundle” is classified as a worsted weight (size 4) yarn and is currently available in 12 shades.
Drew Emborsky (The Crochet Dude) carries this yarn at his shop in Michigan, The Bear & Fox Yarn Den.
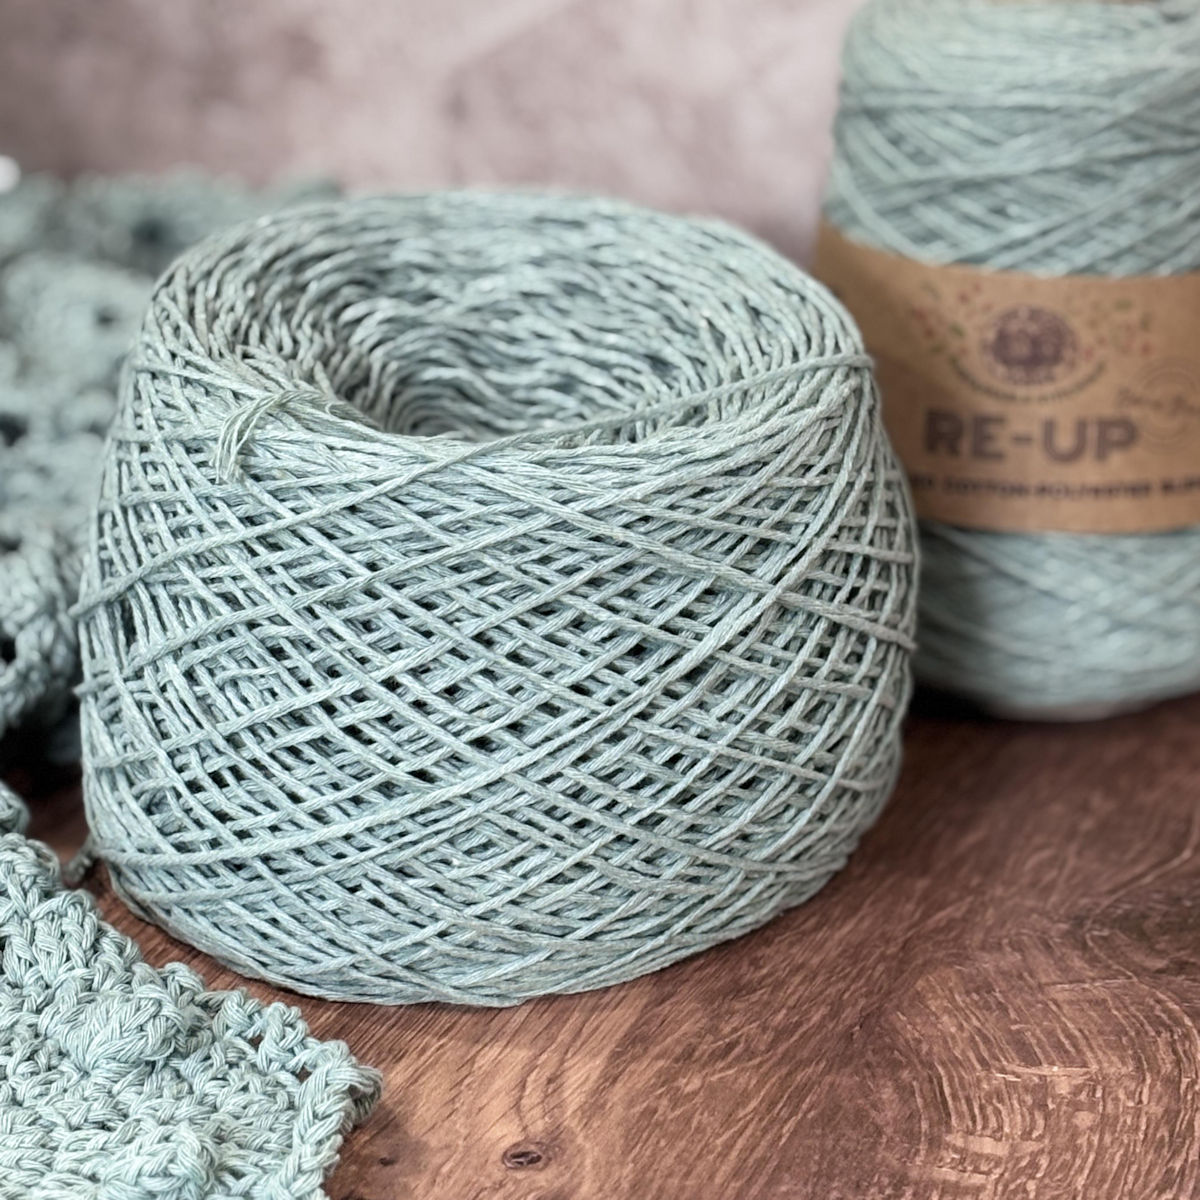
I didn’t like working directly off the cone so I wound the entire cone into a cake. I highly recommend this method if you find yourself fighting the cone of yarn too.
Other Materials
Suggested Crochet Hook Size I-9 (5.5mm) or hook needed to meet gauge.
Yarn Needle for weaving ends.
Gauge
One octagon is about 8.5″ across from straight edge to straight edge. One square is about 5″ across.
Working at a different tension may require additional materials.
Special Stitches
Alternative Beginning Double Crochet: I really like the look of 2 stacked single crochet to replace the double crochet at the beginning. It produced a better, more sturdy beginning stitch than simple chains. A standing double crochet would also be useful. If you prefer the standard chain 2 or chain 3 to begin a round, you can replace each stacked single crochet with those chains.
Popcorn: Ch 1, work 5 double crochet in the indicated stitch, remove the hook from the last double crochet and pinch the loop of that double crochet with your non-hook hand, place the hook in the chain 1 and through the loop being pinched, pull the pinched loop through the chain 1 to complete.
This is a Popcorn I found on a vintage pattern recently and I really like it better than the typical, pull the loop through the top of the first double crochet.
Double Treble Two Together (dtr2tog): *Yo 3 times, insert hook in ch-3 sp, yo, pull lp through, [yo, pull through 2 lps] 3 times (2 lps remain on hook), rep from * in next ch-3 sp, yo, pull through 3 lps on hook.
Back Loop Single Crochet (BLsc): Make single crochet in back loop only of double crochet.
Back Loop Double Crochet (BLdc): Make double crochet in back loop only.
Other Abbreviations
This crochet pattern is written in US crochet terminology.
ch=chain; dc=double crochet; dtr=double treble crochet; rep=repeat; sc=single crochet; sk=skip; sl=slip; sp(s)=space(s); st(s)=stitch(es); tr=treble crochet.
All numbers after the colon at the end of an instruction are stitch counts. Use the stitch count to check your work.
New Pattern Free PDF Download Weekend
This pattern is made free through ad support below, but the PDF download for the Octagon Lace Throw pattern is available for free this weekend only. This promotion ends at 11:59pm CST, Sunday, June 7.
Click on the link near the top of this post to Ravelry, place the PDF in your cart. Do not click Buy Now. Put it in your cart. Add the code OCTAGON626, then check out once your total changes to $ZERO. There are no refunds so please do not click checkout unless your total is $ZERO. Enjoy your free pattern!
Free Crochet Pattern Instructions
There are three different motif shapes included for this project below. The instructions indicate the full last round with the chain spaces. But, this is a join-as-you-go project, with acronym JAYGO. With the join-as-you-go method, the motifs are joined on the last round by substituting the center chain of a chain space with a slip stitch in the corresponding chain space of the prior motif.
Joining
The instructions will say something like [sc, ch 3], however, when you want to join a side together, you will [sc, ch 1, sl st to the prior motif, ch 1, sc back in the current motif]. You go back and forth, back and forth, until those two sides are joined.
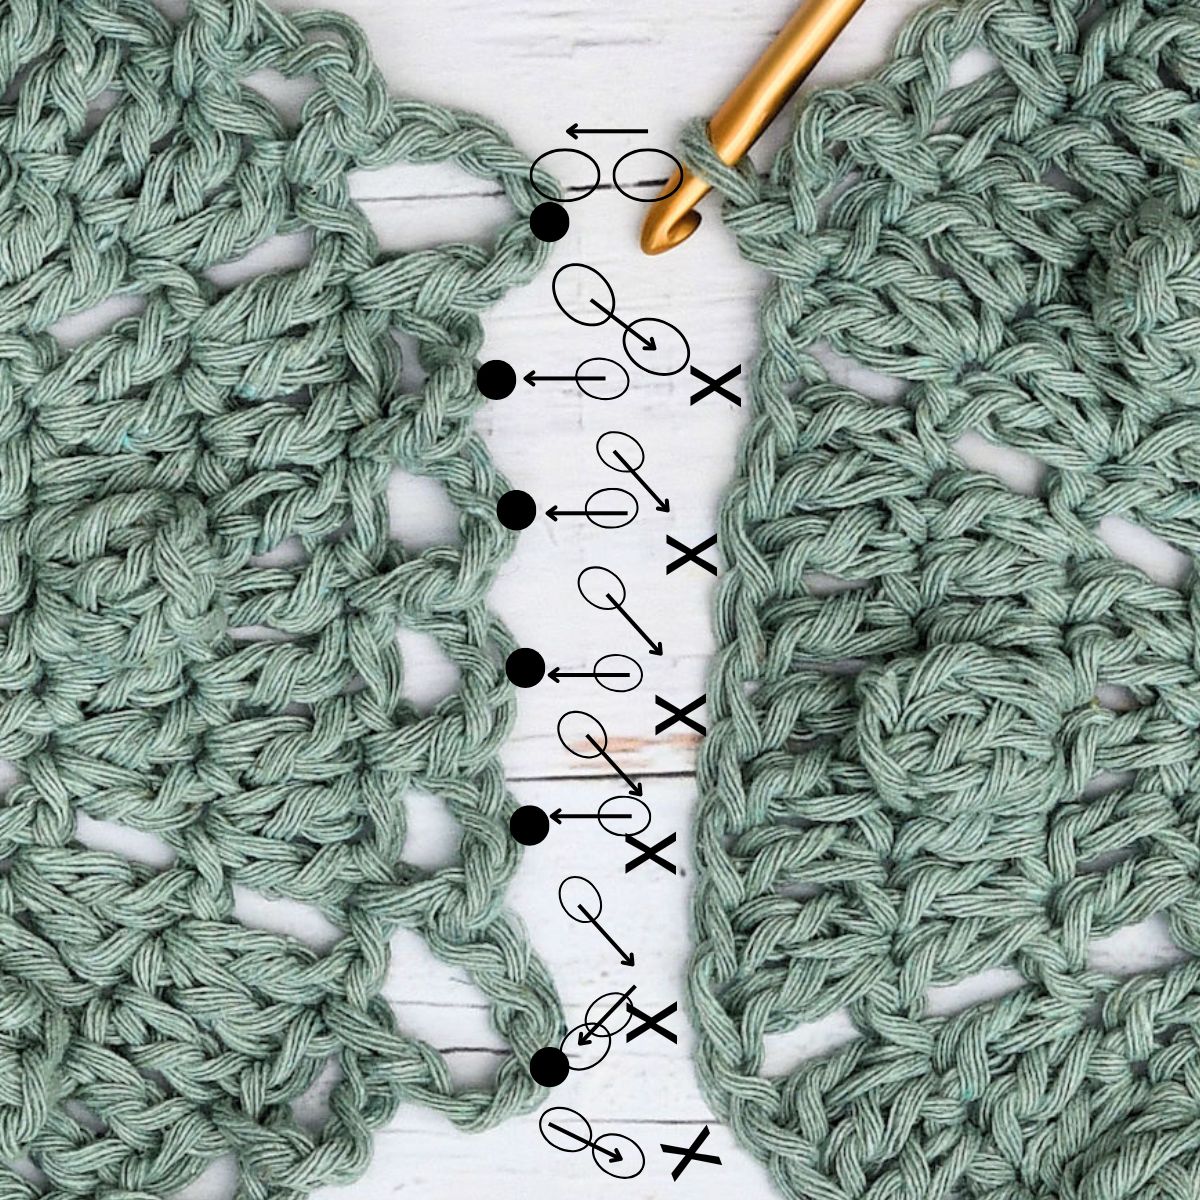
Try it first with the Octagons. Complete one entire Octagon, then make the next Octagon. When starting the final round of the next Octagon, you’ll join one of the sides together. It doesn’t matter which one. You have 8 sides. If you mess it up, try again. Keep trying until you’re happy with the method.
Once you’ve joined four Octagons, you’ll have a square space in the center where you will place the Square Motif. All 4 sides of a Square Motif will be joined to the others, so you won’t have a chance to make a plain, full Square at all. When you join the corners, where there are 5 chains, chain 2, slip stitch to the slip stitch join that’s already there, then chain 2 and continue.
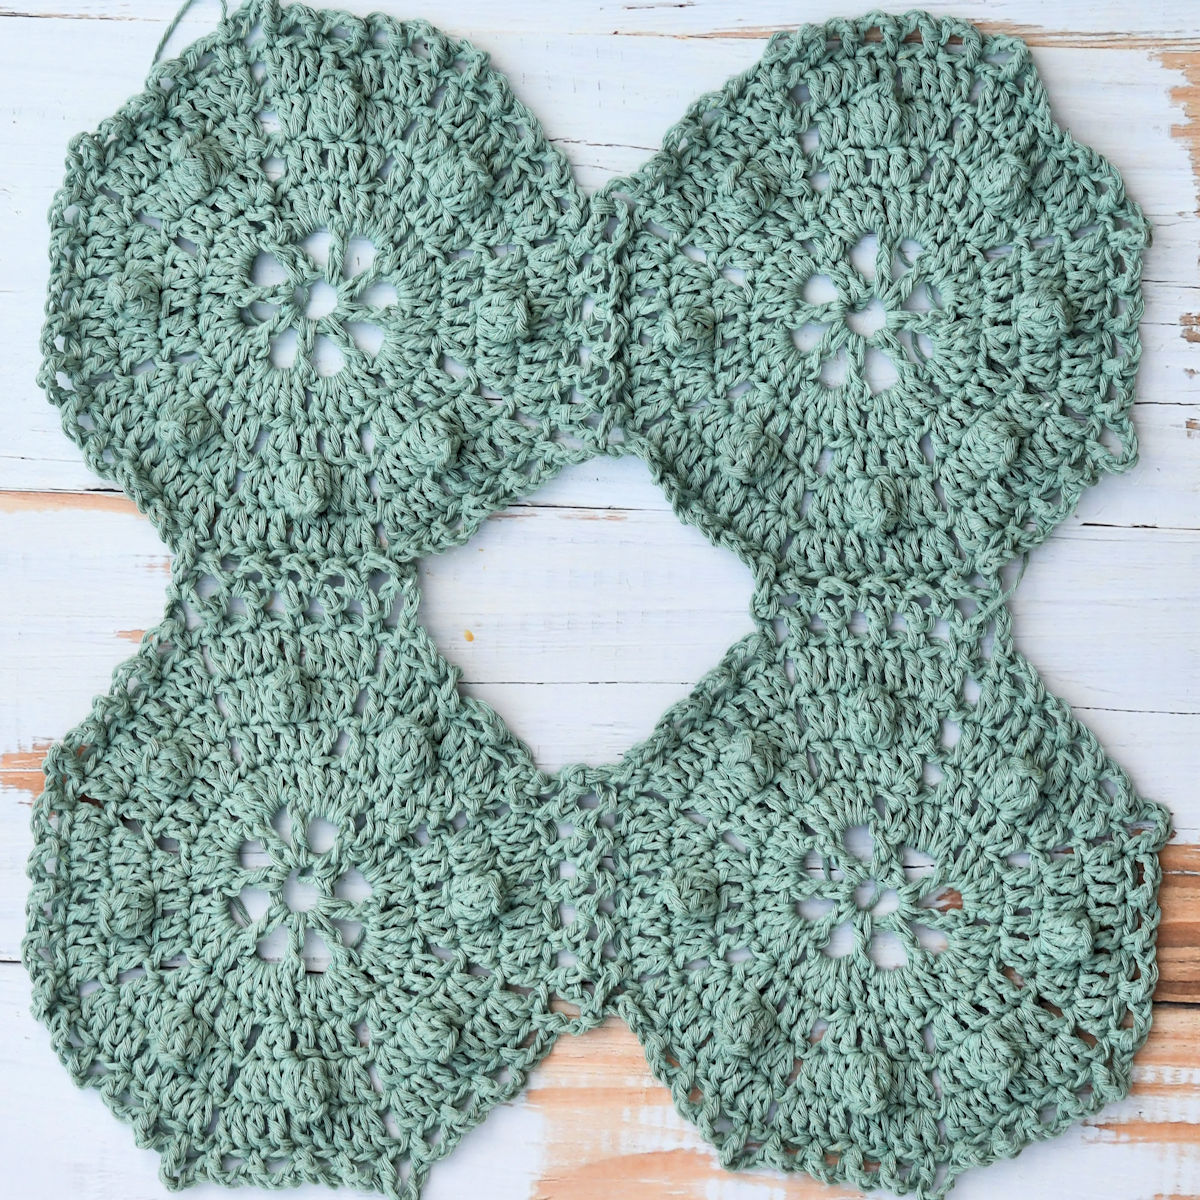
Once all the Octagons and Squares are completed according to the assembly chart, the Filler Triangles can be added.
The instructions aren’t written in step by step fashion for the joining. It would be way too confusing when joining one side of the octagon, skipping two sides, joining the next side, etc. You will need to view the assembly chart and join back and forth the same way for all required sides until complete.
I have marked this pattern as a challenging pattern, not because the motifs are difficult but because the joining is a challenge. Join as you go is easy enough when there’s only one motif. There are several videos on YouTube teaching you to join standard squares. With this, working in join as you go when there are three different motifs becomes a challenge and you need to concentrate and view your work frequently to make sure that you’ve joined the correct sides. I had to take mine out a couple of times myself. Don’t weave in your ends until you’re certain you have joined the correct straight edges.
Make each motif all the way through, at least once, so you can familiarize yourself with the chain spaces and how they will fit on the joining round. Once you’re ready, simply take out that last round and work it again while joining.
Alternatively, you could make the individual motifs and leave a little bit more yarn at the cut than normal just to make sure you have enough. Don’t weave in the ends. Then, when you get ready to join them, rip back until you reach a spot to join and complete the join. This would enable you to make the motifs while you’re on the go. Just don’t weave in the ends, because you’re going to have to rip back on the last round.
Octagon (Make 30)
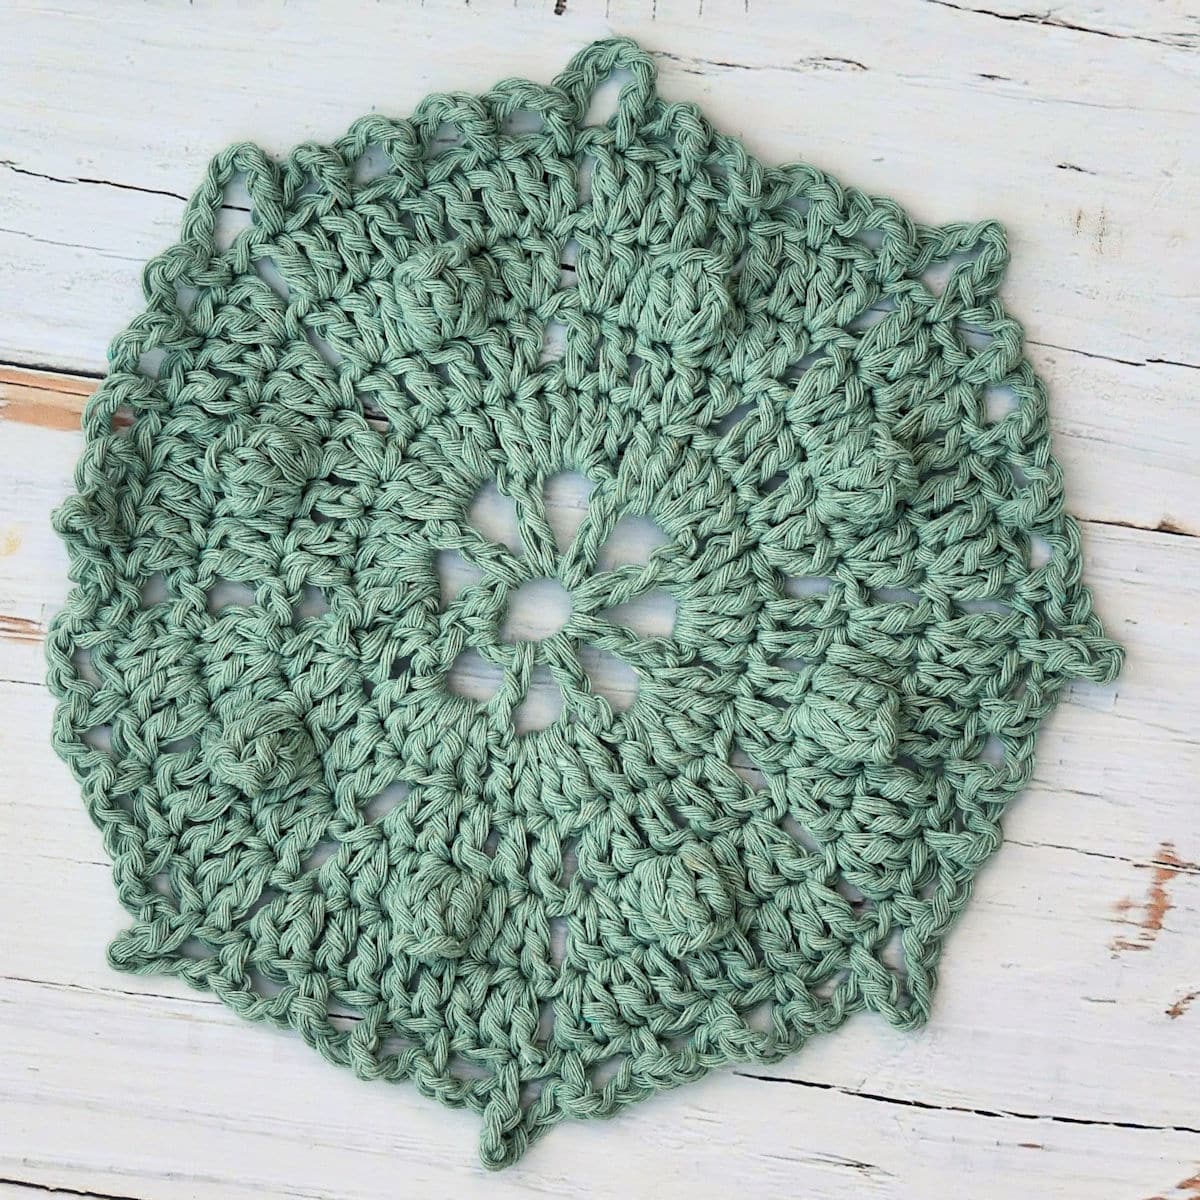
Round 1: Ch 8, sl st to first ch to form a ring, ch 1, 2 stacked single crochet (see Special Stitches above) in ring (counts as first dc here and throughout), *ch 3, dc in ring, rep from * 6 times, ch 3, sl st to top of first dc: 8 dc and 8 ch-3 sps.
Round 2: Ch 1, 2 stacked single crochet in same dc as joining, *4 dc in ch-3 sp, dc in next dc, rep from * 6 times, 4 dc in last ch-3 sp, sl st to top of first dc: 40 dc.
Round 3: Ch 1, 2 stacked single crochet in same dc as joining and dc in same dc as joining, *dc in next 3 dc, ch 1, sk 1 dc, 2 dc in next dc, rep from * to last 4 dc, dc in next 3 dc, ch 1, sk 1 dc, sl st to top of first dc: 40 dc and 8 ch-1 sps.
Round 4: Ch 1, 2 stacked single crochet in same dc as joining and dc in same dc as joining, *dc in next dc, popcorn (see Special Stitches above) in next dc, dc in next dc, 2 dc in next dc, ch 1, sk ch-1 sp, 2 dc in next dc, rep from * to last 4 dc, dc in next dc, popcorn in next dc, dc in next dc, 2 dc in last dc, ch 1, sk ch-1 sp, sl st to top of first dc: 48 dc and 8 popcorn and 8 ch-1 sps.
Round 5: Ch 1, 2 stacked single crochet in same dc as joining and dc in same st as joining, *dc in next 2 dc, dc in top of popcorn, dc in next 2 dc, 2 dc in next dc, ch 1, sk ch-1 sp, 2 dc in next dc, rep from * to last 6 sts, dc in next 2 dc, dc in top of popcorn, dc in next 2 dc, 2 dc in next dc, ch 1, sk ch-1 sp, sl st to top of first dc: 72 dc and 8 ch-1 sps.
Round 6: Ch 1, sc in same dc as joining, *[ch 3, sk 1 dc, sc in next dc] 4 times, ch 5, sk ch-1 sp, sc in next dc, rep from * to last 8 dc, [ch 3, sk 1 dc, sc in next dc] 4 times, ch 5, sk ch-1 sp, sl st to top of first sc, fasten off: 32 ch-3 sps and 8 ch-5 sps. Note: You won’t make any other motif with a full last round of chain 3 spaces. Sides of the motifs are joined as described in the Joining section. I know that I keep repeating myself but I’m concerned that someone will make every individual motif for an entire stack of motifs and then not realize they should have been joined.
Square (Make 20)
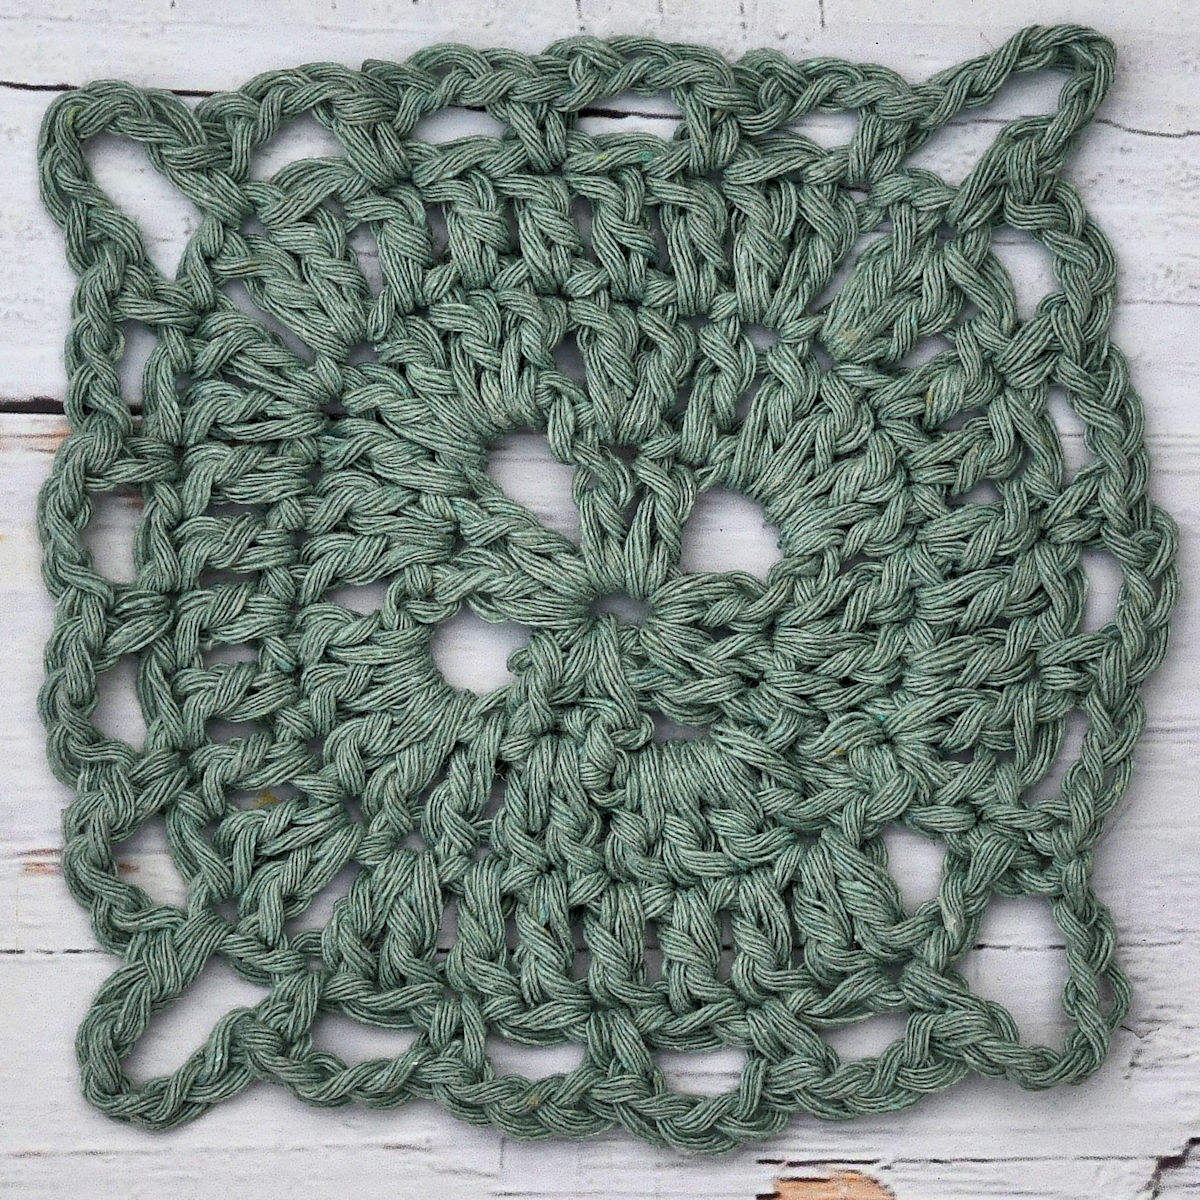
Round 1: Ch 4, sl st to first ch to form a ring, ch 1, 2 stacked single crochet in ring, dc in ring, ch 3, *[2 dc in ring, ch 3] 3 times, sl st to top of first dc: 8 dc and 4 ch-3 sps.
Round 2: Ch 1, 2 stacked single crochet in same dc as joining, 2 dc in next dc, *4 dc in ch-3 sp, dc in next dc, 2 dc in next dc, rep from * 2 times more, 4 dc in ch-3 sp, sl st to top of first dc: 28 dc.
Round 3: Ch 1, 2 stacked single crochet in same dc as joining and dc in same dc as joining, *dc in next 5 dc, 2 dc in next dc, ch 1, 2 dc in next dc, rep from * 2 times more, dc in next 5 dc, 2 dc in last dc, ch 1, sl st to top of first dc: 32 dc and 4 ch-1 sps.
Round 4: Ch 1, sc in same dc as joining, *[ch 3, sk 1 dc, sc in next dc] 4 times, ch 5, sk ch-1 sp, sc in next dc, rep from * to last 8 dc, [ch 3, sk 1 dc, sc in next dc] 4 times, ch 5, sk ch-1 sp, sl st to top of first sc, fasten off: 32 ch-3 sps and 4 ch-5 sps.
Filler Side Triangles (Make 20)
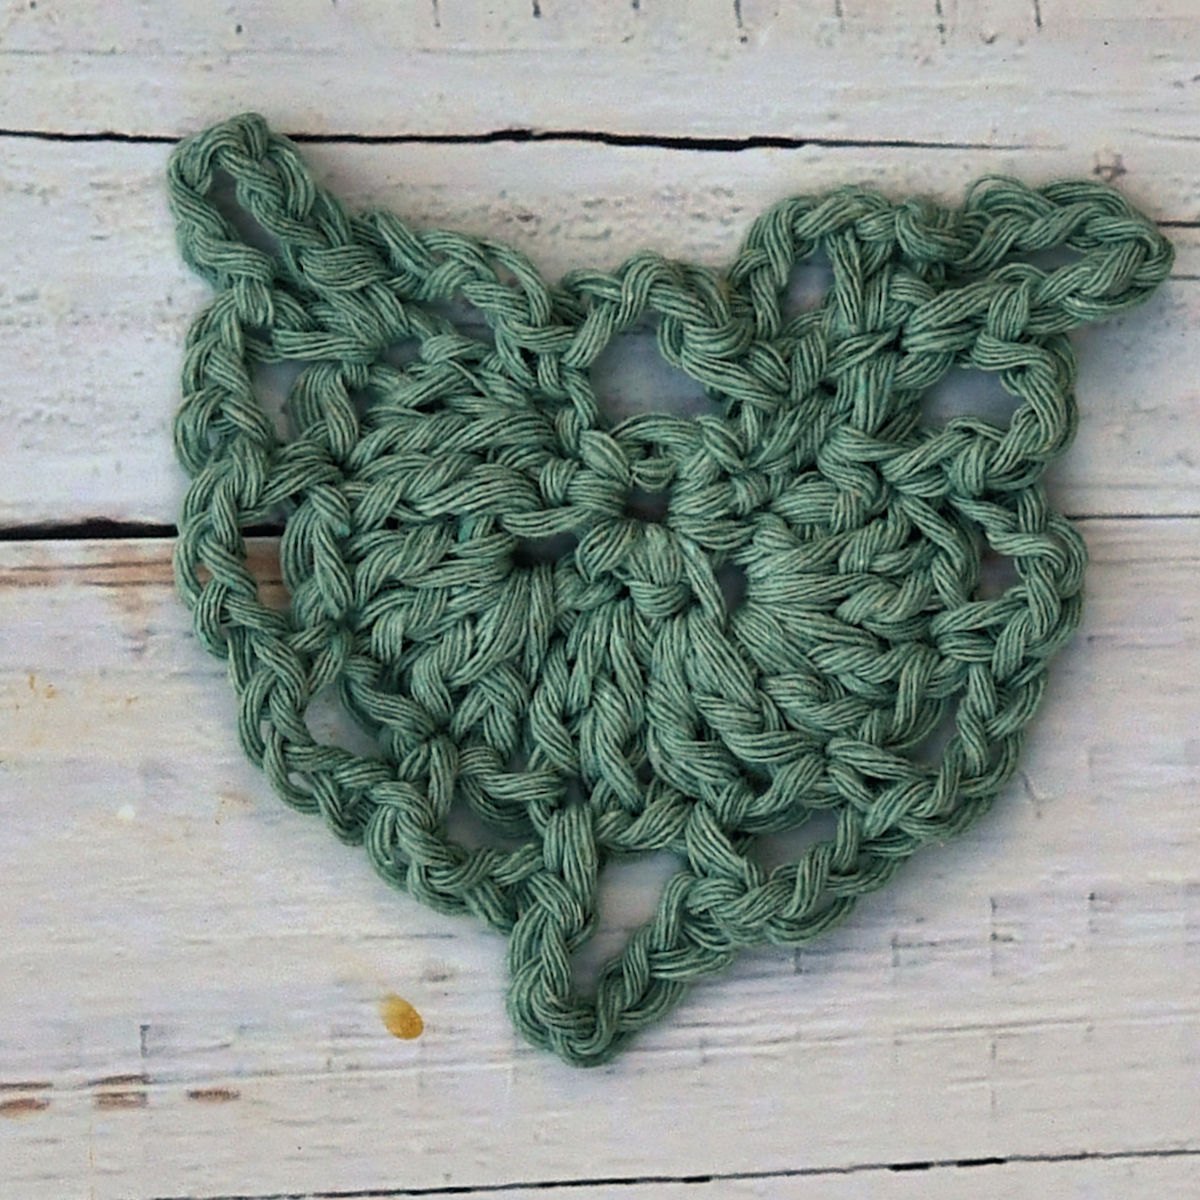
Row 1: Ch 4, sl st to form a ring, ch 1, [2 sc in ring, ch 3] 2 times, 2 sc in ring, turn: 6 sc and 2 ch-3 sps.
Row 2: Ch 1, 2 stacked single crochet in first sc, dc in same sc, dc in next sc, 4 dc in ch-3 sp, 2 dc in next sc, ch 1, 2 dc in next sc, 4 dc in ch-3 sp, dc in next sc, 2 dc in last sc, do not turn: 18 dc and 1 ch-1 sp.
Note: As with the Square, this filler Triangle’s last round will never be worked alone like this. The center chains will be replaced in join-as-you-go method. The final round is here solely so you can familiarize yourself with how it will be stitched but you will make the adjustments for joining.
Round 3: (Begin working in rounds.) Note: When joining, the “raw edge” side will be on the outer edge of the project. It forms the straight line of the blanket. Rotate motif so you are working along the raw edges of the rows of previous 2 rows, ch 1, sc in same corner, working evenly across the sides of those 2 rows: [ch 3, sc] 3 times (this creates 3 ch-3 sps, working from corner to corner along the raw edge, then continue around), ch 5, sc in position of last sc, [ch 3, sk 1 dc, sc in next dc] 4 times, ch 5, sk ch-1 sp, sc in next dc, [ch 3, sk 1 dc, sc in next dc] 4 times (last st in same position as first sc), ch 5, sl st to first sc, fasten off.
Border
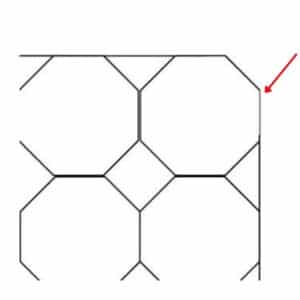
Note: Begin by marking the 8 ch-5 sps at each corner of the blanket. There are 2 ch-5 sps at the edge of each of the 4 outermost corner Octagons. Join with sl st to any first marked ch-5 sp of a corner Octagon. The diagram indicates the first marked space if you are right-handed. It will be the other side if you are left-handed.
Round 1: To make corner: ch 1, sc in marked ch-5 sp, ch 3, dc in next ch-3 sp, dtr2tog (see Special Stitches above) across next 2 ch-3 sps, ch 3, dc in next ch-3 sp, ch 3, sc in next marked ch-5 sp. Continue: [ch 3, sc in next sp] with last sc in marked ch-5 sp, work Corner. Continue working the sides with chain spaces and the corners as stated, sl st to first sc and sl st into ch-3 sp.
Note: The next round requires an odd number of ch-3 sps on each edge. Depending on the number of octagons and whether you’ve been perfect with the positioning, you may need to do a slight adjustment on this round. The odd number of octagons doesn’t require an adjustment, but the even number side will require an adjustment. It’s easy to do and isn’t noticeable. Since you are working a repeat of [5 dc in next ch-3 sp, sc in next ch-3 sp], it is very easy to throw in a decrease sc across two ch-3 sps especially at the joins around the tips of the octagons. Just throw in one decrease (sc2tog) during round 2 if necessary, to ensure that you get the up/down/up/down of the repeat around.
Round 2: To make corner: ch 1, sc in ch-3 sp, 5 dc in next ch-3 sp, 3 tr in top of dtr2tog, 5 dc in next ch-3 sp, sc in next ch-3 sp. Continue: [5 dc in next ch-3 sp, sc in next ch-3 sp] to next Corner and work Corner. Continue working the sides and corners as stated, sl st to first sc.
Round 3: Ch 1, popcorn in sc (so you will actually be making 2 chains to start, remember), BLsc (see Special Stitches above) in next 5 dc. To make corner at the 3-tr position: 2 BLdc (see Special Stitches above) in tr, popcorn in next tr, 2 BLdc in next tr. Continue: Continue working BLsc in each dc, popcorn in each sc and working corner as stated, sl st to first popcorn.
Round 4: You are currently at the top of a pocorn, reach over and, at 3rd sc of 5-sc group, work: [3 dc, ch 3, sl st in third ch from hook (picot made), 3 dc]. To make corner: sl st in first dc, [3 dc, picot, 3 dc] in popcorn at the top of the corner, sl st in 2nd dc. Continue: Work [3 dc, picot, 3 dc] in each 3rd sc of 5-sc group, then sl st to top of each popcorn, repeat on each side edge, working corners as instructed. Sl st to first sl st at popcorn, fasten off.
Finishing
Weave in all ends securely.

Twitter | Facebook | Pinterest
All the patterns at Make It Crochet are free. Since many of you have asked how to help with the costs of running a site like this, I’ve made all the patterns into print-ready PDFs and the cost is about the same as a cup of coffee. Every little bit helps.
TERMS: To my fellow crafters, you have my permission to use my patterns to make and sell your projects* anywhere you like. You cannot use my images to sell your projects, though. You must take photos of your own work. All patterns have been tested but mistakes can happen. If you find a mistake, please let me know. Everything at MakeItCrochet.com is protected by copyright to Kim Guzman. Other than the permissions previously given, no one other than Kim Guzman has permission to: reproduce, copy, publish or distribute this pattern, its parts or photos in any way or form, including, but not limited to, translations into foreign languages & video production.
*Not intended to be blanket permission for mass production.
I hope you enjoy this new crochet pattern. If you have any questions, please let me know.