
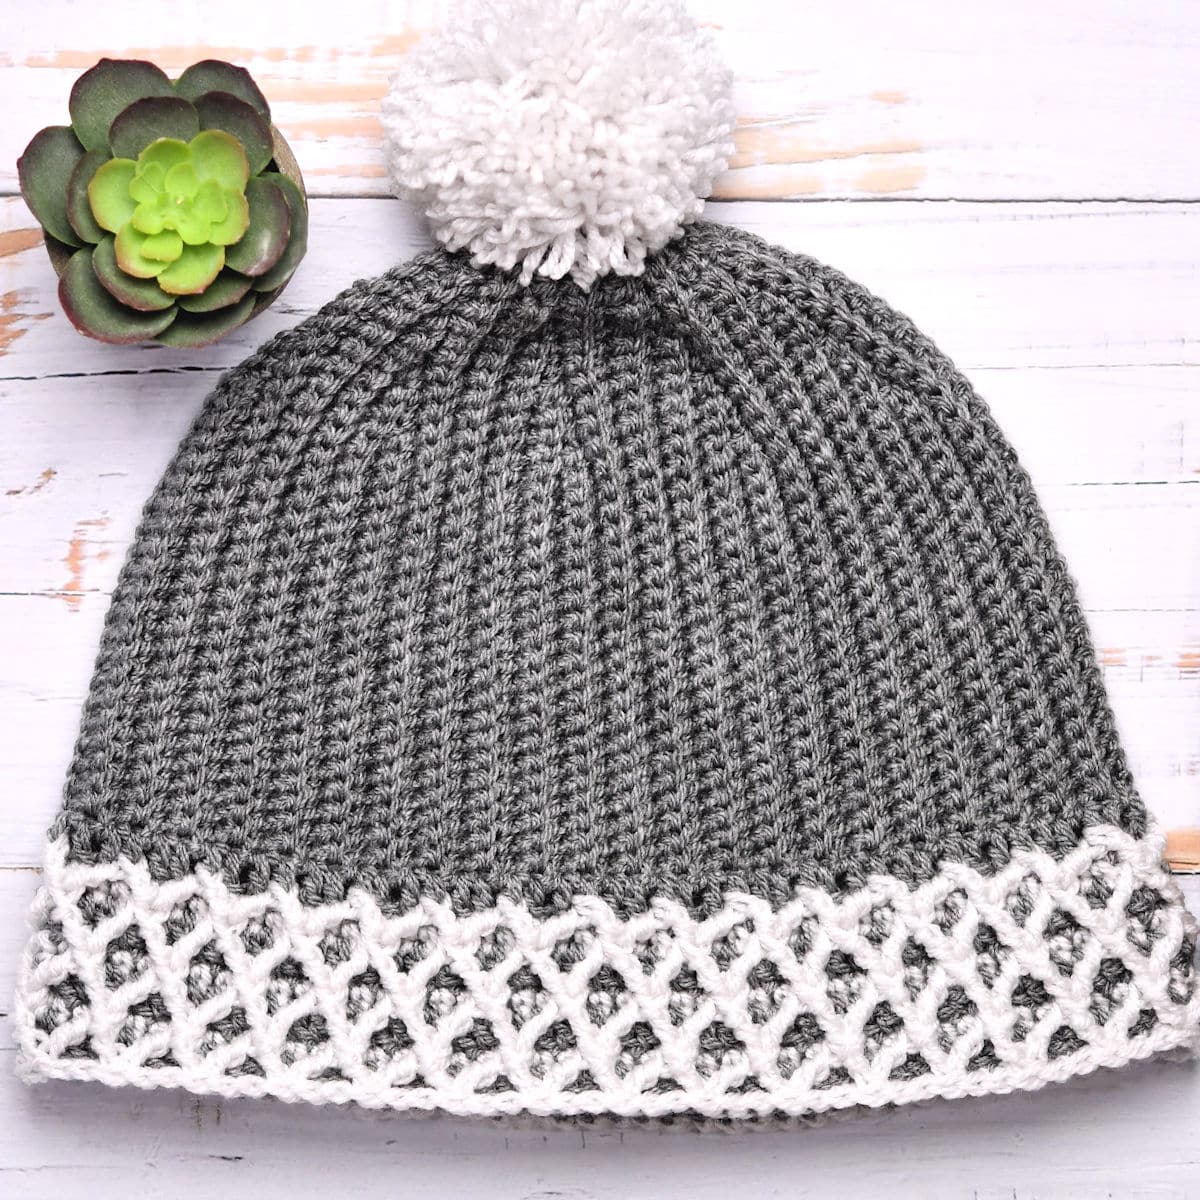
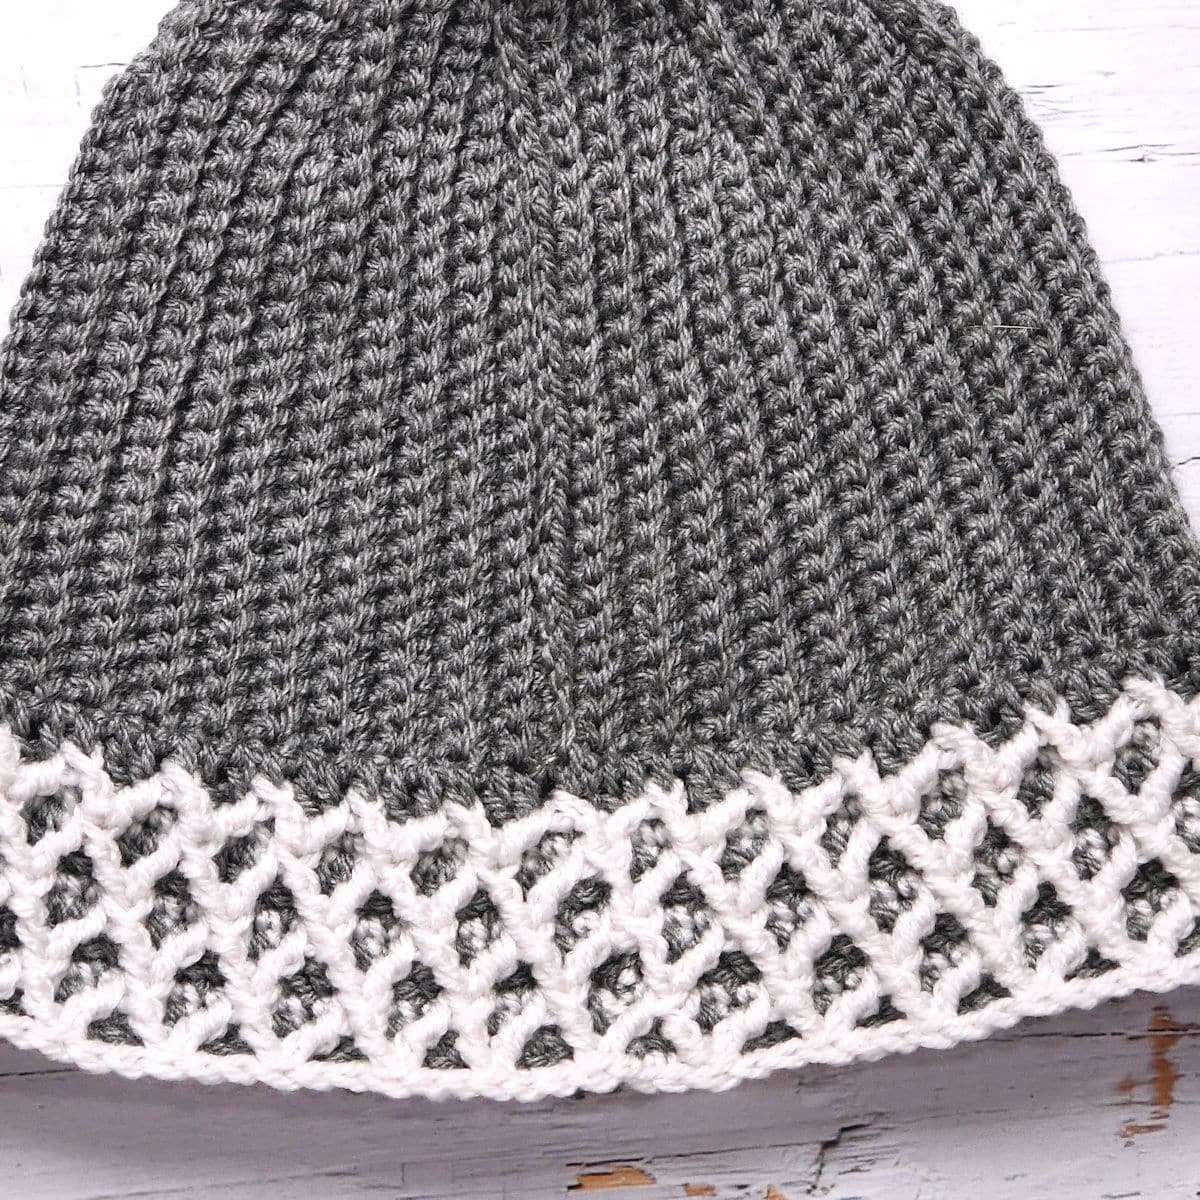
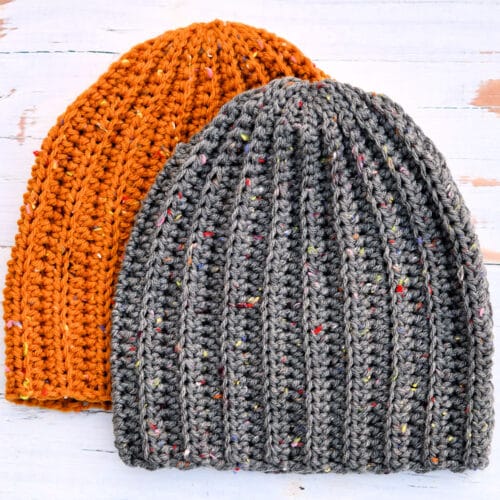
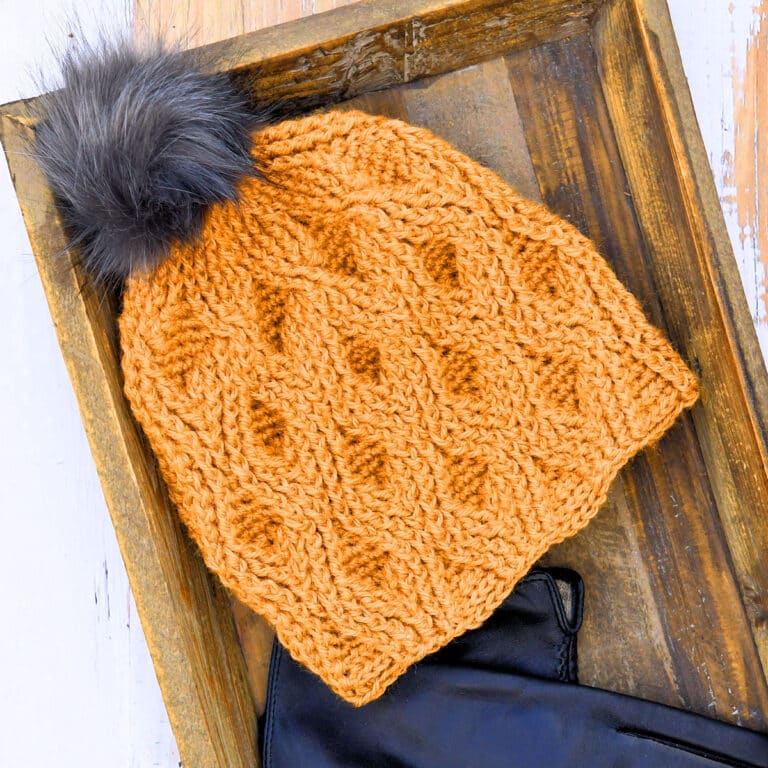
This Lattice Brim Hat is designed in pixie hat style. The brim is double-thick to keep the ears toasty warm, without sacrificing whimsical charm.
If you’re unfamiliar with the pixie hat shape, it’s the shape you’ll find in most santa hats. There’s a bit of a point at the top and there is no tightened brim ribbing like you would find on a beanie or beret.
“Lattice Brim Hat” free crochet pattern by Kim Guzman © Mar. 2023. All rights reserved.
Technique: Regular Crochet.
Skill Level: Intermediate.

Crochet Pattern At A Glance
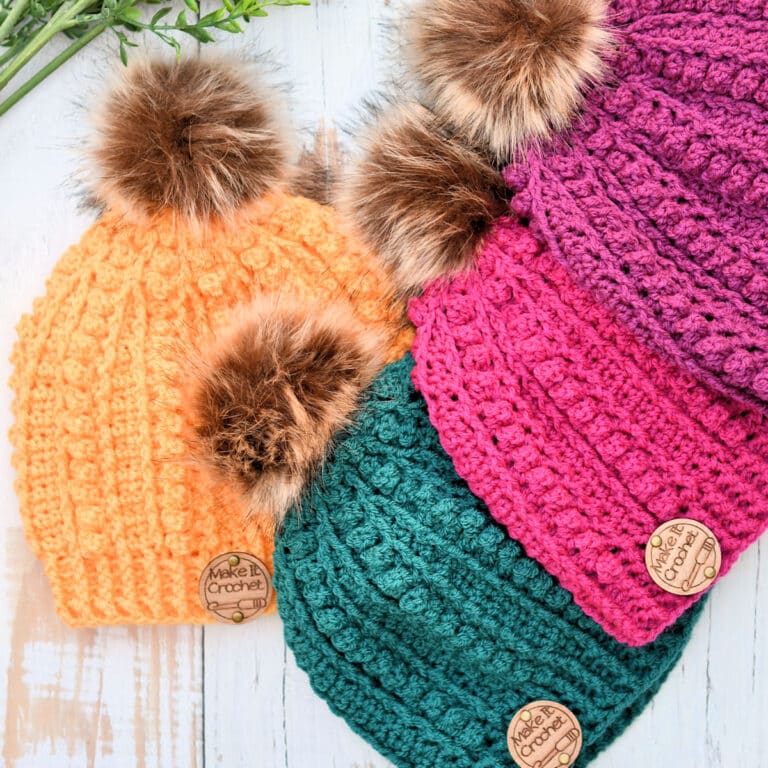
Lattice Brim Hat Free Crochet Pattern
Designer: Kim Guzman © 2022-2026. All rights reserved.Rate the Pattern
Yarn
- Stylecraft “Special DK”, 100% acrylic, 322 yds/295m per 3.5 oz/100g per skein: 1 skein each of “Grey” and “Touch of Silver”, approx. 165 yards of each used (including yardage for pompom).
Other Materials
- Suggested Crochet Hook Size G-7 (4.5mm) or hook needed to meet gauge
- Yarn Needle for weaving ends
- Pom Pom, optional, 2.5″ piece of cardboard to wrap yarn
Instructions
- Begin by making 9 wedges (or triangles) using the short row shaping technique.
- Seam the larger piece to form the majority of the hat body.
- Attach the yarn and set up for the Lattice Stitch.
- Work 3 more post stitch rounds to make fully formed diamonds.
- Make a pompom, if desired. Or, attach a purchased pompom.
Full Free Crochet Pattern Below

This is a free crochet pattern and the written instructions are below. If you prefer a printable download, a PDF is also available for purchase.
My Crochet Pattern Notes
At Intermediate Skill Level, you can expect to find unique crochet stitches and shaping. You will need to have some patience to get through these new things.
This hat is worked in two sections. The first section is worked side to side in a single crochet ribbing. It’s shaped with crochet short rows to form a slight point, for a pixie hat style.
Once the top portion is completed and seamed, the lower brim is worked in the round in stripes with highly textured front post stitches.
Because this is a pixie hat, it will also make a nice santa hat, worked in red and white.
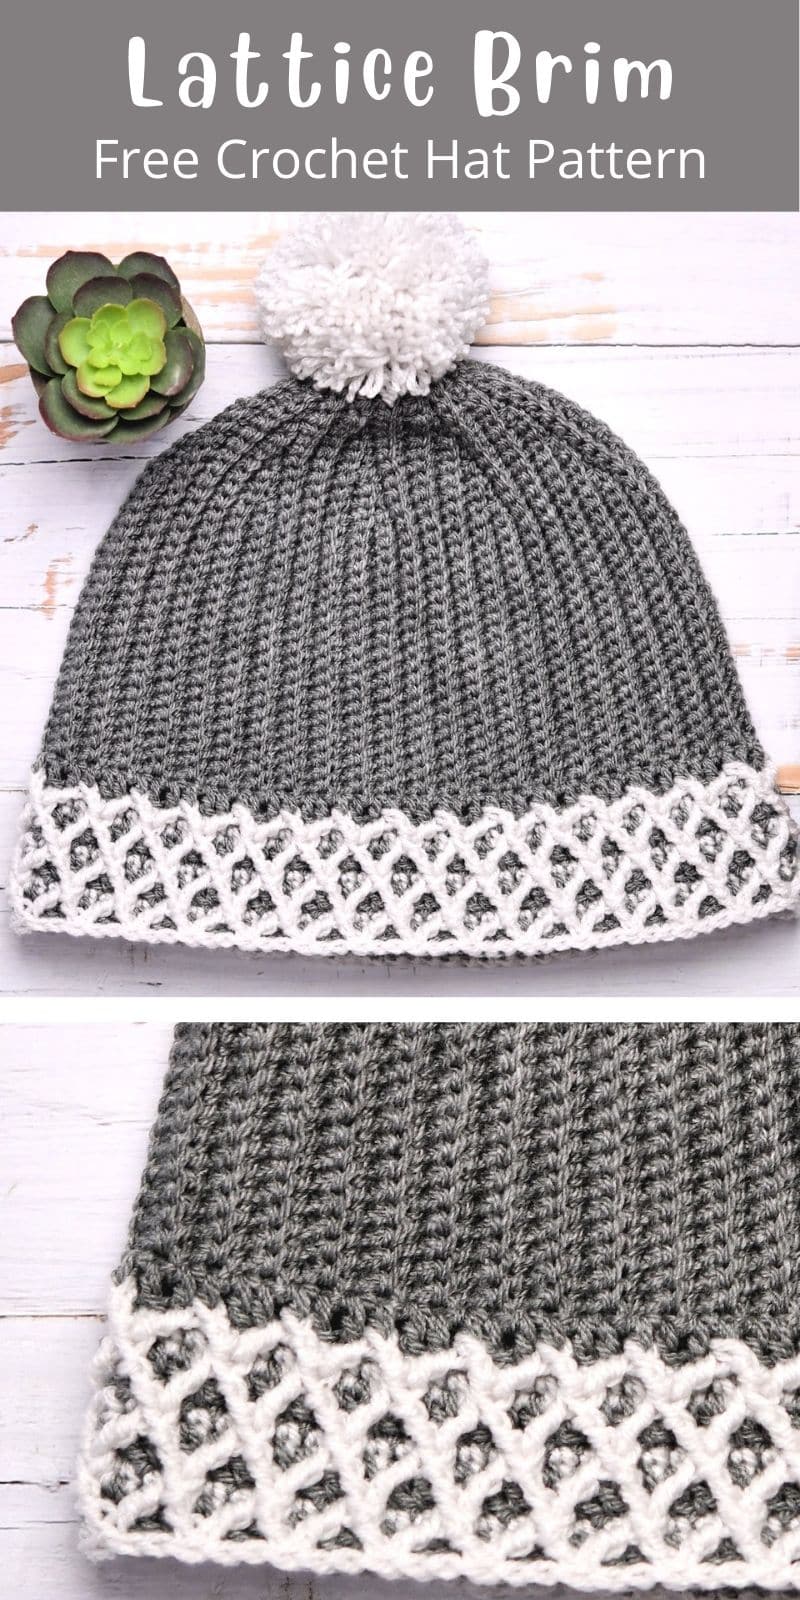
Pin It For Later
What Are Short Rows?
Short rows are used as a shaping technique. This technique is usually used to create circles or tubes, like this hat. The short row is a row that isn’t worked all the way across. It’s shorter than the last row.
In this case, there are nine wedges (or triangles) of 10 rows each. The rows get increasingly shorter to form the top of the hat.
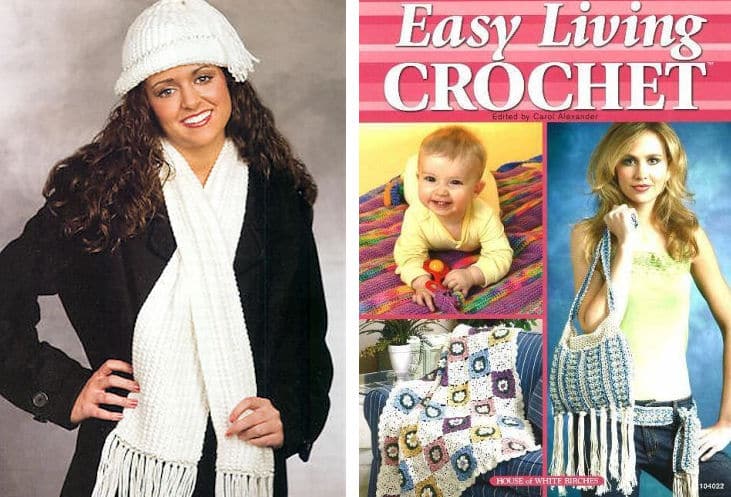
Using short rows for shaping isn’t new and I didn’t invent it, of course. The Pearls in the Snow Hat and Scarf were published in 2005 in “Easy Living Crochet” as my first published design in short rows shaping.
Here, you can see all my designs using short rows. I’ve used this shaping for garments, hats and afghans.
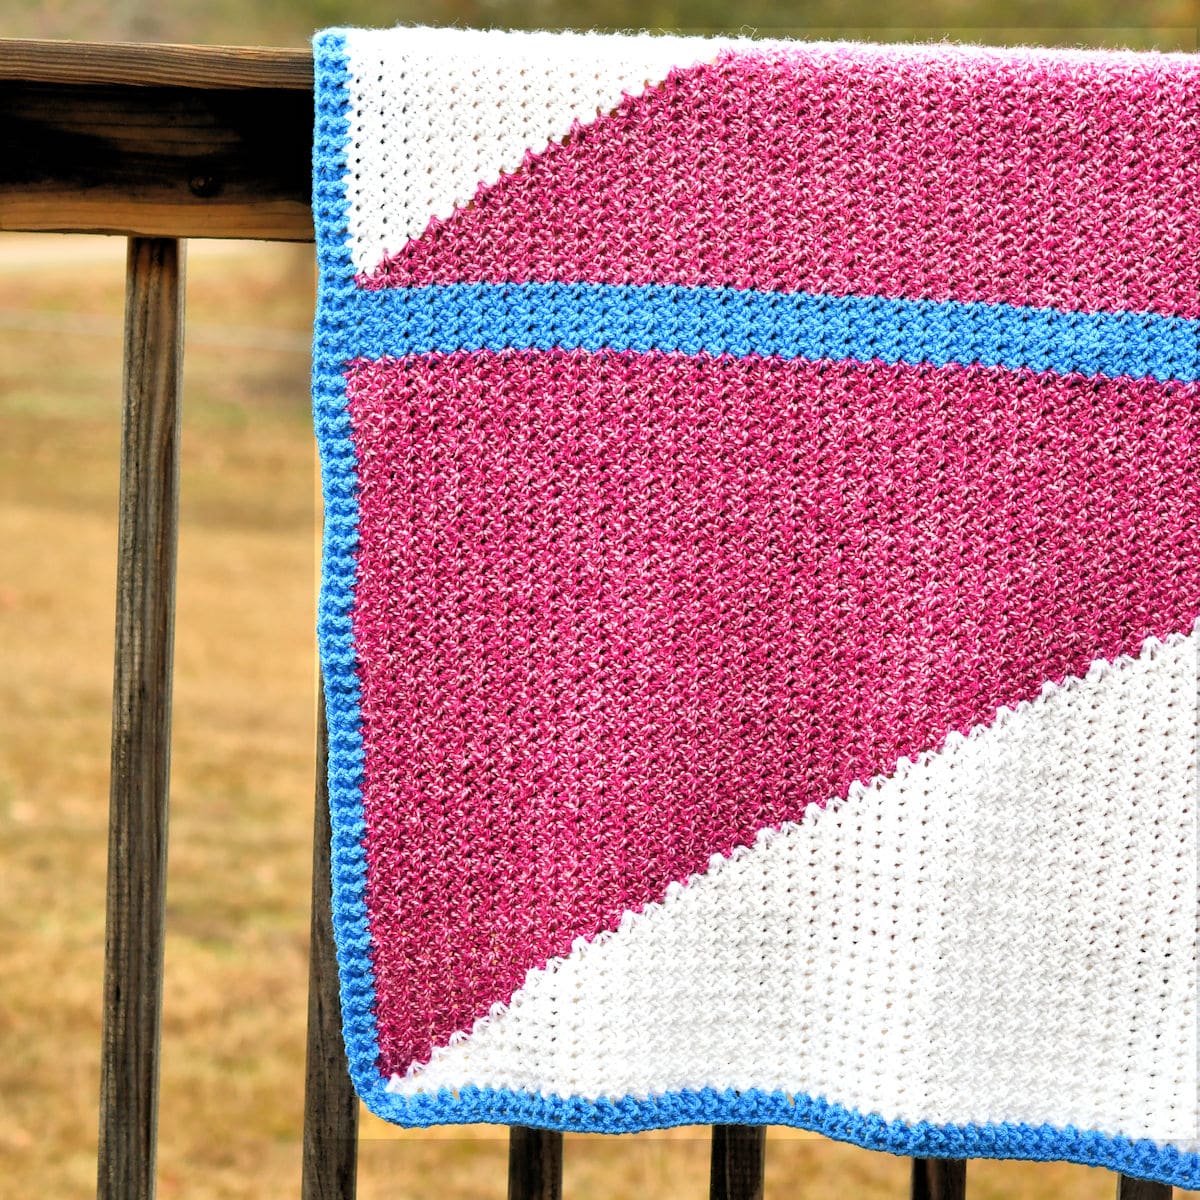
I love short rows so much that this Lattice Brim Hat is now my third short row project at Make It Crochet. The Modern Baby Blanket is often mistaken for corner to corner (C2C), but it’s actually not. It’s created with short rows.
Seaming and Finishing Techniques
The goal here is to make the seam as invisible as possible. You can barely see it down the center and it will probably go unnoticed by everyone.
In order to try to follow the same look of the single crochet ribbing as closely as possible, start out by working your foundation row into the back horizontal bar of the chain. Just turn it over to get to that back bar. It takes a little more time, but you’re worth it!
When you get ready to seam, hold the hat with the right side facing up. You are going to overlap row 1 over the top of row 91.
Start by inserting your yarn needle under the top layer of the two VERTICAL bars of the single crochet on row 91. Next, insert your hook under the corresponding vertical bars of row 1 but from underneath.
As you begin seaming this way, row 1 will sit right on top of row 91 and the exposed chain will mimic the ribbing that’s already formed by the single crochet.
What Is The Lattice Stitch?
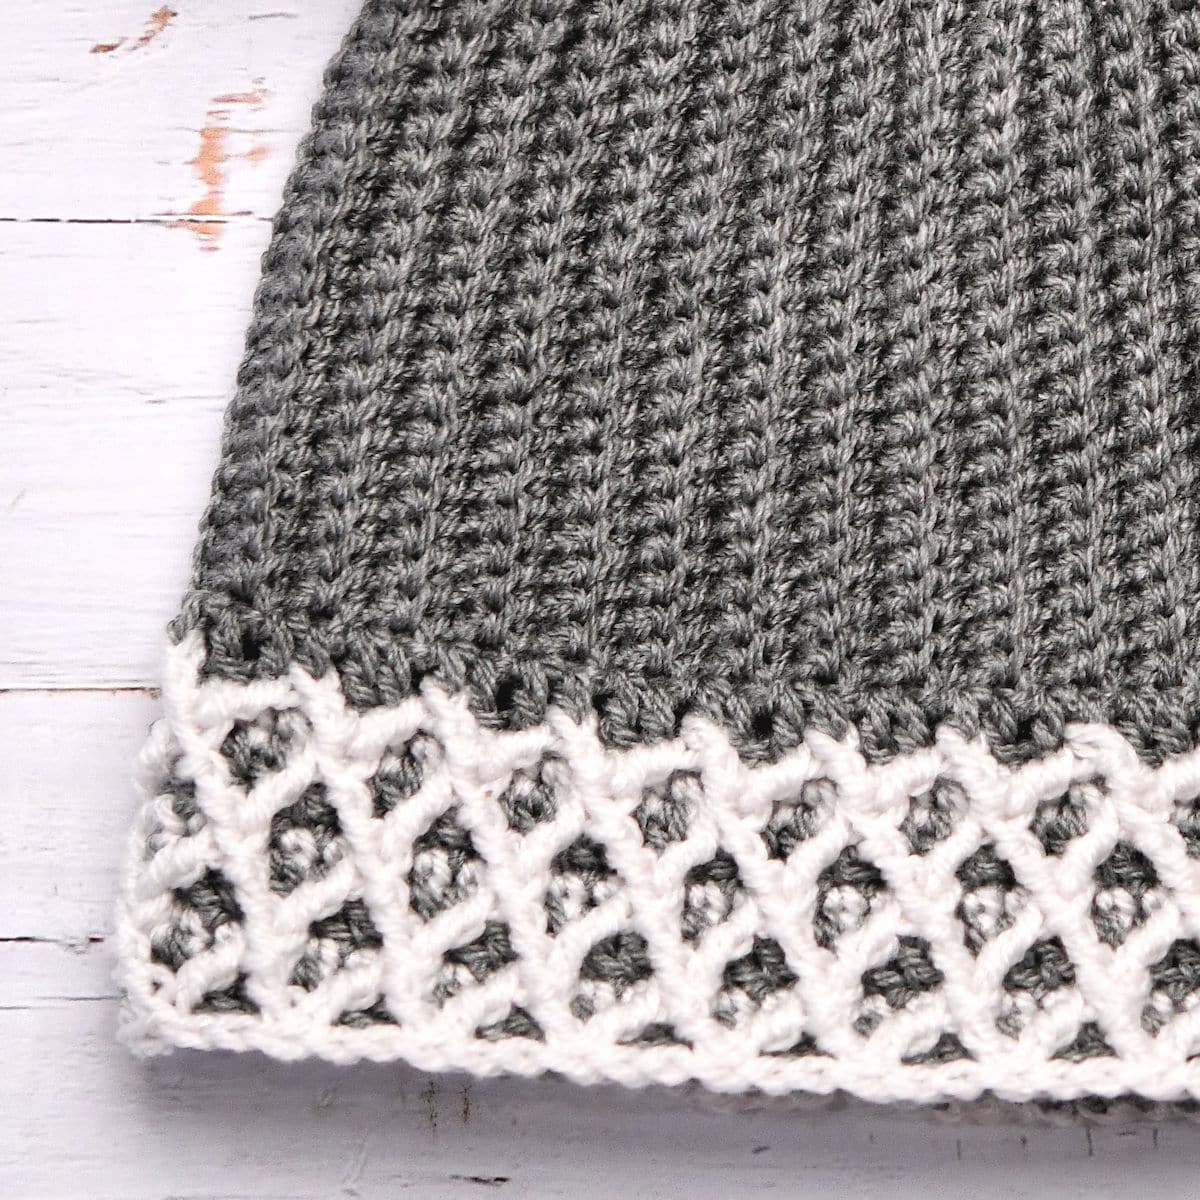
The Lattice Stitch I’ve used for the brim has also been called the Diamond Stitch. I’ve used it for embellishment in the past but never in the round like this. Alternating the colors in stripes lets the darker color peek through giving the colors more of a transition rather than a large band of the solid color.
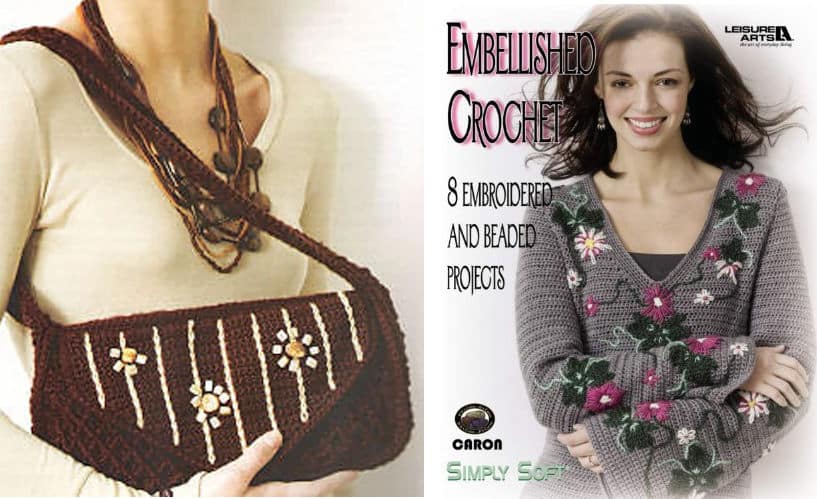
It’s hard to see here but I used this stitch for the body of this embellished purse.
The stitch pattern is made with diagonally placed post stitches worked throughout to create Diamond shapes.
You will commonly see this stitch used in the highly textured Aran style afghans too. It’s a bit of a relief from the cabled and braided stitches. Not much of a break, though! It’s not an easy stitch but, once you get it, you can get through it fairly quickly.
Step by Step Lattice Stitch
These tutorial photos will teach you the concept of working the post stitches diagonally. This isn’t the full pattern, though. Study these and then apply them to the pattern.
This placement is a bit unusual so it will take a bit to become accustomed. Have patience with yourself when learning new techniques.

When working a Lattice stitch (or Diamond stitch), you begin with a partial treble crochet. The stitch holder shows the placement under the point of two partial trebles.
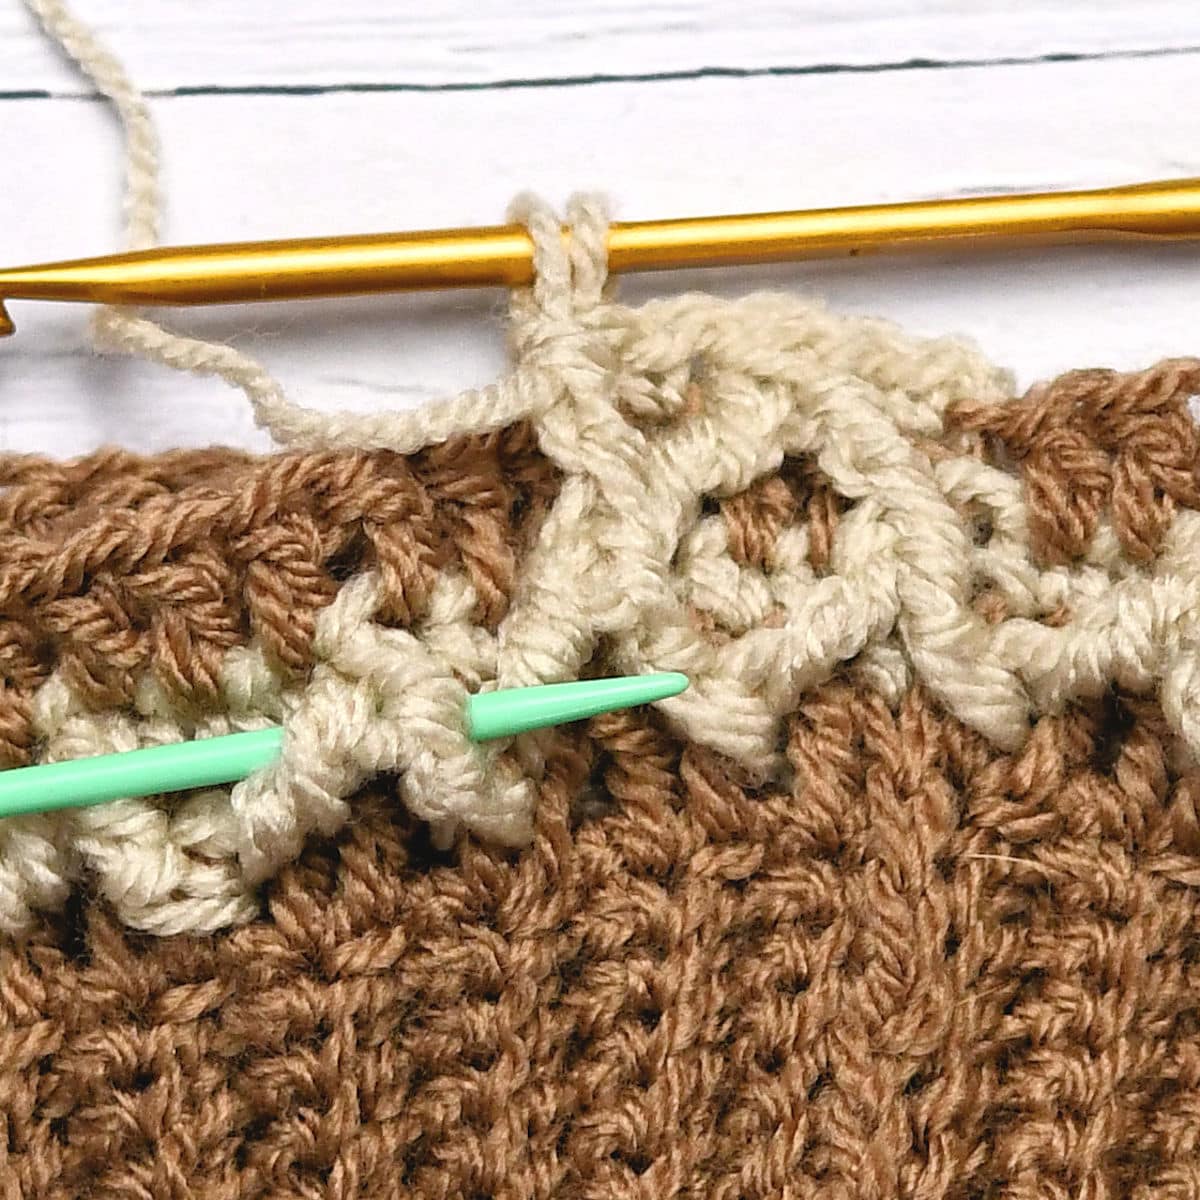
After creating the partial treble, you can see that there are two loops remaining on the hook. Now, another partial treble will be made in the point of the next two. You can see the stitch holder marking the position.
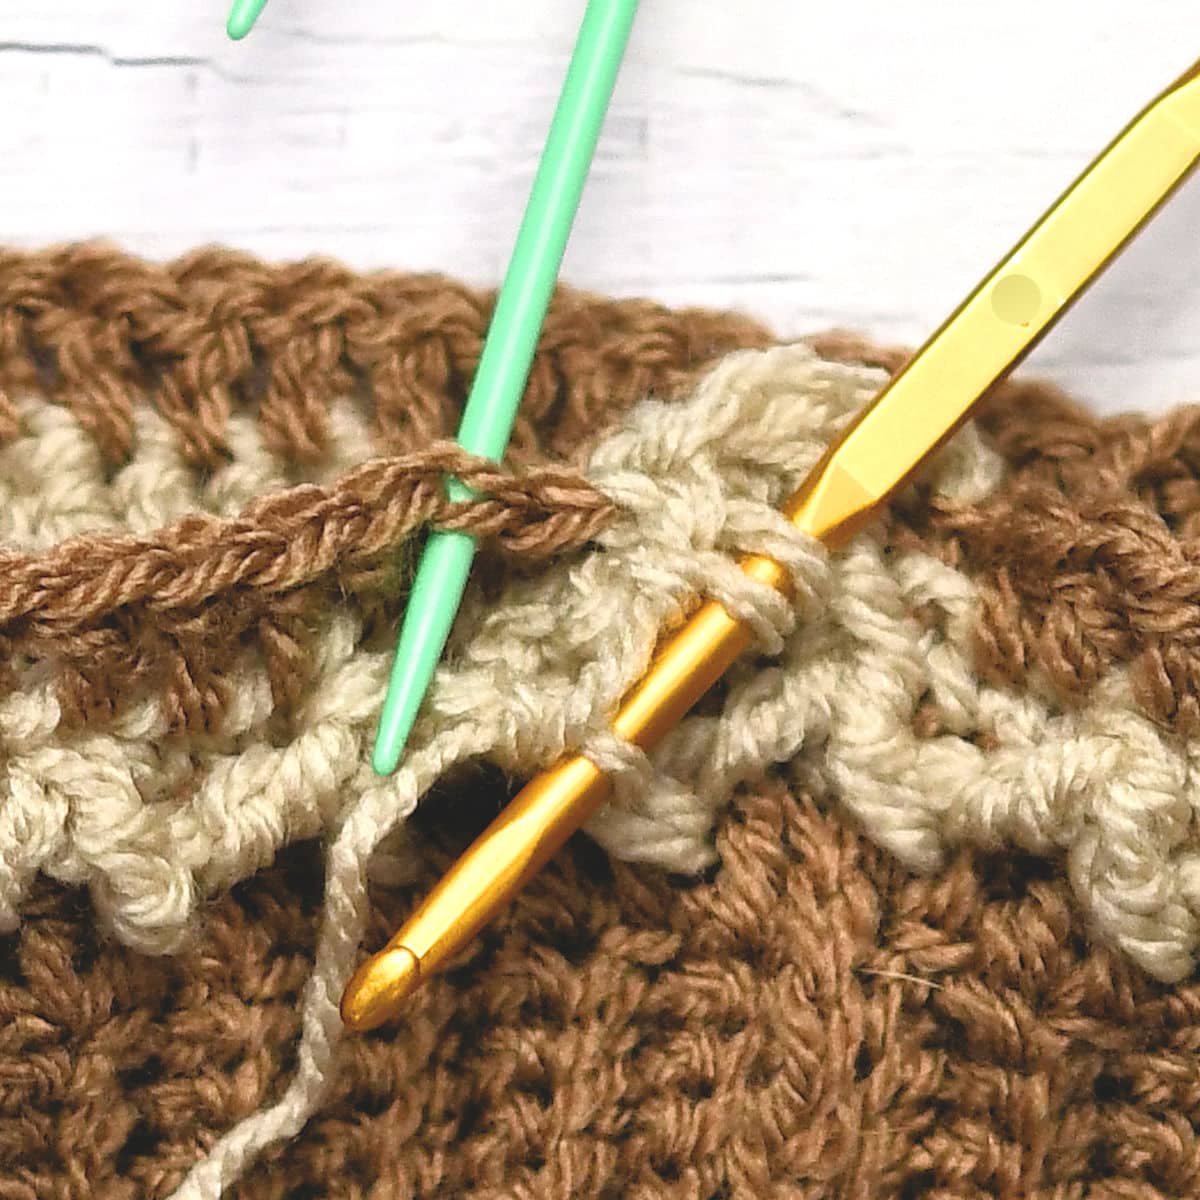
Now that the second partial treble is completed, there are three loops remaining on the hook. You’ll need to move your stitches out of the way so you can insert your hook under the first double crochet back there.
Once you pull up a loop in that double crochet in the back, you will have four loops remaining on your hook.
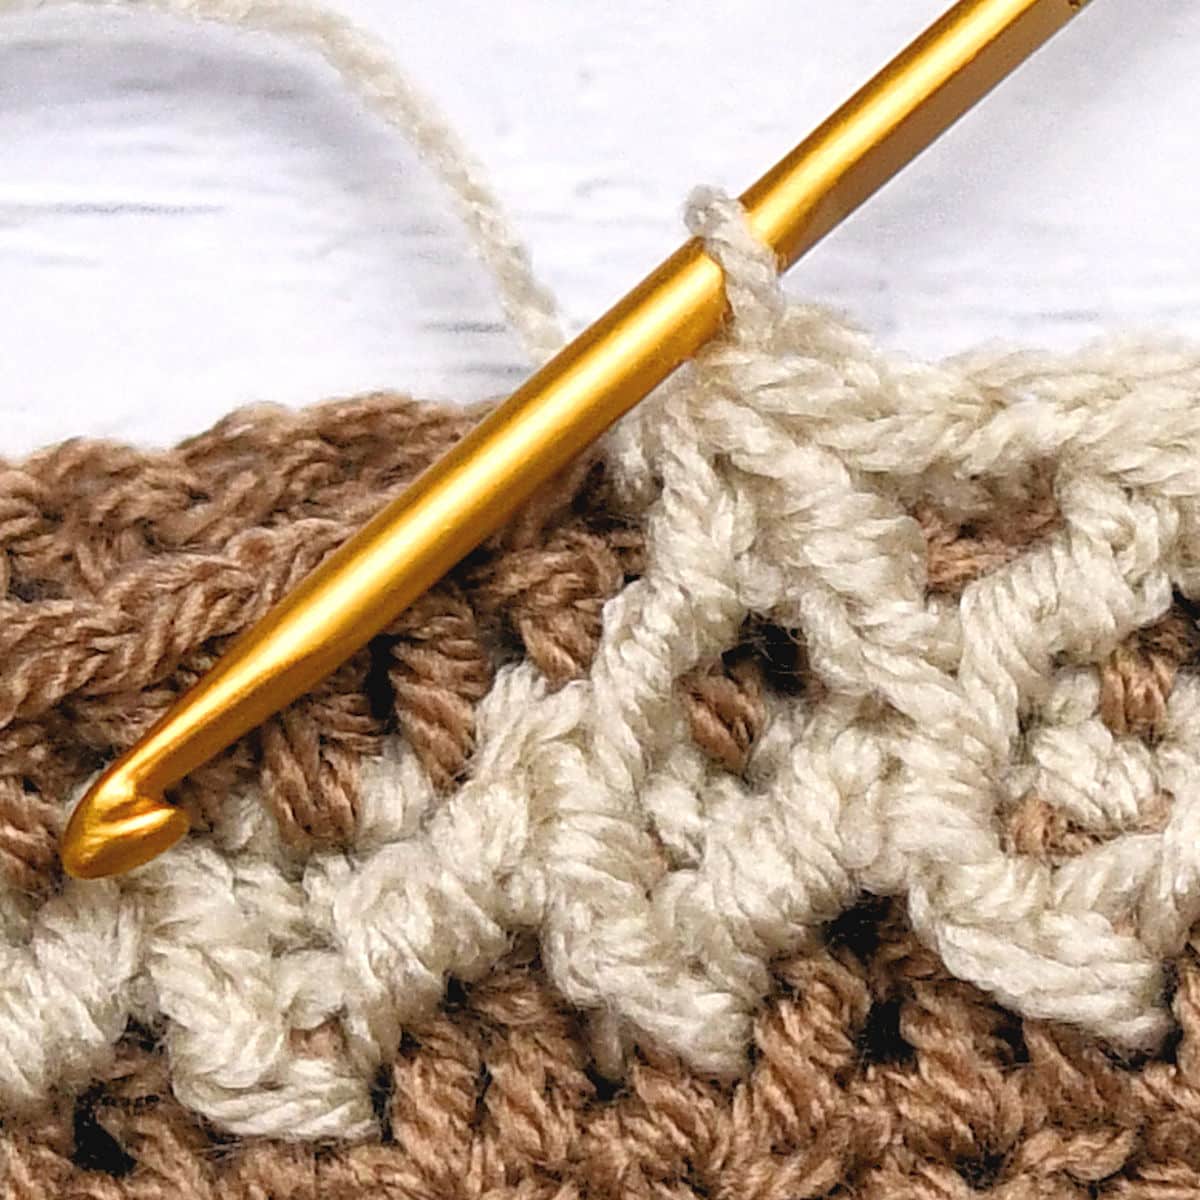
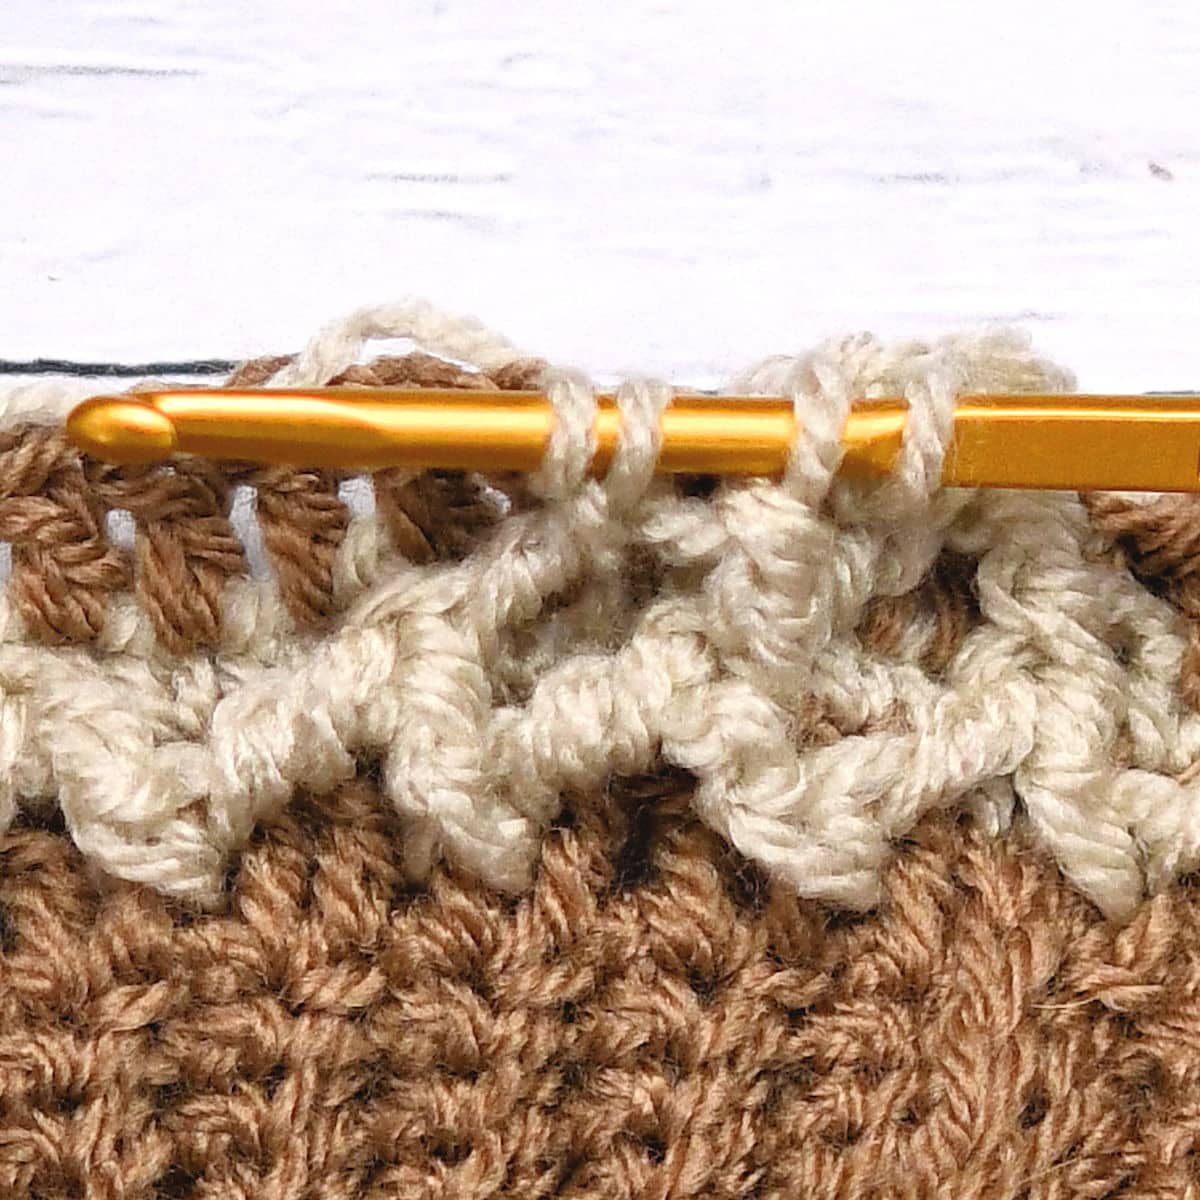
Yarn over and pull your yarn through all four of the loops to complete the top of one of the diamonds. Repeat the entire process around the body of the hat.
Finished Size
Height: 9″, Circumference: 20″.
Yarn
Stylecraft “Special DK”, 100% acrylic, 322 yds/295m per 3.5 oz/100g per skein: 1 skein each of “Grey” and “Touch of Silver”, approx. 165 yards of each used (including yardage for pompom).

“Special Double Knit” is classified as a DK weight (size 3) yarn and is currently available in over 120 shades.
Available at LoveCrafts (aff link).
See more projects in Stylecraft Special DK yarn.
If you are unable to use Stylecraft Special DK, any acrylic or acrylic blend in size 3 lightweight yarn will be close enough.
Other Materials
Suggested Crochet Hook Size G-7 (4.5mm) or hook needed to meet gauge.
Yarn Needle for weaving ends.
Pom Pom, optional, 2.5″ piece of cardboard to wrap yarn, or purchased pom pom.
Special Stitches
Partial Treble Crochet (ptr): Yarn over twice, insert hook around stitch indicated, yarn over, pull loop through, [yarn over, pull through 2 loops on hook] twice. 2 loops remaining on hook.
When the pattern indicates to work around the post of a double crochet, insert the hook to the side, around the back and out the other side, then pull the loop through.
Other Abbreviations
This crochet hat pattern is written in US crochet terminology.
ch=chain; dc=double crochet; lp(s)=loop(s); RS=right side; rep=repeat; sc=single crochet; sk=skip; sl=slip; st(s)=stitch(es); yo=yarn over.
All numbers after the colon at the end of an instruction are stitch counts. Use the stitch count to check your work.
Gauge
The Hat Body measures 7″ tall, 20″ wide when flat.
19 back loop single crochet for 18 rows measures approximately 4″ x 4″.
Free Crochet Pattern Instructions
The Main Body of the hat is worked side to side in short rows to form wedges and each wedge is built on the previous wedge. This portion is worked entirely in back loop single crochet. When working the last single crochet of even rows, you can work into both loops for more stability. See “Seaming and Finishing Techniques” for more information. For best results, count the stitches in every row to ensure proper count.
Hat Body
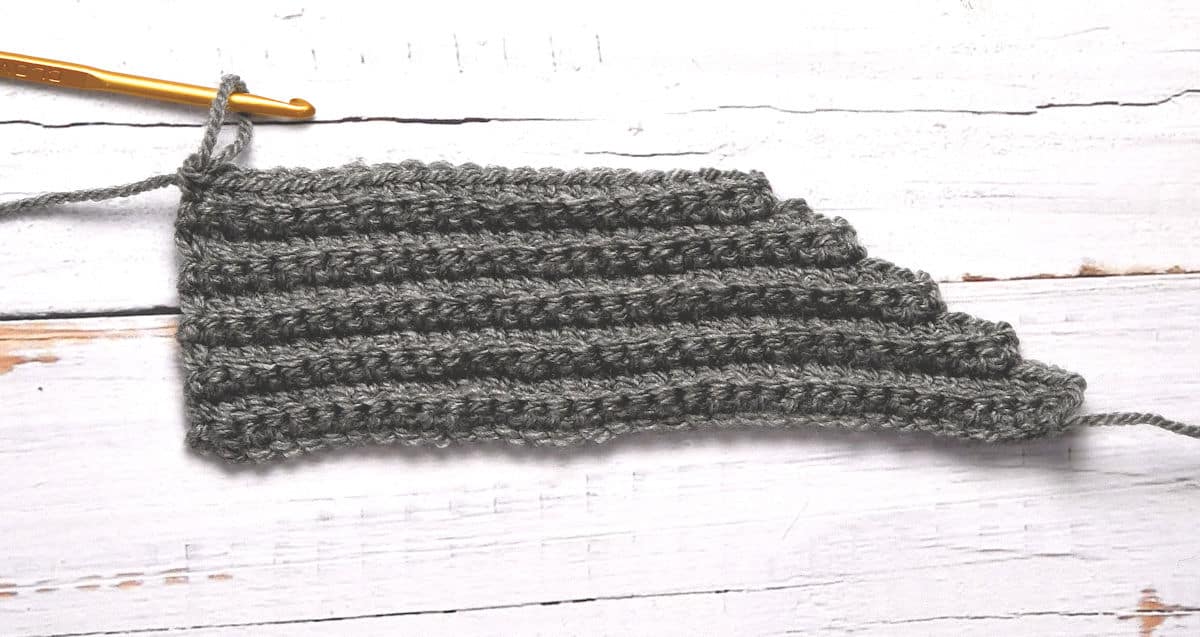
Row 1 (RS): With Grey, ch 35, sk first ch, working in back horizontal bar, work sc in each ch across, turn: 34 sc.
Row 2: Do not ch, sk first sc, sc in each remaining sc, turn: 33 sc.
Row 3: Ch 1, sc in each sc to last 2 sc, turn, leaving last 2 sc unworked: 31 sc.
Row 4: Do not ch, sk first sc, sc in each remaining sc, turn: 30 sc.
Row 5: Ch 1, sc in each sc to last 2 sc, turn, leaving last 2 sc unworked: 28 sc.
Row 6: Do not ch, sk first sc, sc in each remaining sc, turn: 27 sc.
Row 7: Ch 1, sc in each sc to last 2 sc, turn, leaving last 2 sc unworked: 25 sc.
Row 8: Do not ch, sk first sc, sc in each remaining sc, turn: 24 sc.
Row 9: Ch 1, sc in each sc to last 2 sc, turn, leaving last 2 sc unworked: 22 sc.
Row 10: Do not ch, sk first sc, sc in each remaining sc, turn: 21 sc.
Note: Remember to always count your stitches for this project. The last stitch of row 11, especially, is more difficult to see.
Row 11: Ch 1, sc in each sc across, sc into all unworked sc from previous rows, turn: 34 sc.
Rows 12-91: Rep rows 2-11. On the last row, fasten off, leaving a 15″ strand for seaming.
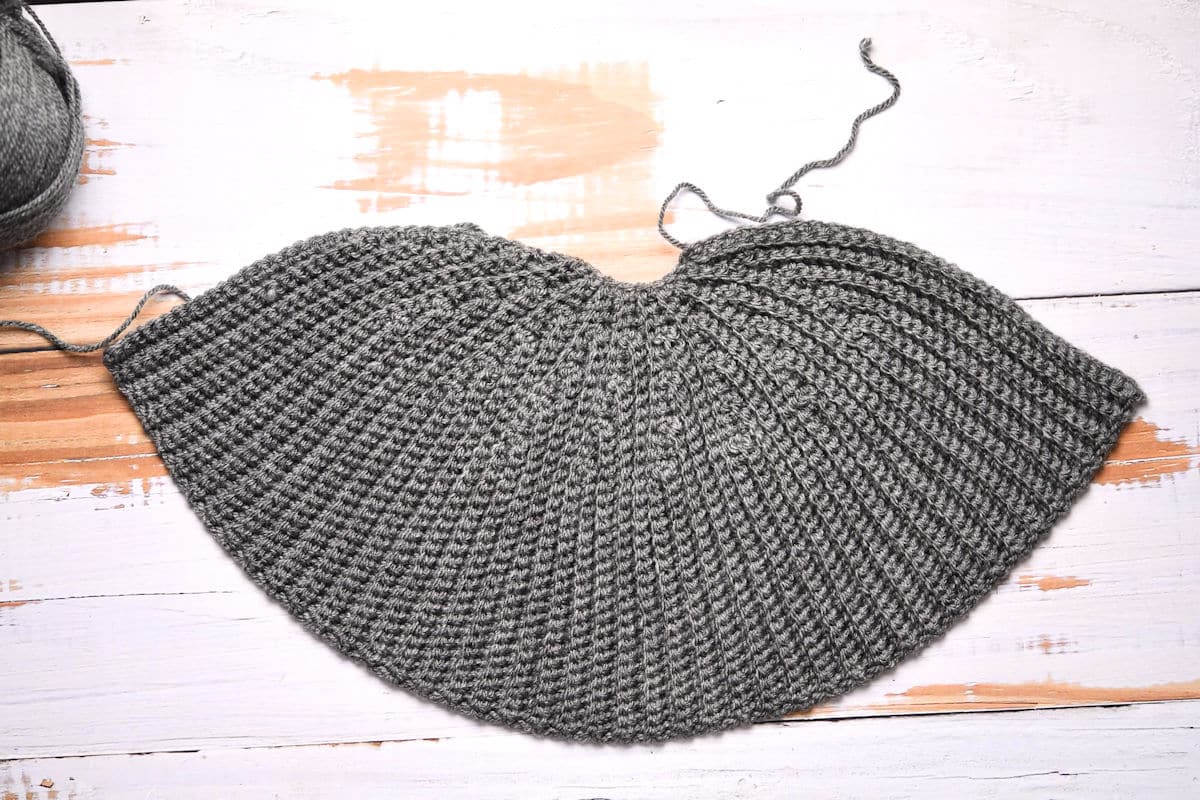
Seam row 1 to row 91. See “Seaming and Finishing Techniques”.
Lattice Brim
Round 1: With RS facing, join “Grey” with sl st in side of rows at widest portion of Hat Body, ch 3 (counts as dc here and throughout), working in sides of rows, 89 dc evenly around, using “Touch of Silver”, sl st to top of first dc, drop Grey to be used later: 90 dc.
Round 2: Now with Touch of Silver, ch 1, sc in first dc, sk next 2 dc, ptr (see Special Stitches above) around post of next dc, working behind ptr just worked, insert hook in first of 2 skipped dc, yo, pull lp through, yo, pull through 3 lps on hook, *sc in next 2 dc, ptr around same dc as ptr just worked (2 lps on hook), sk 2 dc, ptr around post of next dc (3 lps on hook), working behind ptr just worked, insert hook in first of 2 skipped dc, yo, pull lp through, yo, pull through 4 lps on hook, rep from * to last 4 dc, sc in next 2 dc, ptr around same dc as ptr just worked (2 lps on hook), sk remaining dc, insert hook in first sc of round, drop Touch of Silver, with Grey, yo, pull lp through and continue pulling lp through 2 remaining lps on hook: 58 ptr.
Round 3: Now with Grey, ch 3, sk first st, dc in each st around, drop Grey, with Touch of Silver, sl st in top of first dc: 88 dc.
Round 4: Now with Touch of Silver, ch 1, sc in first and next dc, work ptr under top of last ptr of round below and first ptr at the same time (this draws together the first and last ptr to a point), sk 2 dc, ptr under point of next 2 ptr, working behind ptr just worked, insert hook in first of 2 skipped dc, yo, pull lp through, yo, pull through 4 lps on hook, *sc in next 2 dc, ptr under point of previous 2 ptr, sk 2 dc, ptr under point of next 2 ptr, working behind ptr just worked, insert hook in first of 2 skipped dc, yo, pull lp through, yo, pull through 4 lps on hook, rep from * to last 4 dc, sc in next 2 dc, ptr under point of previous 2 ptr, sk 2 dc, ptr under point of first 2 ptr, working behind ptr just worked, insert hook in first of 2 skipped dc, yo, pull lp through, yo, pull through 4 lps on hook, sk last dc, drop Touch of Silver, with Grey, sl st in first sc: 58 ptr.
Round 5: Rep round 3: 88 dc.
Round 6: Now with Touch of Silver, ch 1, sc in first dc, work ptr under point of last 2 ptr from previous round, sk 2 dc, ptr under point of next 2 ptr, working behind ptr just worked, insert hook in first of 2 skipped dc, yo, pull lp through, yo, pull through 4 lps on hook, *sc in next 2 dc, ptr under point of previous 2 ptr, sk 2 dc, ptr under point of next 2 ptr, working behind ptr just worked, insert hook in first of 2 skipped dc, yo, pull lp through, yo, pull through 4 lps on hook, rep from * to last 5 dc, sc in next 2 dc, ptr under point of previous 2 ptr, sk 2 dc, ptr under point of next 2 ptr, which was previously worked at the beginning of this round, insert hook in first of 2 skipped dc, yo, pull lp through, yo, pull through 4 lps on hook, sk next dc, sc in last dc, drop Touch of Silver, with Grey, sl st in first sc: 58 ptr,
Round 7: Rep round 3: 88 dc.
Round 8: Now with Touch of Silver, ch 1, work ptr under point of last 2 ptr of round below, ptr under point of next 2 ptr, working behind ptr just worked, insert hook in first of dc of round, yo, pull lp through, yo, pull through 4 lps on hook, *sc in next 2 dc, ptr under point of previous 2 ptr, sk 2 dc, ptr under point of next 2 ptr, working behind ptr just worked, insert hook in first of 2 skipped dc, yo, pull lp through, yo, pull through 4 lps on hook, rep from * to last 5 dc, sc in next 2 dc, ptr under point of previous 2 ptr, sk 2 dc, ptr under point of next 2 ptr, which was previously worked at the beginning of this round, working behind ptr just worked, insert hook in first of 2 skipped dc, yo, pull lp through, yo, pull through 4 lps on hook, sc in last 2 dc, sl st in first st: 58 ptr. Fasten off.
Finishing
With yarn needle, weave in all loose ends securely. Make pompom by wrapping yarn around cardboard, attach a separate strand of yarn around the center and cut off ends. Attach to top of hat.
Twitter | Facebook | Pinterest
All the patterns at Make It Crochet are free. Since many of you have asked how to help with the costs of running a site like this, I’ve made all the patterns into print-ready PDFs and the cost is about the same as a cup of coffee. Every little bit helps.
TERMS: To my fellow crafters, you have my permission to use my patterns to make and sell your projects* anywhere you like. You cannot use my images to sell your projects, though. You must take photos of your own work. All patterns have been tested but mistakes can happen. If you find a mistake, please let me know. Everything at MakeItCrochet.com is protected by copyright to Kim Guzman. Other than the permissions previously given, no one other than Kim Guzman has permission to: reproduce, copy, publish or distribute this pattern, its parts or photos in any way or form, including, but not limited to, translations into foreign languages & video production.
*Not intended to be blanket permission for mass production.


Thanks for this beautiful pattern. I found the lattice brim instructions somewhat wordy and confusing, but, after viewing a couple lattice diamond stitch tutorials on YouTube, I was able to figure it out. All in all my hat turned out nicely and I’m starting another one.
I understand. It can take a bit to figure out this more difficult concept. I’m glad you got it worked out and headlong into your next one. 🙂 Thank you for writing!